Pass Terraform Certification with top Terraform Interview Questions and Answers

If you are preparing for a DevOps interview or for a Terraform administrator or a developer, consider this Pass Terraform Certification with top Terraform Interview Questions and Answers tutorial as your lucky friend, which will help you pass the Certificate or the Terraform interview.

Without further delay, let’s get into this UltimatePass Terraform Certification with the top Terraform Interview Questions and Answers guide.

Join 64 other subscribers

PAPER-1

Q1. What is IAC ?

Answer: IAC stands for Infrastructure as a code which allows to write code, check the code, compile code then execute the code and if required update the code again and redeploy. It is easier to use IAC as you can create and destroy the infrastructure quickly and efficiently.

Q2. Are there any benefits of Infrastructure as Code ?

Answer: Yes there are lot many. IAC allows you to automate multiple things such as with one script with same syntax throughout you can update, scale up-down and destroy the resources quickly. Infrastructure as a code has also capabilities to reuse the code and version it in version control. Terraform is an Infrastructure as code open source tool.

Q3. What are use cases of Terraform ?

Answer: There are multiple use cases of Terraform such as:

  • Heroku App Setup – PAAS based application
  • Multi Tier apps ( For ex: web apps + DB + API + Caching )
  • Disposable environments such as DEV and Stage for testing purpose.
  • Multi cloud deployment.
  • Resource schedulers such as Kubernetes , Borg which can schedule containers , Spark etc.

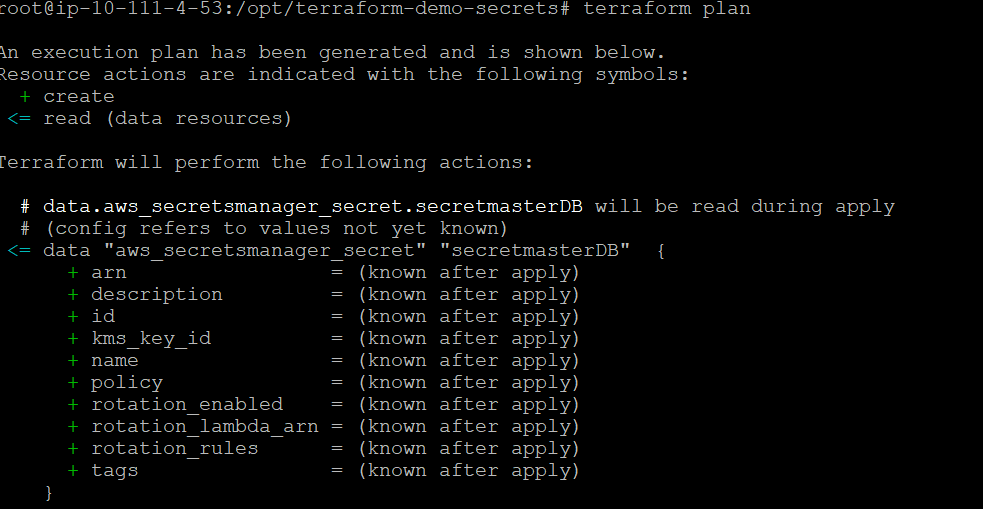
Q4. What is Terraform state file ?

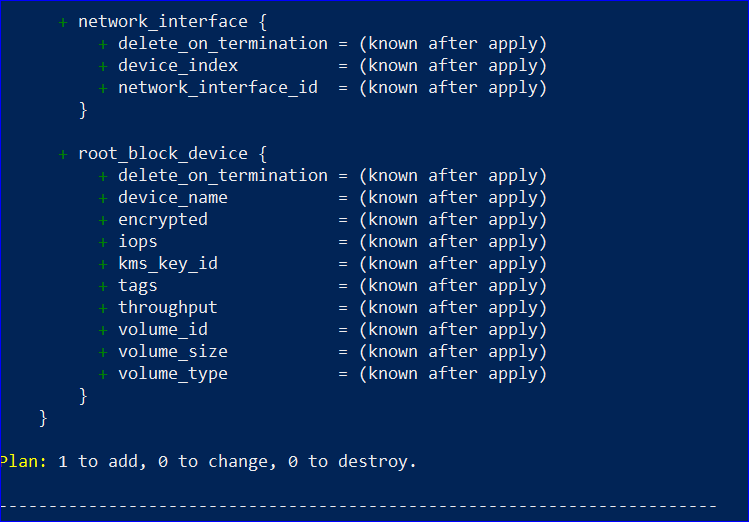
Answer: Terraform state file maintains the status of your infrastructure such as resource which are provisioned or needs to be provisioned. When you run Terraform plan command a JSON structured output is generated (initially empty) and when you deploy all the resources ID and other details come in JSON file .

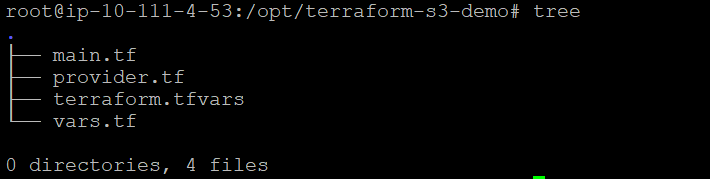
Q5. What are different format of Terraform configuration file?

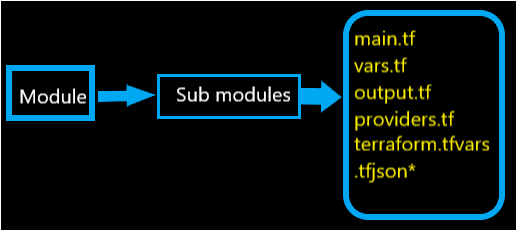
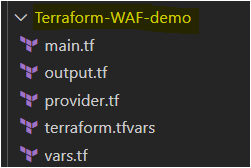
Answer: The format of Terraform configuration file is .tf or .tf.json. Some of the example of Terraform configuration file are main.tf, vars.tf, output.tf, terraform.tfvars , provider.tf etc.

Q6. What are Terraform Providers ?

Answer: Terraform Providers are most important part of terraform which allow to connect to remote systems by the help of API’s. There are different Terraform providers such as google provider, terraform aws provider, terraform azure provider , Oracle, MySQL , Postgres etc.

Q7. Name three Terraform provisioners that are used in Terraform ?

Answer: Terraform provisioners: Local exec , Remote exec and File.

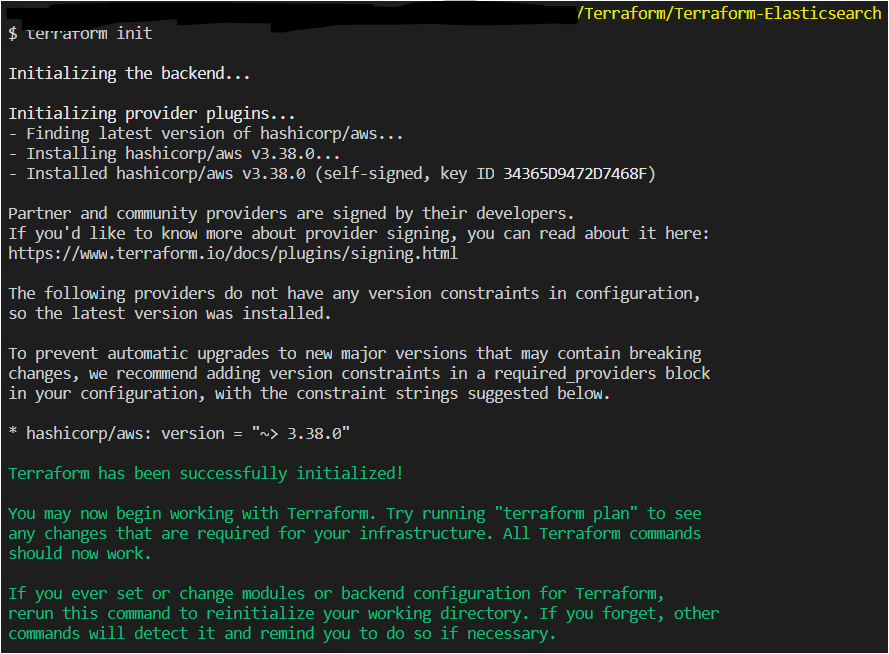
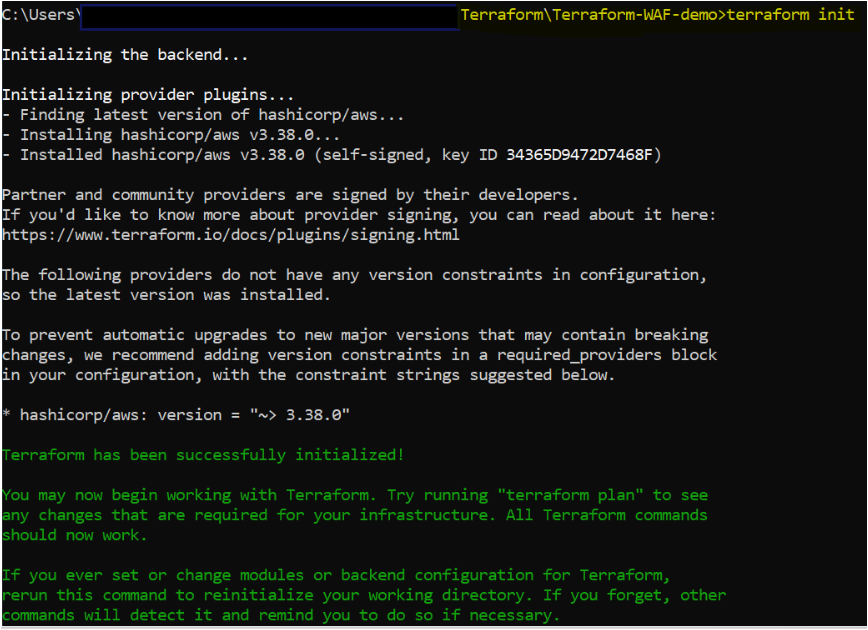
Q8. What happens when you run Terraform init ?

Answer: Terraform init allows all the Terraform modules and Terraform providers to initialize with latest version if there are no dependency locks.

Q9. How do you define Terraform provider version ?

Answer:

terraform {
      required_providers {
           aws = "~> 1.0" } 
     }

Q10. How to update Terraform provider version?

Answer:

terraform init --upgrade

Q11. What is the other way to define Terraform provider other than in Terraform Block?

Answer:

provider {
      version  = "1.0" 
           }

Q12. In case you have two Terraform providers with same name but need to deploy resources in different regions, What do you do in that case?

Answer: Use alias to solve this issue.

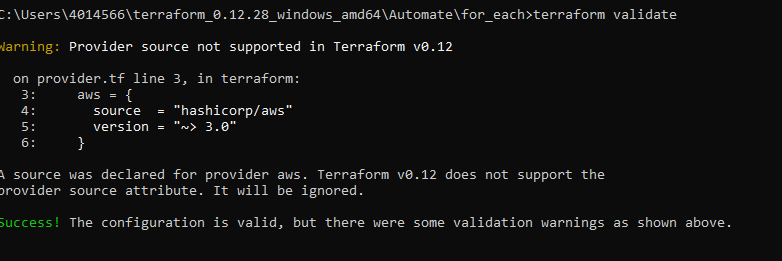
Q13. How do you format and validate Terraform configuration files?

Answer: Use command terraform fmt and terraform validate

Q14. What is Command to Check the current status of infrastructure applied and how you can list resources from your state file?

Answer: terraform show and terraform state list

Q15. What is difference between local exec and remote exec Terraform provisioners?

Answer: local exec is used to run the commands locally on your system like output on the terminal while running terraform plan command and remote exec is to execute remotely on the resources such as EC2.

Q16. What are the two types of connections used while you use remote exec Terraform provisioner?

Answer: SSH or Winrm

Q17. When does Terraform mark the resources as tainted ?

Answer: When resources are created successfully but fails during provisioning. Terraform represents this by marking the object as “tainted” in the Terraform state, and Terraform will propose to replace it in the next plan you create.

Q18. What happens to tainted resource when you run Terraform Plan next time ?

Answer: Terraform ignores them as they are risking objects and will create or replace new resources instead.

Q19. How to manually taint a resource and does taint modify your infrastructure ?

Answer: You can use terraform taint command followed by resource.id. No, only state file is modified.

Q20. How to By Pass any failure in Terraform apply ?

Answer: You can use on_failure setting. Never continue if you thing this failure can cause issues.

PAPER-2

Q1. What does the version = “~ > 1.0 ” mean ?

Answer: It means any version greater than 1 but less than 2.0

Q2. What is more secure practice in terraform ? Using hard coded credentials or Instance profile ?

Answer: Instance Profile.

Q3. How can you remove resource that failed while terraform apply without affecting entire infrastructure ?

Answer: We can use terraform taint resource.id

Q4. What is Terraform workspace and what is default Terraform workspace name?

Answer: Terraform workspace is used to store the permanent data inside terraform state file in backend and by default there is only one terraform state file and if you would like to have multiple terraform state file associated with one backend then you need workspaces. By default there is only one workspace named as default.

Q5. What is the command to list the Terraform workspaces and create new Terraform workspace. ?

Answer: terraform workspace list and terraform workspace new *new_workspace*

Q6. Can you delete default Terraform workspace ?

Answer: No, you cannot delete default Terraform workspace.

Q7. If you want to create one resource in default Terraform workspace and other five resource in different terraform workspace using count, then how can you achieve this?

Answer: Run the below command

resource "aws_instance" "mymachine" {
     count = "${terraform.workspace == "default"  ? 1 : 5 } "
}

Q8. How can you check a single resource attribute in state file?

Answer: terraform state show ‘resource name’.

Q9. How can you bring state file locally on machine and upload to remote location ?

Answer: terraform state pull – To bring the state file to local machine and terraform state push to manually upload the state file to remote location such as S3 bucket in AWS.

Q10. How to remove items from Terraform state file?

Answer: terraform state rm “packet_device.worker”

Q11. How to move items from Terraform state file?

Answer: To move items within Terraform state file run the below command.

terraform state mv 'module.app' 'module.parent.module.app'

Q12. Where are Terraform modules located ?

Answer: Terraform modules can be stored in repositories such as AWS S3 bucket, GIT, local filesystem or Terraform Registry.

Q13. Where are your Terraform providers located ?

Answer: Within the Terraform registry.

Q14. What is the command to check the current status of infrastructure applied and how you can list resources from your state file?

Answer: terraform show and terraform state list

Q15. How do you download Terraform modules in a file ?

Answer: Using module block containing source and version.

Q16. What are terraform Module ?

Answer: Terraform module contains set of Terraform configuration files in a single directory and allows others to reuse for simplicity and ease.

Q17. What is “${}” know as ?

Answer: “${}” is interpolation that was used with previous versions and still can be used.

Q18. What is default data type in Terraform ?

Answer: String.

Q19. What does .terraform directory contains?

Answer: .terraform directory stores downloaded packages and plugins and Terraform provider details.

Q20. What are Core Terraform commands?

Answer: terraform init ➔ terraform plan ➔ terraform apply

PAPER-3

Q1. How do you protect any Terraform provisioner to fail on terraform apply ?

Answer: By using on_failure settings as shown below.

resource "aws_instance" "web" {
  provisioner "local-exec" {
    command  = "echo The server's IP address is ${self.private_ip}"
    on_failure = "continue" # This will ignore the error and continue with creation or destruction or 
    fail       = It will Raise an Error 
  }
}

Q2. Is it Possible to skip Terraform backend ? If Yes, then how?

Answer: Yes you can skip terraform backend by running below command. command

terraform init -backend=false

Q3. How can you remove Plugin installation while initializing the terraform?

Answer: By running the following commands.

terraform init -get-plugins=false

Q4. What is the use of terraform plan command ?

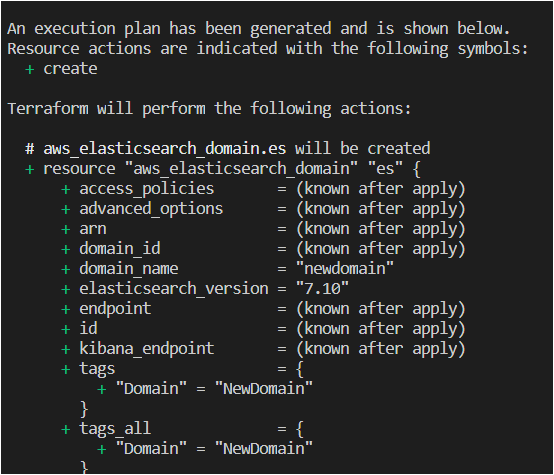
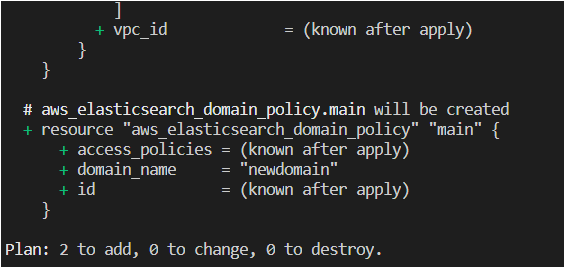
Answer: Terraform plan command helps in creation of execution plan and determines which actions are necessary to achieve the desired state.

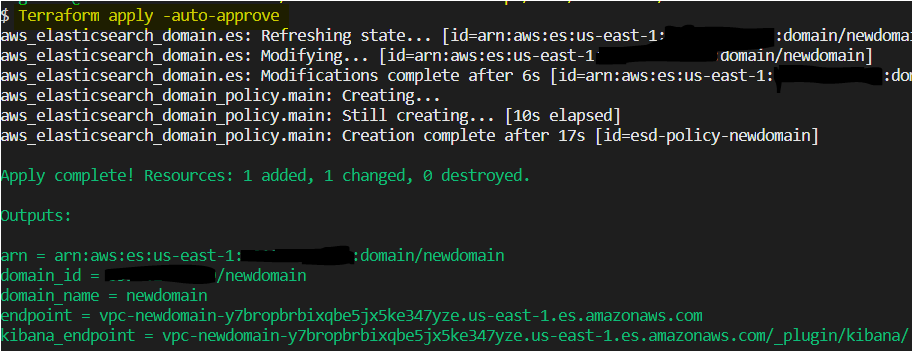
Q5. How can you allow terraform to self approve and deploy the infrastructure ?

Answer: Using below command.

terraform apply -auto-approve

Q6. How can you preview the behavior of terraform destroy command ?

Answer: Use the below command that will inform which resources will be destroyed.

terraform plan -destroy

Q7. How can you save the execution Plan ?

Answer: Save the execution Plan by using below command.

terraform plan -out=tf-plan

Q8. How can you see single attribute in state file?

Answer: By using below command.

terraform state show 'resource name'. 

Q9. How can you get detailed exit code while running plan in Terraform ?

Answer: By adding the -detailed-exitcode in terraform plan command.

terraform plan -detailed-exitcode. 

Q10. If you remove EC2 instance manually from AWS console which was created by terraform. What happens when you run terraform apply command next time? Does terraform recreate it ?

Answer: Yes , it does recreate it as this is already defined in state file.

Q11. What are Terraform backends?

Answer: Terraform backend determines where Terraform state is stored or loaded from. By default it is stored on local machine but you can also give remote backed such as AWS S3 bucket.

Q12. What do you mean by state lock ?

Answer: State lock gets applied as soon as you work on the resource. It helps in corruption of your state file.

Q13. Can you revert from remote backend to Local backend ? If yes then what next needs to be done?

Answer: Yes you can revert from remote backend to local backend by configuring in Terraform configuration file and later running terraform init command.

Q14. What is Command to Sync or reconcile your terraform state file if you modify terraform created resource manually?

Answer: Use Terraform refresh command.

Q15. Can you use output generated from one Terraform module to other Terraform module? If yes how?

Answer: Yes the output generated from one Terraform module can be used in other Terraform module. You can define in module block by specifying the source and version and then use it.

Q16. What is correct approach for declaring meta argument ? a = “${a}” or “${}” = a

Answer: a = “${a}” is correct way to use meta arguments. Now interpolation is used very rarely.

Q17. Name some important Data types in Terraform ?

Answer: String , lists , set, map , tuple , bool, number and object.

Q18. How do you convert built in function from String to number ?

Answer: parseint(“100″,”10”)

Q19. Which built in function evaluates expression and return Boolean result ?

Answer: can function.

Q20. How can you encode built in function to a string using JSON Syntax ?

Answer: jsonencode({“hello”=”America”})

Join 64 other subscribers

Conclusion

In this ultimate guide(Pass Terraform Certification with top Terraform Interview Questions and Answers), you had a chance to revise everything you needed to pass and crack the Terraform interview.

Now that you have sound knowledge of Terraform, and are ready for your upcoming interview.

Learn Terraform: The Ultimate terraform tutorial [PART-2]

In the previous; Learn Terraform: The Ultimate terraform tutorial [PART-1], you got a jump start into Terraform world; why not gain a more advanced level of knowledge of Terraform that you need to become a terraform pro.

In this Learn Terraform: The Ultimate terraform tutorial [PART-2] guide, you will learn more advanced level of Terraform concepts such as terraform lifecycle, terraform function, terraform modules, terraform provisioners, terraform init, terraform plan, terraform apply commands and many more.

Without further delay, let’s get into it.

Join 64 other subscribers

Table of Content

  1. What are Terraform modules?
  2. Terraform provisioner
  3. Terraform Lifecycle
  4. Terraform jsonencode example with Terraform json
  5. Terraform locals
  6. Terraform conditional expression
  7. Terraform dynamic block conditional
  8. Terraform functions
  9. Terraform can function
  10. Terraform try function
  11. Terraform templatefile function
  12. Terraform data source
  13. Terraform State file
  14. Terraform backend [terraform backend s3]
  15. Terraform Command Line or Terraform CLI
  16. Quick Glance of Terraform CLI Commands
  17. Terraform ec2 instance example (terraform aws ec2)

What are Terraform modules?

Terraform modules contain the terraform configuration files that may be managing a single resource or group of resources. For example, if you are managing a single resource in the single terraform configuration file that is also a Terraform module, or if you wish to manage multiple resources defined different files and later clubbed together in a single file, that is also known as Terraform modules or a root module.

A Terraform root module can have multiple individual child modules, data blocks, resources blocks, and so on. To call a child module, you will need to explicitly define the location of the child module using the source argument as shown below.

  • In the below code the location of module EFS is one directory behind the current directory, so you defined the local Path as ./modules/EFS
module "efs" {                            # Module and Label is efs
  source               = "./modules/EFS"  # Define the Path of Child Module                             
  subnets              = var.subnet_ids
  efs_file_system_name = var.efs_file_system_name
  security_groups      = [module.SG.efs_sg_id]
  role_arn             = var.role_arn
}
  • In some cases the modules are stored in Terraform Registry, GitHub, Bitbucket, Mercurial Repo, S3 bucket etc and to use these repsoitories as your source you need to declare as shown below.
module "mymodule1" {                              # Local Path located  Module
  source = "./consul"
}

module "mymodule2" {                              # Terraform Registry located Module
  source = ".hasicorp/consul/aws"
  version = "0.1.0"
}

module "mymodule3" {                              # GIT located  Module
  source = "github.com/automateinfra/"
}

module "mymodule4" {                              # Mercurial located  Module
  source = "hg::https://automateinfra.com/vpc.hg"
}

module "mymodule5" {                               # S3 Bucket located  Module
  source = "s3::https://s3-eu-west-1.amazonaws.com/vpc.zip"
}
The diagram displaying the root module ( module1 and module2) containing the child modules such as (ec2, rds, s3 etc)
The diagram displaying the root module ( module1 and module2) containing the child modules such as (ec2, rds, s3, etc.)

Terraform provisioner

Do you know what Terraform allows you to perform an action on your local machine or remote machine such as running a command on the local machine, copying files from local to remote machines or vice versa, Passing data into virtual machines, etc. all this can be done by using Terraform provisioner?

Terraform provisioners allow to pass data in any resource that cannot be passed when creating resources. Multiple terraform provisioners can be specified within a resource block and executed in the order they’re defined in the configuration file.

The terraform provisioners interact with remote servers over SSH or WinRM. Most cloud computing platforms provide mechanisms to pass data to instances at the time of their creation such that the data is immediately available on system boot. Still, you can pass the data with Terraform provisioners even after creating the resource.

Terraform provisioners allows you to declare conditions such as when = destroy , on_failure = continue and If you wish to run terraform provisioners that aren’t directly associated with a specific resource, use null_resource.

Let’s look at the example below to declare multiple terraform provisioners.

  • Below code creates two resources where resource1 create an AWS EC2 instance and other work with Terraform provisioner and performs action on the AWS EC2 instance such as copying apache installation instrution from local machine to remote machine and then using file installing apache on the AWS EC2 instance.

resource "aws_instance" "resource1" {
  instance_type = "t2.micro"
  ami           = "ami-9876"
  timeouts {                     # Customize your operations longevity
   create = "60m"
   delete = "2h"
   }
}

resource "aws_instance" "resource2" {

  provisioner "local-exec" {
    command = "echo 'Automateinfra.com' >text.txt"
  }
  provisioner "file" {
    source      = "text.txt"
    destination = "/tmp/text.txt"
  }
  provisioner "remote-exec" {
    inline = [
      "apt install apache2 -f /tmp/text.txt",
    ]
  }
}

Join 64 other subscribers

Terraform Lifecycle

Terraform lifecycle defines the behavior of resources how they should be treated, such as ignoring changes to tags, preventing destroy the infrastructure.

There are mainly three arguments that you can declare within the Terraform lifecycle such as :

  1. create_before_destroy: By default Terraform destroys the existing object and then create a new replacement object but with create_before_destroy argument within terraform lifecycle the new replacement object is created first, and then the legacy or prior object is destroyed.
  2. prevent_destroy: Terraform skips the destruction of the existing object if you declare prevent_destroy within the terraform lifecycle.
  3. ignores-changes: When you execute Terraform commands if there are any differences or changes required in the infrastructure terraform by default informs you however if you need to ignores the changes, then consider using ignore_changes inside the terraform lifecycle.
  • In the below code aws_instance will ignore any tag changes for the instance and for azurerm_resource_group new resource group is created first and then destroyed once the new replacement is ready.
resource "aws_instance" "automate" {
  lifecycle {
    ignore_changes = [
      tags,
    ]
  }
}

resource "azurerm_resource_group" "automate" {
  lifecycle {
    create_before_destroy = true
  }
}

Terraform jsonencode example with Terraform json

If you need to encode Json files in your terraform code, consider using terraform jsonencode function. This is a quick section about terraform jsonencode, so let’s look at a basic Terraform jsonencode example with Terraform json.

  • The below code creates an IAM role policy in which you are defining the policy statement in json format.
resource "aws_iam_role_policy" "example" {
  name   = "example"
  role   = aws_iam_role.example.name
  policy = jsonencode({
    "Statement" = [{
      # This policy allows software running on the EC2 instance to access the S3 API
      "Action" = "s3:*",
      "Effect" = "Allow",
    }],
  })
}

Terraform locals

Terraform locals are the values that are declared once but can be referred to multiple times in the resource or module block without repeating it.

Terraform locals helps you to decrease the number of code lines and reduce the repetitive code.

locals {                                         # Declaring the set of related locals in a single block
  instance = "t2.micro"
  name     = "myinstance"
}

locals {                                         # Using the Local values 
 common_tags {
  instance_type  = local.instance
  instance_name  = local.name
   }
}

resource "aws_instance" "instance1" {            # Using the newly created Local values
  tags = local.common_tags
}

resource "aws_instance" "instance2" {             # Using the newly created Local values
  tags = local.common_tags
}

Terraform conditional expression

There is multiple time when you will encounter using conditional expressions in Terraform. Let’s look at some important terraform conditional expression examples below, which will forever help you using Terraform. Let’s get into it.

  • Below are examples on how to retrieve outputs with different conditions.
aws_instance.myinstance.id      # This will provide you a result with Ec2 Instance details.
aws_instance.myinstance[0].id   # This will provide you a result with first Ec2 Instance details.
aws_instance.myinstance[1].id   # This will provide you a result with second Ec2 Instance details
aws_instance.myinstance.*id     # This will provide you a result with all Ec2 Instance details
  • Now, let us see few complex examples where different conditions are applied to retrieve outputs.
[for value in aws_instance.myinstance:value.id]    # Returns all instance values by their ids.
var.a != "auto" ? var.a : "default-a"              # if var.a is auto then use var.a else default-a
[for a in var.list : a.instance[0].name]           # var.list[*].instance[0].name
[for a in var.list: upper(a)]                      # iterates over each item in var.list and lists upper case 
[for a in var.list : a => upper(a)]     # list original objects and corresponding upper case [("a","A"),("c","C")]                                                         


Terraform dynamic block conditional

Terraform dynamic block conditional is used when resource or module block cannot accept the static value of the argument and instead depend on separate objects that are related to, embedded within the other block or outputs.

For example application = "${aws_elastic_beanstalk_application.tftest.name}" .

Also, while creating any resource in the module, you are not allowed to provide the arguments multiple times, such as name and value, so in that case, you can use dynamic settings. Below is a basic example of a dynamic setting.

resource "aws_elastic_beanstalk_environment" "tfenvtest" {
  name                = "tf-test-name"
  application         = "${aws_elastic_beanstalk_application.tftest.name}"
  solution_stack_name = "64bit Amazon Linux 2018.03 v2.11.4 running Go 1.12.6"

  dynamic "setting" {
    for_each = var.settings
    content {
      namespace = setting.value["namespace"]
      name = setting.value["name"]
      value = setting.value["value"]
    }
  }
}

Terraform functions

The Terraform includes multiple terraform functions, also known as built-in functions that you can call from within expressions to transform and combine values. The syntax for function calls is a function name followed by comma-separated arguments in parentheses: min, join, element, jsonencode, etc.

min(2,3,4)                                 # The output of this function is 2

join("","","hello", "Automate", "infra")   # The output of this function is hello, Automate , infra

element(["a", "b", "c"], length(["a", "b", "c"])-1)   # The output of this function is c

lookup({a="ay", b="bee"}, "c", "unknown?")          # The output of this function is unknown

jsonencode({"hello"="Automate"})          # The output of this function is {"hello":"Automate"}

jsondecode("{\"hello\": \"Automate\"}")   # The output of this function is { "hello"="Automate"}                                                           
                                                                 

Terraform can function

Terraform can evaluate the given expression or condition and accordingly returns a boolean value (true if the expression is valid, else false if the result has any errors. This special function can catch errors produced when evaluating its argument.

local.instance {
  myinstance1 = "t2.micro"
  myinstance2 = "t2.medium"
}

can(local.instance.myinstance1) #  This is True
can(local.instance.myinstance3) #  This is False

variable "time" {
  validation {
     condition  = can(formatdate("","var.time"))   # Checking the 2nd argument
  }
}


Terraform try function

Terraform try function evaluates all of its argument expressions in turn and returns the result of the first one that does not produce any errors.

As you can check below, the terraform try function checks the expression and returns the first correct option, t2.micro, in the first and second options in the second case.

local.instance {
  myinstance1 = "t2.micro"
  myinstance2 = "t2.medium"
}

try(local.instance.myinstance1, "second-option") # This is available in local so output is t2.micro
try(local.instance.myinstance3, "second-option") # This is not available in local so output is second-option

Terraform templatefile function

The Terraform templatefile function reads the file at a given directory or path and renders the content present in the file as a template using the template variable.

Syntax: templatefile(path,vars)
  • Lets understand the example of Terraform templatefile function with Lists. Given below is the backend.tpl template file with below content. When you execute the templatefile() function it renders the backend.tpl and assigns the address and port to the backend argument.
# backend.tpl

%{for addr in ipaddr ~}      # Condition via Directive
backend ${addr}:${port}      # Prints this      
%{end for ~}                 # Condition via Directive

templatefile("${path.module}/backend.tpl, { port = 8080 , ipaddr =["1.1.1.1","2.2.2.2"]})

backend 1.1.1.1:8080
backend 2.2.2.2:8080
  • Lets checkout another example of Terraform templatefile function but this time with maps. When you execute the templatefile() function it renders the backend.tpl and assigns the value of set with each config mentioned in the templatefile (a=automate and i=infra).
# backend.tmpl

%{ for key,value in config }
set ${key} = ${value}
%{ endfor ~}

  • Execute the function
templatefile("${path.module}/backend.tmpl,
     { 
        config = {
              "a" = "automate"
              "i" = "infra"
           } 
      })

set a = automate
set i = infra

Terraform data source

Terraform data source allows you to fetch the data defined outside of Terraform, defined by another separate Terraform configuration, or modified by functions. After fetching the data, Terraform data source can use it as input and apply it to other resources.

Let’s learn with a basic example. In the below code, you will notice that using data it is fetching the instance details with a provided instance_id.

data "aws_instance" "my-machine1" {          # Fetching the instance
  instance_id = "i-0a0269cf952a02832"
  }

Terraform State file

The main function of the Terraform state file is to store the terraform state, which contains bindings between objects in remote systems and is defined in your Terraform configuration files. Terraform State file is by default stored locally on your machine where you run the Terraform commands with the name of terraform.tfstate.

The Terraform state is stored in JSON formats. When you run terraform show or terraform output command, it fetches the output in JSON format from the Terraform state file. Also, you can import existing infrastructure which you have created by other means such as manually or using scripts within Terraform state file.

When you are an individual, it is ok to keep the Terraform state file in your local machine but when you work in a team, consider storing it in a repository such as AWS S3, etc. While you write anything on the resource that is Terraform configuration file, then the Terraform state file gets Locked, which prevents someone else from using it simultaneously and avoids it being corrupted.

You can store your remote state file in S3, Terraform Cloud, Hasicorp consul, Google cloud storage, Azure blob storage, etc.

Join 64 other subscribers

Terraform backend [terraform backend s3]

Terraform backend is a location where terraform state file resides. The Terraform state file contains all the resource details and tracking which were provisioned or will be provisioned with Terraform, such as terraform plan or terraform apply command.

There are two types of Backend; one is local that resides where you run terraform from it could be Linux machine, windows machine or wherever you run it from, and other is remote backend which could be SAAS based URL or storage location such as AWS S3 bucket.

Let’s take a look at how you can configure local backend or remote backend with terraform backend s3

# Local Backend
# whenever statefile is created or updates it is stored in local machine.

terraform {
  backend "local" {
    path = "relative/path/to/terraform.tfstate"
  }
}

# Configuring Terraform to use the remote terraform backend s3.
# whenever statefile is created or updates it is stored in AWS S3 bucket. 

terraform {
  backend "s3" {
    bucket = "mybucket"
    key    = "path/to/my/key"
    region = "us-east-2"
  }
}

Terraform Command Line or Terraform CLI

The Terraform command-line interface or Terraform CLI can be used via terraform command, which accepts a variety of subcommands such as terraform init or terraform plan. Below is the list of all of the supported subcommands.

  • terraform init: It initializes the provider, module version requirements, and backend configurations.
  • terraform init -input=true ➔ You can need to provide the inputs on the command line else terraform will fail.
  • terraform init -lock=false ➔ Disable lock of terraform state file but this is not recommended
  • terraform init -upgrade ➔ Upgrades Terraform modules and Terraform plugins
  • terraform plan: terraform plan command determines the state of all resources and compares them with real or existing infrastructure. It uses terraform state file data to compare and provider API to check.
  • terraform plan -compact-warnings ➔ Provides the summary of warnings
  • terraform plan -out=path ➔ Saves the execution plan on the specific directory.
  • terraform plan -var-file= abc.tfvars ➔ To use specfic terraform.tfvars specified in the directory.
  • terraform apply: To apply the changes in a specific cloud such as AWS or Azure.
  • terraform apply -backup=path ➔ To backup the Terraform state file
  • terraform apply -lock=true ➔ Locks the state file
  • terraform apply -state=path ➔ prompts to provide the path to save the state file or use it for later runs.
  • terraform apply -var-file= abc.tfvars ➔ Enter the specific terraform.tfvars which contains environment-wise variables.
  • terraform apply -auto-approve ➔ This command will not prompt to approve the apply command.
  • terraform destroy: It will destroy terraform-managed infrastructure or the existing enviornment created by Terraform.
  • terraform destroy -auto-approve ➔ This command will not prompt to approve the destroy command.
  • terraform console: Provides interactive console to evaluate the expressions such as join command or split command.
  • terraform console -state=path ➔ Path to local state file
  • terraform fmt: terraform fmt command formats the configuration files in the proper format.
  • terraform fmt -check ➔ Checks the input format
  • terraform fmt – recursive ➔ It formats Terraform configuration files stored in subdirectories.
  • terraform fmt – diff ➔ displays the difference between the current and previous formats.
  • terraform validate -json ➔ Output is in json format
  • terraform graph: terraform graph generates a visual representation of the execution plan in graph form.
  • terraform graph -draw-cycles
  • terraform graph -type=plan
  • terraform output: terraform output command extracts the values of an output variable from the state file.
  • terraform output -json
  • terraform output -state=path
  • terraform state list: It lists all the resources present in the state file created or imported by Terraform.
  • terraform state list – id=id ➔ This command will search for a particular resource using resource id in Terraform state file.
  • terraform state list -state=path ➔ This command will prompt you to provide the path of the state file and then provides the list of all resources in terraform state file.
  • terraform state show: It shows attributes of specific resources.
  • terraform state show -state=path ➔ This command will prompt you to provide the path and then provide the attributes of specific resources.
  • terraform import: This command will import existing resources from infrastructure which was not created using terraform but will be imported in terraform state file and will be included in Terraform next time we run it.
  • terraform refresh: It will reconcile the Terraform state file. Whatever resource you created using terraform and if they are manually or by any means modified, the refresh will sync them in the state file.
  • terraform state rm: This command will remove the resources from the Terraform state file without actually removing the existing resources.
  • terraform state mv: This command moves the resources within the Terraform state file from one location to another
  • terraform state pull: This command will manually download the Terraform state file from a remote state in your local machine.

Quick Glance of Terraform CLI Commands

Initialize ProvisionModify ConfigCheck infraManipulate State
terraform initterraform planterraform fmtterraform graphterraform state list
terraform getterraform applyterraform validateterraform outputterraform state show
terraform destroyterraform consoleterraform state show terraform state mv/rm
terraform state listterraform state pull/push
Terraform CLI commands

Terraform ec2 instance example (terraform aws ec2)

Let’s wrap up this ultimate guide with a basic Terraform ec2 instance example or terraform aws ec2.

  • Assuming you already have Terraform installed on your machine.
  • First create a folder of your choice in any directory and a file named main.tf inside it and copy/paste the below content.
# This is main.tf terraform file.

resource "aws_instance" "my-machine" {
  ami = "ami-0a91cd140a1fc148a"
  for_each  = {
      key1 = "t2.micro"
	  key2 = "t2.medium"
   }
    instance_type      = each.value
	key_name       = each.key
    tags =  {
	   Name  = each.value
	}
}

resource "aws_iam_user" "accounts" {
  for_each = toset( ["Account11", "Account12", "Account13", "Account14"] )
  name     = each.key
}

  • Create another file vars.tf inside the same folder and copy/paste the below content.

#  This is var.tf terraform file.

variable "tag_ec2" {
  type = list(string)
  default = ["ec21a","ec21b"]
}
  • Finally, create another file output.tf again in the same folder and copy/paste the below content.
# This is  output.tf terraform file

output "aws_instance" {
   value = "${aws_instance.my-machine.*.id}"
}
output "aws_iam_user" {
   value = "${aws_iam_user.accounts.*.name}"
}


Make sure your machine has Terraform role attached or Terraform credentials configured properly before you run the below Terraform commands.

terraform -version  # It gives Terraform Version information
Finding Terraform version
  • Now Initialize the terraform by running the terraform init command in same working directory where you have all the above terraform configuration files.
terraform init   # To initialize the terraform 
Initializing the terraform using terraform init command
  • Next run the terraform plan command. This command provides the blueprint of what all resources will be deployed before deploying actually.
terraform plan   
Running the terraform plan command
terraform validate   # To validate all terraform configuration files.
Running the terraform validate command
  • Now run the Terraform show command provides the human readable output of state file that gets generated only after terraform plan command.
terraform show   # To provide human-readable output from a state or plan file.
Running the terraform show command
  • To list all resources within terraform state file run the terraform state list command.
terraform state list 
Running the terraform state list command
terraform apply  # To Actually apply the resources 
Running the terraform apply command
  • To provide graphical view of all resources in configuration files run terraform graph command.
terraform graph  
Running the terraform graph command
  • To Destroy the resources that are provisioned using Terraform run Terraform destroy command.
terraform destroy   # Destroys all your resources or the one which you specified 
Running the terraform destroy command

Join 64 other subscribers

Conclusion

Now that you have learned everything you should know about Terraform, you are sure going to be the Terraform leader in your upcoming projects or team or organizations.

So with that, what are you planning to automate using Terraform in your next adventure?

Learn Terraform: The Ultimate terraform tutorial [PART-1]

If you are looking to learn to terraform, then you are in the right place; this Learn Terraform: The Ultimate terraform tutorial guide will simply help you to gain complete knowledge that you need from basics to becoming a terraform pro.

Terraform infrastructure as a code tool to build and change the infrastructure effectively and simpler way. With Terraform, you can work with various cloud providers such as Amazon AWS, Oracle, Microsoft Azure, Google Cloud, and many more.

Let’s get started with Learn Terraform: The Ultimate terraform tutorial without further delay.

Join 64 other subscribers

Table of Content

  1. Prerequisites
  2. What is terraform?
  3. Terraform files and Terraform directory structure
  4. How to declare Terraform variables
  5. How to declare Terraform Output Variables
  6. How to declare Terraform resource block
  7. Declaring Terraform resource block in HCL format.
  8. Declaring Terraform resource block in terraform JSON format.
  9. Declaring Terraform depends_on
  10. Using Terraform count meta argument
  11. Terraform for_each module
  12. Terraform provider
  13. Defining multiple aws providers terraform
  14. Conclusion

Prerequisites

What is terraform?

Let’s kick off this tutorial with What is Terraform? Terraform is a tool for building, versioning, and updating the infrastructure. It is written in GO Language, and the syntax language of Terraform configuration files is HCL, i.e., HashiCorp Configuration Language, which is way easier than YAML or JSON.

Terraform has been in use for quite a while now and has several key features that make this tool more powerful such as

  • Infrastructure as a code: Terraform execution and configuration files are written in Infrastructure as a code language which comes under High-level language that is easy to understand by humans.
  • Execution Plan: Terraform provides you in depth details of execution plan such as what terraform will provision before deploying the actual code and resources it will create.
  • Resource Graph: Graph is an easier way to identify and manage the resource and quick to understand.

Terraform files and Terraform directory structure

Now that you have a basic idea of Terraform and some key features of Terraform. Let’s now dive into Terraform files and Terraform directory structure that will help you write the Terraform configuration files later in this tutorial.

Terraform code, that is, Terraform configuration files, are written in a tree-like structure to ease the overall understanding of code with .tf format or .tf.json or .tfvars format. These configuration files are placed inside the Terraform modules.

Terraform modules are on the top level in the hierarchy where configuration files reside. Terraform modules can further call another child to terraform modules from local directories or anywhere in disk or Terraform Registry.

Terraform modules folder structure

Terraform contains mainly five files as main.tf , vars.tf , providers.tf , output.tf and terraform.tfvars.

  1. main.tf – Terraform main.tf file contains the main code where you define which resources you need to build, update or manage.
  2. vars.tf – Terraform vars.tf file contains the input variables which are customizable and defined inside the main.tf configuration file.
  3. output.tf : The Terraform output.tf file is the file where you declare what output paraeters you wish to fetch after Terraform has been executed that is after terraform apply command.
  4. .terraform: This directory contains cached provider , modules plugins and also contains the last known backend configuration. This is managed by terraform and created after you run terraform init command.
  5. terraform.tfvars files contains the values which are required to be passed for variables that are refered in main.tf and actually decalred in vars.tf file.
  6. providers.tf – The povider.tf is the most important file whrere you define your terraform providers such as terraform aws provider, terraform azure provider etc to authenticate with the cloud provider.

How to declare Terraform variables

In the previous section, you learned Terraform files and Terraform directory structure. Moving further, it is important to learn how to declare Terraform variables in Terraform configuration file (var. tf)

Declaring the variables allows you to share modules across different Terraform configurations, making your module reusable. There are different types of variables used in Terraform, such as boolean, list, string, maps, etc. Let’s see how different types of terraform variables are declared.

  • Each input variable in the module must be declared using a variable block as shown below.
  • The label after the variable keyword is a name for the variable, which should be unique within the same module
  • The following arguments can be used within the variable block:
    • default – A default value allows you to decalre the value in this block only and makes the variable optional.
    • type – This argument declares the value types.
    • description – You can provide the description of the input variable’s.
    • validation -To define validation rules if any.
    • sensitive – If you specify the value as senstive then terraform will not print the values in while executing.
    • nullable – Specify null if you dont need any value for the variable.
variable "variable1" {                        
  type        = bool
  default     = false
  description = "boolean type variable"
}

variable  "variable2" {                       
   type    = map
   default = {
      us-east-1 = "image-1"
      us-east-2 = "image2"
    }

   description = "map type  variable"
}

variable "variable3" {                   
  type    = list(string)
  default = []
  description = "list type variable"
}

variable "variable4" {
  type    = string
  default = "hello"
  description = "String type variable"
}                        

variable "variable5" {                        
 type =  list(object({
  instancetype        = string
  minsize             = number
  maxsize             = number
  private_subnets     = list(string)
  elb_private_subnets = list(string)
            }))

 description = "List(Object) type variable"
}


variable "variable6" {                      
 type = map(object({
  instancetype        = string
  minsize             = number
  maxsize             = number
  private_subnets     = list(string)
  elb_private_subnets = list(string)
  }))
 description = "Map(object) type variable"
}


variable "variable7" {
  validation {
 # Condition 1 - Checks Length upto 4 char and Later
    condition = "length(var.image_id) > 4 && substring(var.image_id,0,4) == "ami-"
    condition = can(regex("^ami-",var.image_id)    
# Condition 2 - It checks Regular Expression and if any error it prints in terraform error_message =" Wrong Value" 
  }

  type = string
  description = "string type variable containing conditions"
}

Terraform variables follows below higher to the lower priority order.

  1. Specifying the environment variables like export TF_VAR_id='["id1","id2"]''
  2. Specifying the variables in the teraform.tfvars file
  3. Specifying the variables in theterraform.tfvars.json file
  4. Specifying the variables in the *.auto.tfvars or *.auto.tfvars.json file
  5. Specifying the variables on the command line with -var and -var-file options

How to declare Terraform Output Variables

In the previous section, you learned how to use terraform variables in the Terraform configuration file. As learned earlier, modules contain one more important file: outputs. tf that contains terraform output variables.

  • In the below output.tf file the you can see there are two different terraform output variables named:
  • output1 that will store and display the arn of instance after running terraform apply command.
  • output2 that will store and display the public ip address of the instance after running terraform apply command.
  • output3 that will store but doesnt display the private ip address of the instance after running terraform apply command using sensitive argument.
# Output variable which will store the arn of instance and display after terraform apply command.

output "output1" {
  value = aws_instance.my-machine.arn
}

# Output variable which will store instance public IP and display after terraform apply command
 
output "output2" {
  value       = aws_instance.my-machine.public_ip
  description = "The public IP address of the instance."
}

output "output3" {
  value = aws_instance.server.private_ip
# Using sensitive to prevent Terraform from showing the ouput values in terrafom plan and apply command.  
  senstive = true                             
}

How to declare Terraform resource block

You are going great in learning the terraform configuration file, but do you know your modules contain one more important main file.tf file, which allows you to manage, create, update resources with Terraform, such as creating AWS VPC, etc., and to manage the resource, you need to define them in terraform resource block.

# Below Code is a resource block in Terraform

resource "aws _vpc" "main" {    # <BLOCK TYPE> "<BLOCK LABEL>" "<BLOCK LABEL>" {
cidr_block = var.block          # <IDENTIFIER> =  <EXPRESSION>  #Argument (assigns value to name)
}                             

Declaring Terraform resource block in HCL format.

Now that you have an idea about the syntax of terraform resource block let’s check out an example where you will see resource creation using Terraform configuration file in HCL format.

  • Below code creates two resources where resource1 create an AWS ec2 instance and other work with Terraform provisioner and install apache on ec2 instance. Timeouts customizes how long certain operations are allowed.

There are some special arguments that can be used with resources such as depends_on, count, lifecycle, for_each and provider, and lastly provisioners.

resource "aws_instance" "resource1" {
  instance_type = "t2.micro"
  ami           = "ami-9876"
  timeouts {                          # Customize your operations longevity
   create = "60m"
   delete = "2h"
   }
}

resource "aws_instance" "resource2" {
  provisioner "local-exec" {
    command = "echo 'Automateinfra.com' >text.txt"
  }
  provisioner "file" {
    source      = "text.txt"
    destination = "/tmp/text.txt"
  }
  provisioner "remote-exec" {
    inline = [
      "apt install apache2 -f /tmp/text.txt",
    ]
  }
}

Declaring Terraform resource block in terraform JSON format.

Terraform language can also be expressed in terraform JSON syntax, which is harder for humans to read and edit but easier to generate and parse programmatically, as shown below.

  • Below example is same which you previously created using HCL configuration but this time it is using terraform JSON syntax. Here also code creates two resources resource1 → AWS EC2 instance and other resource work with Terraform provisioner to install apache on ec2 instance.
{
  "resource": {
    "aws_instance": {
      "resource1": {
        "instance_type": "t2.micro",
        "ami": "ami-9876"
      }
    }
  }
}


{
  "resource": {
    "aws_instance": {
      "resource2": {
        "provisioner": [
          {
            "local-exec": {
              "command": "echo 'Automateinfra.com' >text.txt"
            }
          },
          {
            "file": {
              "source": "example.txt",
              "destination": "/tmp/text.txt"
            }
          },
          {
            "remote-exec": {
              "inline": ["apt install apache2 -f tmp/text.txt"]
            }
          }
        ]
      }
    }
  }
}

Declaring Terraform depends_on

Now that you learned how to declare Terraform resource block in HCL format but within the resource block, as discussed earlier, you can declare special arguments such as depends_on. Let’s learn how to use terraform depends_on meta argument.

Use the depends_on meta-argument to handle hidden resource or module dependencies that Terraform can’t automatically handle.

  • In the below example while creating a resource aws_rds_cluster you need the information about the aws_db_subnet_group so aws_rds_cluster is dependent and in order to specify the dependency you need to declare depends_on meta argument within aws_rds_cluster.
resource "aws_db_subnet_group" "dbsubg" {
    name = "${var.dbsubg}" 
    subnet_ids = "${var.subnet_ids}"
    tags = "${var.tag-dbsubnetgroup}"
}

# Component 4 - DB Cluster and DB Instance

resource "aws_rds_cluster" "main" {
  depends_on                   = [aws_db_subnet_group.dbsubg]  
  # This RDS cluster is dependent on Subnet Group

Join 64 other subscribers

Using Terraform count meta argument

Another special argument is Terraform count. By default, terraform create a single resource defined in Terraform resource block. But at times, you want to manage multiple objects of the same kind, such as creating four AWS EC2 instances of the same type in the AWS cloud without writing a separate block for each instance. Let’s learn how to use Terraform count meta argument.

  • In the below code terraform will create 4 instance of t2.micro type with (ami-0742a572c2ce45ebf) ami as shown below.
resource "aws_instance" "my-machine" {
  count = 4 
  
  ami = "ami-0742a572c2ce45ebf"
  instance_type = "t2.micro"
  tags = {
    Name = "my-machine-${count.index}"
         }
}
Using Terraform count to create four ec2 instance
  • Similarly in the below code terraform will create 4 AWS IAM users named user1, user2, user3 and user4.
resource "aws_iam_user" "users" {
  count = length(var.user_name)
  name = var.user_name[count.index]
}

variable "user_name" {
  type = list(string)
  default = ["user1","user2","user3","user4"]
}
Using Terraform count to create four IAM user

Terraform for_each module

Earlier in the previous section, you learned to terraform count is used to create multiple resources with the same characteristics. If you need to create multiple resources in one go but with certain parameters, then terraform for_each module is for you.

The for_each meta-argument accepts a map or a set of strings and creates an instance for each item in that map or set. Let’s look at the example below to better understand terraform for_each.

Example-1 Terraform for_each module

  • In the below example, you will notice for_each contains two keys (key1 and key2) and two values (t2.micro and t2.medium) inside the for each loop. When the code is executed then for each loop will create:
    • One instance with key as “key1” and instance type as “t2.micro”
    • Another instance with key as “key2” and instance type as “t2.medium”.
  • Also below code will create different account with names such as account1, account2, account3 and account4.
resource "aws_instance" "my-machine" {
  ami = "ami-0a91cd140a1fc148a"
  for_each  = {
      key1 = "t2.micro"
      key2 = "t2.medium"
   }
  instance_type    = each.value	
  key_name         = each.key
  tags =  {
   Name = each.value 
	}
}

resource "aws_iam_user" "accounts" {
  for_each = toset( ["Account1", "Account2", "Account3", "Account4"] )
  name     = each.key
}

Terraform for_each module example 1 to launch ec2 instance and IAM users

Example-2 Terraform for_each module

  • In the below example, you will notice for_each is a variable of type map(object) which has all the defined arguments such as (instance_type, key_name, associate_public_ip_address and tags). After Code is executed every time each of these arguments get a specific value.
resource "aws_instance" "web1" {
  ami                         = "ami-0a91cd140a1fc148a"
  for_each                    = var.myinstance
  instance_type               = each.value["instance_type"]
  key_name                    = each.value["key_name"]
  associate_public_ip_address = each.value["associate_public_ip_address"]
  tags                        = each.value["tags"]
}

variable "myinstance" {
  type = map(object({
    instance_type               = string
    key_name                    = string
    associate_public_ip_address = bool
    tags                        = map(string)
  }))
}

myinstance = {
  Instance1 = {
    instance_type               = "t2.micro"
    key_name                    = "key1"
    associate_public_ip_address = true
    tags = {
      Name = "Instance1"
    }
  },
  Instance2 = {
    instance_type               = "t2.medium"
    key_name                    = "key2"
    associate_public_ip_address = true
    tags = {
      Name = "Instance2"
    }
  }
}
Terraform for_each module example 2 to launch multiple ec2 instance
Terraform for_each module example 2 to launch multiple ec2 instances

Example-3 Terraform for_each module

  • In the below example, similarly you will notice instance_type is using toset which contains two values(t2.micro and t2.medium). When the code is executed then instance type takes each value from the set values inside toset.
locals {
  instance_type = toset([
    "t2.micro",
    "t2.medium",
  ])
}

resource "aws_instance" "server" {
  for_each      = local.instance_type

  ami           = "ami-0a91cd140a1fc148a"
  instance_type = each.key
  
  tags = {
    Name = "Ubuntu-${each.key}"
  }
}
Terraform for_each module example 3 to launch multiple ec2 instances

Terraform provider

Terraform depend on the plugins to connect or interact with cloud providers or API services, and to perform this, you need Terraform provider. There are several terraform providers that are stored in Terraform registry such as terraform provider aws or aws terraform provider or terraform azure.

Terraform configurations must declare which providers they require so that Terraform can install and use them. Some providers require configuration (like endpoint URLs or cloud regions) before using. The provider also uses local utilities like generating random strings or passwords. You can create multiple or single configurations for a single provider. You can have multiple providers in your code.

Providers are stored inside the “Terraform registry,” Some are in-house providers ( companies that create their own providers). Providers are written in Go Language.

Let’s learn how to define a single provider and then define the provider’s configurations inside terraform.

# Defining the Provider requirement 

terraform {
  required_providers {
    aws = {
      source = "hashicorp/aws"
    }
    postgresql = {
      source = "cyrilgdn/postgresql"
    }
  }
  required_version = ">= 0.13"   # New way to define version 
}


# Defining the Provider Configurations and names are Local here i.e aws,postgres,random

provider "aws" {
  assume_role {
  role_arn = var.role_arn
  }
  region = var.region
}

provider "random" {}

provider "postgresql" {
  host                 = aws_rds_cluster.main.endpoint
  username             = username
  password             = password
}

Defining multiple aws providers terraform

In the previous section, you learned how to use aws provider terraform to connect to AWS resources, which is great, but with that, you can only in one particular aws region. However, consider using multiple aws providers’ Terraform configurations if you need to work with multiple regions.

  • To create multiple configurations for a given provider, you should include multiple provider blocks with the same provider name but to use the additional non-default configuration, use the alias meta-argument as shown below.
  • In the below code, there is one aws terraform provider named aws that works with the us-east-1 region by default and If you need to work with another region, consider declaring same provider again but with different region and alias argument.
  • For creating a resource in us-west-1 region declare provider.<alias-name> in the resource block as shown below.
# Defining Default provider block with region us-east-1

provider "aws" {      
  region = us-east-1
}

# Name of the provider is same that is aws with region us-west-1 thats why used ALIAS

provider "aws" {    
  alias = "west"
  region = us-west-1
}

# No need to define default Provider here if using Default Provider 

resource "aws_instance" "resource-us-east-1" {}  

# Define Alias Provider here to use west region  

resource "aws_instance" "resource-us-west-1" {    
  provider = aws.west
}

Quick note on Terraform version : In Terraform v0.12 there was no way to give a source but in the case of Terraform v 0.13 onwards you have an option to add a source address.

# This is how you define provider in Terraform v0.13 and onwards
terraform {          
  required_providers {
    aws = {
      source = "hasicorp/aws"
      version = "~>1.0"
}}}

# This is how you define provider in Terraform v 0.12
terraform {               
  required_providers {
    aws = "~/>1.0"
}}

Join 64 other subscribers

Conclusion

In this Ultimate Guide, you learned what is terraform, terraform provider, and understood how to declare terraform provider aws and further used to interact with cloud services.

Now that you have gained a handful of Knowledge on Terraform continue with the PART-2 guide and become the pro of Terraform.

Learn Terraform: The Ultimate terraform tutorial [PART-2]

How to Install Terraform on Linux and Windows

Are you overwhelmed with the number of cloud services and resources you have to manage? Do you wonder what tool can help with these chores? Wonder no more and dive right in! This tutorial will teach how to install Terraform!

Terraform is the most popular automation tool to build, change and manage your cloud infrastructure effectively and quickly. So let’s get started!

Click here and Continue reading

How to Launch AWS Elasticsearch using Terraform (Terraform aws elasticsearch)

Machine-generated data is growing exponentially, and getting insights is important for your business so that you can search unstructured or semi-structured data on your site. You need a search analytic solution with speed, scalability, flexibility, and real-time search, and this is possible with Latest Amazon OpenSearch Service ( successor to Amazon Elasticsearch Service.

In this tutorial, you will learn about Amazon OpenSearch Service, Amazon Elasticsearch, and how to create an Amazon Elasticsearch domain using Terraform.

Let’s get started.

Join 64 other subscribers

Table of Content

  1. What Is Amazon Elasticsearch Service?
  2. Features of Amazon Elasticsearch Service
  3. What is Amazon OpenSearch Service?
  4. Prerequisites
  5. Terraform files and Terraform directory structure
  6. Building Terraform Configuration for AWS Elasticsearch
  7. Verify AWS Elasticsearch in Amazon Account
  8. Conclusion

What Is Amazon Elasticsearch Service?

Amazon Elasticsearch Service is a distributed search and analytics engine mainly used for log analytics, full-text search, business analytics, and operational intelligence. It performs real-time application monitoring and log analytics.

In the Amazon Elasticsearch service, you need to send the data in JSON format using the API or Logstash. Then Elasticsearch automatically stores the data and adds a searchable reference to the document in clusters index, and you can search using Elasticsearch API.

AWS Elastic search Working

Amazon Elasticsearch service creates the AWS Elasticsearch clusters and nodes. If the nodes fail in the cluster, then the failed Elasticsearch nodes are automatically replaced.

Features of Amazon Elasticsearch Service

  • Amazon Elasticsearch service can scale up to 3 PB of attached storage and works with various instance types.
  • Amazon Elasticsearch easily integrates with other services such as IAM for security such as Amazon VPC , AWS S3 for loading data , AWS Cloud Watch for monitoring and AWS SNS for alerts notifications.

What is Amazon OpenSearch Service?

Amazon OpenSearch Service is a managed service that allows you to deploy, operate and scale OpenSearch clusters in Amazon Cloud. While you create the OpenSearch cluster, you can select the search engine of your choice.

Amazon OpenSearch is a fully open-source search and analytics engine for use cases such as log analytics, real-time application monitoring, and clickstream analysis. 

The latest version of OpenSearch is 1.1 and supports all elasticsearch versions, such as 7.10. 7.9 etc.

Prerequisites

Terraform files and Terraform directory structure

Now that you know what is Amazon Elastic search and Amazon OpenSearch service are. Let’s now dive into Terraform files and Terraform directory structure that will help you write the Terraform configuration files later in this tutorial.

Terraform code, that is, Terraform configuration files, are written in a tree-like structure to ease the overall understanding of code with .tf format or .tf.json or .tfvars format. These configuration files are placed inside the Terraform modules.

Terraform modules are on the top level in the hierarchy where configuration files reside. Terraform modules can further call another child to terraform modules from local directories or anywhere in disk or Terraform Registry.

Terraform contains mainly five files as main.tf , vars.tf , providers.tf , output.tf and terraform.tfvars.

  1. main.tf – Terraform main.tf file contains the main code where you define which resources you need to build, update or manage.
  2. vars.tf – Terraform vars.tf file contains the input variables which are customizable and defined inside the main.tf configuration file.
  3. output.tf : The Terraform output.tf file is the file where you declare what output paraeters you wish to fetch after Terraform has been executed that is after terraform apply command.
  4. .terraform: This directory contains cached provider , modules plugins and also contains the last known backend configuration. This is managed by terraform and created after you run terraform init command.
  5. terraform.tfvars files contains the values which are required to be passed for variables that are refered in main.tf and actually decalred in vars.tf file.
  6. providers.tf – The povider.tf is the most important file whrere you define your terraform providers such as terraform aws provider, terraform azure provider etc to authenticate with the cloud provider.

Building Terraform Configuration for AWS Elasticsearch

Now that you know what are Terraform configurations files look like and how to declare each of them. In this section, you will learn how to build Terraform configuration files for AWS Elasticsearch before running Terraform commands. Let’s get into it.

  • Log in to the Ubuntu machine using your favorite SSH client.
  • Create a folder in opt directory named terraform-Elasticsearch and switch to that folder.
mkdir /opt/terraform-Elasticsearch
cd /opt/terraform-Elasticsearch
  • Create a file named main.tf inside the /opt/terraform-Elasticsearch directory and copy/paste the below content. The below file creates the below components:
    • Creates domains are clusters with the settings, instance types, instance counts, and storage resources that you specify.
    • Creates the AWS Elasticsearch domain policy.
# Creating the Elasticsearch domain

resource "aws_elasticsearch_domain" "es" {
  domain_name           = var.domain
  elasticsearch_version = "7.10"

  cluster_config {
    instance_type = var.instance_type
  }
  snapshot_options {
    automated_snapshot_start_hour = 23
  }
  vpc_options {
    subnet_ids = ["subnet-0d8c53ffee6d4c59e"]
  }
  ebs_options {
    ebs_enabled = var.ebs_volume_size > 0 ? true : false
    volume_size = var.ebs_volume_size
    volume_type = var.volume_type
  }
  tags = {
    Domain = var.tag_domain
  }
}

# Creating the AWS Elasticsearch domain policy

resource "aws_elasticsearch_domain_policy" "main" {
  domain_name = aws_elasticsearch_domain.es.domain_name
  access_policies = <<POLICIES
{
    "Version": "2012-10-17",
    "Statement": [
        {
            "Action": "es:*",
            "Principal": "*",
            "Effect": "Allow",
            "Resource": "${aws_elasticsearch_domain.es.arn}/*"
        }
    ]
}
POLICIES
}
  • Create one more file named vars.tf inside the /opt/terraform-Elasticsearch directory and copy/paste the below content. This file contains all the variables that are referred in the main.tf configuration file.
variable "domain" {
    type = string
}
variable "instance_type" {
    type = string
}
variable "tag_domain" {
    type = string
}
variable "volume_type" {
    type = string
}
variable "ebs_volume_size" {}

  • Create one more file named outputs.tf inside the /opt/terraform-Elasticsearch directory and copy/paste the below content. This file contains all the outputs variables that will be used to display he output after running the terraform apply command.
output "arn" {
    value = aws_elasticsearch_domain.es.arn
} 
output "domain_id" {
    value = aws_elasticsearch_domain.es.domain_id
} 
output "domain_name" {
    value = aws_elasticsearch_domain.es.domain_name
} 
output "endpoint" {
    value = aws_elasticsearch_domain.es.endpoint
} 
output "kibana_endpoint" {
    value = aws_elasticsearch_domain.es.kibana_endpoint
}

  • Create another file and name it as provider.tf. This file allows Terraform to interact with AWS cloud using AWS API.
provider "aws" {
  region = "us-east-2"
}
  • Create one more file terraform.tfvars inside the same folder and copy/paste the below content. This file contains the values of the variables that you declared in vars.tf file and refered in main.tf file.
domain = "newdomain" 
instance_type = "r4.large.elasticsearch"
tag_domain = "NewDomain"
volume_type = "gp2"
ebs_volume_size = 10
  • Now your folder should have all files as shown below and should look like.
 Terraform-elasticsearch folder
Terraform-elasticsearch folder
  • Now your files and code are ready for execution. Initialize the terraform using the terraform init command.
terraform init
Initializing the terraform using the terraform init command.
  • Terraform initialized successfully , now its time to run the plan command which provides you the details of the deployment. Run terraform plan command to confirm if correct resources is going to provisioned or deleted.
terraform plan
Running the terraform plan command
The output of the terraform plan command
  • After verification, now its time to actually deploy the code using terraform apply command.
terraform apply
Running the terraform apply command

Verify AWS Elasticsearch in Amazon Account

Terraform commands terraform init→ terraform plan→ terraform apply all executed successfully. But it is important to manually verify the AWS Elasticsearch domain on the AWS Management console.

  • Open your favorite web browser and navigate to the AWS Management Console and log in.
  • While in the Console, click on the search bar at the top, search for ‘Elasticsearch’, and click on the Elasticsearch menu item.
 Search for ‘Elasticsearch’ in AWS console
Search for ‘Elasticsearch’ in AWS console
  • Now you will see that the newdomain that you specified in Terraform configuration file is created succesfully.
AWS Elasticsearch domain created successfully
  • Next, click on newdomain to check the details of the newly created domain.
Check the details of the newly created domain.

In the new Amazon OpenSearch service, you should see something like below.

Amazon Open search domain

Join 64 other subscribers

Conclusion

In this tutorial, you learned Amazon Elasticsearch and how to create an Amazon Elasticsearch domain using Terraform.

Now that you have a strong basic understanding of AWS Elasticsearch, which documents will you upload for indexing and searching?

How to Setup AWS WAF and Web ACL using Terraform on Amazon Cloud

Are you protecting your applications or website from web exploits and attacks done by bots? If you want to get rid of attacks and secure your websites, consider using a Web Application Firewall (AWS WAF) to protect your web applications from common web exploits.

AWS WAF allows you to control how traffic reaches your applications by enabling security rules that control bot traffic and block common attack patterns, such as SQL injection or cross-site scripting.

This tutorial teaches AWS WAF and sets up AWS WAF and Web ACL using Terraform on Amazon Cloud.

Join 64 other subscribers

Table of Content

  1. What is AWS WAF ?
  2. Prerequisites
  3. Terraform files and Terraform directory structure
  4. Building Terraform Configuration files to Create AWS WAF and WAF rules using Terraform
  5. Deploying the AWS WAF using Terraform.
  6. Conclusion

What is AWS WAF ?

AWS WAF stands for Amazon Web services Web Application Firewall. With AWS WAF, you monitor all the HTTP or HTTPS requests forwarded to Amazon Cloud Front, Amazon Load balancer, Amazon API Gateway REST API, etc., from users.

AWS WAF protects the web applications from common web exploits. AWS WAF also controls who can access the required content or data based on specific conditions such as source IP address etc.

For AWS WAF to work, you will need the below components:

  • Web ACLs ➜ Web access control list (ACL) protect the set of AWS resources by adding rules. You can set a default action for the web ACL to block or allow through those requests that pass the rules inspections.
  • Rules ➜ Each rule contains a statement that defines which requests will be blocked or will pass after meeting the the criteria or how handle requests that match the criteria .
  • Rules groups ➜ Instead of using the rules individually, you can add rules in the group so that it can be reused.

AWS WAF architecture

Prerequisites

  • Ubuntu machine to run terraform command, if you don’t have Ubuntu machine you can create an AWS EC2 instance on AWS account with 4GB RAM and at least 5GB of drive space.
  • Terraform Installed on Ubuntu Machine. If you don’t have Terraform installed refer Terraform on Windows Machine / Terraform on Ubuntu Machine
  • Ubuntu machine should have IAM role attached with full access to create AWS WAF/ AWS WAF rules or administrator permissions.

You may incur a small charge for creating an EC2 instance on Amazon Managed Web Service.

Terraform files and Terraform directory structure

Now that you know what is Amazon Elastic search and Amazon OpenSearch service are. Let’s now dive into Terraform files and Terraform directory structure that will help you write the Terraform configuration files later in this tutorial.

Terraform code, that is, Terraform configuration files, are written in a tree-like structure to ease the overall understanding of code with .tf format or .tf.json or .tfvars format. These configuration files are placed inside the Terraform modules.

Terraform modules are on the top level in the hierarchy where configuration files reside. Terraform modules can further call another child to terraform modules from local directories or anywhere in disk or Terraform Registry.

Terraform contains mainly five files as main.tf , vars.tf , providers.tf , output.tf and terraform.tfvars.

  1. main.tf – Terraform main.tf file contains the main code where you define which resources you need to build, update or manage.
  2. vars.tf – Terraform vars.tf file contains the input variables which are customizable and defined inside the main.tf configuration file.
  3. output.tf : The Terraform output.tf file is the file where you declare what output paraeters you wish to fetch after Terraform has been executed that is after terraform apply command.
  4. .terraform: This directory contains cached provider , modules plugins and also contains the last known backend configuration. This is managed by terraform and created after you run terraform init command.
  5. terraform.tfvars files contains the values which are required to be passed for variables that are refered in main.tf and actually decalred in vars.tf file.
  6. providers.tf – The povider.tf is the most important file whrere you define your terraform providers such as terraform aws provider, terraform azure provider etc to authenticate with the cloud provider.

Building Terraform Configuration files to Create AWS WAF and WAF rules using Terraform

Now that you know what are Terraform configurations files look like and how to declare each of them. In this section, you will learn how to build Terraform configuration files to create AWS WAF on the AWS account before running Terraform commands. Let’s get into it.

  • Log in to the Ubuntu machine using your favorite SSH client.
  • Create a folder in opt directory named terraform-WAF-demo and switch to that folder.
mkdir /opt/Terraform-WAF-demo
cd /opt/Terraform-WAF-demo
  • Create a file named main.tf inside the /opt/Terraform-WAF-demo directory and copy/paste the below content. The below file creates the below components:
# Creating the IP Set tp be defined in AWS WAF 

resource "aws_waf_ipset" "ipset" {
   name = "MyFirstipset"
   ip_set_descriptors {
     type = "IPV4"
     value = "10.111.0.0/20"
   }
}

# Creating the AWS WAF rule that will be applied on AWS Web ACL

resource "aws_waf_rule" "waf_rule" { 
  depends_on = [aws_waf_ipset.ipset]
  name        = var.waf_rule_name
  metric_name = var.waf_rule_metrics
  predicates {
    data_id = aws_waf_ipset.ipset.id
    negated = false
    type    = "IPMatch"
  }
}

# Creating the Rule Group which will be applied on  AWS Web ACL

resource "aws_waf_rule_group" "rule_group" {  
  name        = var.waf_rule_group_name
  metric_name = var.waf_rule_metrics

  activated_rule {
    action {
      type = "COUNT"
    }
    priority = 50
    rule_id  = aws_waf_rule.waf_rule.id
  }
}

# Creating the Web ACL component in AWS WAF

resource "aws_waf_web_acl" "waf_acl" {
  depends_on = [ 
     aws_waf_rule.waf_rule,
     aws_waf_ipset.ipset,
      ]
  name        = var.web_acl_name
  metric_name = var.web_acl_metics

  default_action {
    type = "ALLOW"
  }
  rules {
    action {
      type = "BLOCK"
    }
    priority = 1
    rule_id  = aws_waf_rule.waf_rule.id
    type     = "REGULAR"
 }
}
  • Create one more file named vars.tf inside the /opt/Terraform-WAF-demo directory and copy/paste below content. This file contains all the variables that are referred in the main.tf configuration file.
variable "web_acl_name" {
  type = string
}
variable "web_acl_metics" {
  type = string
}
variable "waf_rule_name" {
  type = string
}
variable "waf_rule_metrics" {
  type = string
}
variable "waf_rule_group_name" {
  type = string
}
variable "waf_rule_group_metrics" {
  type = string
}
  • Create one more file provider.tf file inside the /opt//Terraform-WAF-demo directory and copy/paste below content. The provider.tf file will allows Terraform to connect to the AWS cloud.
provider "aws" {
  region = "us-east-2"
}

  • Create one more file output.tf inside the /opt//Terraform-WAF-demo directory and copy/paste below content. the output fill will extract the output fro the state file and display on the console after running terraform apply command.
output "aws_waf_rule_arn" {
   value = aws_waf_rule.waf_rule.arn
}

output "aws_waf_rule_id" {
   value = aws_waf_rule.waf_rule.id
}

output "aws_waf_web_acl_arn" {
   value = aws_waf_web_acl.waf_acl.arn
}

output "aws_waf_web_acl_id" {
   value = aws_waf_web_acl.waf_acl.id
}

output "aws_waf_rule_group_arn" {
   value = aws_waf_rule_group.rule_group.arn
}

output "aws_waf_rule_group_id" {
   value = aws_waf_rule_group.rule_group.id
}
  • Create one more file terraform.tfvars inside the same folder and copy/paste the below content. This file contains the values of the variables that you declared in vars.tf file and refered in main.tf file.
web_acl_name = "myFirstwebacl"
web_acl_metics = "myFirstwebaclmetics"
waf_rule_name = "myFirstwafrulename"
waf_rule_metrics = "myFirstwafrulemetrics"
waf_rule_group_name = "myFirstwaf_rule_group_name"
waf_rule_group_metrics = "myFirstwafrulgroupmetrics"

  • Now your files and code are all set and your directory should look something like below.
AWS WAF folder and file structure

Deploying the AWS WAF using Terraform.

Earlier in the previous section, you learned how to configure Terraform configuration files needed to create the AWS WAF in the AWS account. Now, let’s use terraform init ➝ terraform plan ➝ terraform apply commands to deploy the configuration files you build. Let’s execute!

  • Now your files and code are ready for execution. Initialize the terraform using the terraform init command.
terraform init
Initializing the terraform using the terraform init command.
  • Terraform initialized successfully , now its time to run the plan command which provides you the details of the deployment. Run terraform plan command to confirm if correct resources is going to provisioned or deleted.
terraform plan
Running the terraform plan command
  • After verification, now its time to actually deploy the code using terraform apply command.
terraform apply
Running the terraform apply command

Terraform commands terraform init→ terraform plan→ terraform apply all executed successfully. Now, you should have AWS Web ACL and other components of AWS WAF created. Let’s verify each of them manually in the AWS Management Console.

  • Open your favorite web browser and navigate to the AWS Management Console and log in.
  • While in the Console, click on the search bar at the top, search for ‘WAF’, and click on the WAF menu item.
Searching for AWS WAF in the AWS console.
  • Now you should be on AWS WAF Page, Lets verify each component starting from Web ACL .
Verifying the newly created AWS Web ACL.
  • Now verify the IP Set
Verifying the newly created IP set
  • Now, Verify the Rules which in the Web ACL.
Verifying the newly created AWS WAF rules
  • Finally verify the Web ACL Rule Groups.
Verifying the Web ACL Rule Groups

Join 64 other subscribers

Conclusion

In this tutorial, you learned about Web Application Firewall (AWS WAF), and how to set up AWS WAF using Terraform.

It is essential to protect your website from attacks and AWS WAF is your new go friend for the same. Now you have newly created AWS WAF in AWS cloud which website do you plan to protect?

How to Install and Setup Terraform on Windows Machine step by step

Are you new to Cloud, if yes then consider learning the most widely used open-source tool to automate your infrastructure using Terraform the Infrastructure as a code tool?

In this tutorial, you’ll learn how to Install and set up Terraform on Windows Machine step by step.

Let’s dive into it

Join 64 other subscribers

Table of Content

  1. What is Terraform ?
  2. Prerequisites
  3. How to Install Terraform on a Windows machine
  4. Creating an IAM user in AWS account with programmatic access
  5. Configure AWS credentials using aws configure
  6. Verify aws configure from AWS CLI by running a simple commands
  7. Creating AWS EC2 Instance Using Terraform
  8. Conclusion

What is Terraform?

Terraform is a tool for building, versioning, and changing the infrastructure. Terraform is Written in GO Language, and the syntax language of configuration files is HashiCorp configuration language(HCL) which is much easier than yaml or json.

Terraform is used with various cloud providers such as Amazon AWS, Oracle, Microsoft Azure, Google Cloud, etc.

Prerequisites

  • Any Windows Machine should work but this tutorial will use Windows 10 Machine.
  • Notepad or Notepad ++ or Visual Studio code editor on your windows Machine to create terraform configuration files. To install visual code studio click here.

Related: How to Install Terraform on an Ubuntu machine

How to Install Terraform on a Windows machine

Now that you have a basic idea about terraform let’s kick off this tutorial by first installing terraform on a Windows machine.

  • First open your favorite browser and download the appropriate version of Terraform from HashiCorp’s download Page. This tutorial will download terraform 0.13.0 version but you will find latest versions on the Hashicorps download page.
Downloading Terraform from Hashicorp website
  • Make a folder on your C:\ drive where you can put the Terraform executable something Like  C:\tools where you can put binaries.
Downloading Terraform binary on the local machine
  • Extract the zip file to the folder C:\tools
Extracting the Terraform binary executable
  • Now Open your Start Menu and type in “environment” and the first thing that comes up should be Edit the System Environment Variables option. Click on that and you should see this window.
Editing the System Environment Variables option.
  • Now under System variables look for Path and edit it.
Editing the Path with Terraform binary location
  • Click New and add the folder path where terraform.exe is located to the bottom of the list. By adding the terraform.exe in PATH will allow you to execute terraform command from anywhere in the system.
Updating the Windows Path with Terraform binary location
  • Click OK on each of the menus and further open command prompt or PowerShell to check if terraform is properly added in PATH by running the command terraform from any location.
Terraform command on command Prompt in Windows Machine
Terraform command on PowerShell in Windows Machine
  • Verify the installation was successful by entering terraform --version. If it returns a version, you’re good to go.
Running the terraform --version command
Running the terraform –version command

Creating an IAM user in AWS account with programmatic access

There are two ways to connect to an AWS account, the first is providing a username and password on the AWS login page and another is configuring the Access key ID and secret keys of IAM users in AWS CLI to connect programmatically.

Earlier, you installed AWS CLI successfully on a Windows machine, but you will need an IAM user with programmatic access to run commands from it.

Let’s learn how to create an IAM user in an AWS account with programmatic access, Access key ID, and secret keys.

  1. Open your favorite web browser and navigate to the AWS Management Console and log in.
  2. While in the Console, click on the search bar at the top, search for ‘IAM’, and click on the IAM menu item.
Checking the IAM AWS service
  1. To Create a user click on Users→ Add user and provide the name of the user myuser and make sure to tick the Programmatic access checkbox in Access type which enables an access key ID and secret access key and then hit the Permissions button.
Adding the IAM user in AWS CLoud
  1. Now select the “Attach existing policies directly” option in the set permissions and look for the “Administrator” policy using filter policies in the search box. This policy will allow myuser to have full access to AWS services.
Attaching the admin rights to IAM user in AWS CLoud
Attaching the admin rights to IAM users in AWS CLoud
  1. Finally click on Create user.
  2. Now, the user is created successfully and you will see an option to download a .csv file. Download this file which contains IAM users i.e. myuser Access key ID and Secret access key which you will use later in the tutorial to connect to AWS service from your local machine.
Downloading the AWS credentials of IAM user

Configure AWS credentials using aws configure in AWS CLI

You are an IAM user with Access key ID and secret keys, but AWS CLI cannot perform anything unless you configure AWS credentials. Once you configure the credentials, AWS CLI allows you to connect to the AWS account and execute commands.

  • Configure AWS Credentials by running the aws configure command on command prompt.
aws configure
  • Enter the details such as AWS Access key ID, Secret Access Key, region. You can skip the output format as default or text or json .
Configure AWS CLI using aws configure command
  • Once AWS is configured successfully , verify by navigating to C:\Users\YOUR_USER\.aws  and see if two file credentials and config are present.
Checking the credentials file and config on your machine
  • Now open both the files and verify and you can see below you’re AWS credentials are configured successfully using aws configure.
Checking the config file on your machine

Verify aws configure from AWS CLI by running a simple commands

Now, you can test if AWS Access key ID, Secret Access Key, region you configured in AWS CLI is working fine by going to command prompt and running the following commands.

aws ec2 describe-instances
Describing the AWS EC2 instances using AWS CLI
  • You can also verify the AWS CLI by listing the buckets in your acount by running the below command.
aws cli s3

Creating AWS EC2 Instance Using Terraform

In this demonstration, you will learn how to create Amazon Web Service (AWS) EC2 instance using Terraform commands on a Windows machine. Lets dive in.

  • First, create a folder Terraform-EC2-simple-demo on your desktop or any location on Windows Machine.
  • Now create a file main.tf inside the folder you’re in and copy/paste the below content.
resource "aws_instance" "my-machine" {          # This is Resource block where we define what we need to create

  ami = var.ami                                 # ami is required as we need ami in order to create an instance
  instance_type = var.instance_type             # Similarly we need instance_type
}
  • Create one more file named vars.tf file under Terraform-EC2-simple-demo folder and copy/paste the content below. The vars.tf file contains the variables that you referred in main.tf file.
variable "ami" {                       # We are declaring the variable ami here which we used in main.tf
  type = string      
}

variable "instance_type" {             # We are declaring the variable instance_type here which we used in main.tf
  type = string 
}

To select the the image ID ( ami ), navigate to the LaunchInstanceWizard and search for ubuntu in the search box to get all the ubuntu image IDs. This tutorial will use Ubuntu Server 18.04.LTS image.

Choosing the Amazon Machine Image
  • Create one more file output.tf file under Terraform-EC2-simple-demomo folder and paste the content below. This file will allow Terraform to display he output after running terraform apply command.
output "ec2_arn" {
  value = aws_instance.my-machine.arn    
}  
  • Create provider.tf file under Terraform-EC2-simple-demo folder and paste the content below.
provider "aws" {     # Defining the Provider Amazon  as we need to run this on AWS  
  region = "us-east-2"
}
  • Create terraform.tfvars file under Terraform-EC2-simple-demo folder and paste the content below. This file contains the value of Terraform vaiables declared in vars.tf file.
ami = "ami-013f17f36f8b1fefb" 
instance_type = "t2.micro"
  • Now your files and code are ready for execution and the folder structure should look something like below.
 folder structure of terraform configuration files
folder structure of terraform configuration files
  • Now your files and code are ready for execution. Initialize the terraform using the terraform init command.
terraform init
Initializing the terraform using the terraform init command.
  • Terraform initialized successfully , now its time to run the plan command which provides you the details of the deployment. Run terraform plan command to confirm if correct resources is going to provisioned or deleted.
terraform plan
Running the terraform plan command
  • After verification, now its time to actually deploy the code using terraform apply command.
terraform apply
Running the terraform apply command

Great Job; terraform commands were executed successfully. Now you should have the AWS EC2 instance launched in AWS Cloud.

Verifying the AWS instance

Generally takes a minute or so to launch an instance, and yes, you can see that the instance is successfully launched now in the us-east-2 region as expected.

Conclusion

In this tutorial, you learned What is terraform, how to Install Terraform on the Windows machine and launch an ec2 instance on an AWS account using terraform.

Now that you have the AWS EC2 instance launched, what are you planning to deploy next using Terraform?

How to Create and Invoke AWS Lambda function using Terraform step by step

Managing your applications on servers and Hardware has always remained a challenge for developers and system administrators, such as memory leakage, storage issues, the system stopped responding, corrupt files by human error, and many more. To avoid the above issue, consider using the most widely and cost-effective AWS serverless compute service, AWS Lambda, that lets you run code without provisioning or managing servers.

In this tutorial, you will learn how to create an AWS Lambda function and invoke it using the AWS Management console and Terraform. Now let’s dive in.

Join 64 other subscribers

Table of Content

  1. What is AWS Lambda ?
  2. Prerequisites
  3. How to create a basic AWS Lambda function using AWS Management console
  4. Terraform files and Terraform directory structure
  5. Building Terraform Configuration files to create AWS Lambda function
  6. Conclusion

What is AWS Lambda ?

AWS Lambda is a serverless compute services that don’t require any infrastructure to run, such as without needing any server to manage, which further saves you from leakage of memory, CPU, network, and other resources. AWS Lambda service can even scale up to tons of requests per second, and you only need to pay for the time you use it as it has a high-availability compute infrastructure.

AWS Lambda runs code that supports various languages such as Node.js, Python, Ruby, Java, Go and dot (net). AWS Lambda is generally invoked with certain events in the AWS cloud, such as:

  • Change in AWS Simple Storage service (AWS S3) such as upload, delete or update of the data.
  • Update of tables in AWS DynamoDB.
  • API Gateway requests.
  • Data process in Amazon kinesis.

Prerequisites

  • You must have AWS account in order to setup Lambda function with full access Lambda access. If you don’t have AWS account, please create a account from here AWS account.
  • Ubuntu machine to run terraform command, if you don’t have Ubuntu machine you can create an AWS EC2 instance on AWS account with 4GB RAM and at least 5GB of drive space.
  • Terraform Installed on Ubuntu Machine. If you don’t have Terraform installed refer Terraform on Windows Machine / Terraform on Ubuntu Machine
  • Ubuntu machine should have IAM role attached with Lambda function creation permissions or administrator permissions.

You may incur a small charge for creating an EC2 instance on Amazon Managed Web Service.

How to create a basic AWS Lambda function using AWS Management console

First, let’s kick off this tutorial by creating an AWS Lambda function using the AWS Management console. Later in this tutorial, you will create it using the most widely used automation tool Terraform. Let’s start.

  • Open AWS management console and on the top search for Lambda.
Searching for AWS Lambda in the AWS management console
  • Once Lambda page opens click on the create function button on the right side of the page.
Creating the AWS Lambda function in the AWS management console
  • Next, choose Author from scratch as a function type & provide the following details and click on Create function button.
    • Name of function as AWSLambdafunctiondemo
    • Choose Runtime as Python 3.9 or later.
Creating the AWS Lambda function in the AWS management console
  • Once the AWS Lambda function is created successfully created, click on TEST button as shown below. Test button test the default hello-world code that already exists in the function.
Verifying the AWS Lambda function in the AWS management console

Terraform files and Terraform directory structure

Now that you know what is Amazon Elastic search and Amazon OpenSearch service are. Let’s now dive into Terraform files and Terraform directory structure that will help you write the Terraform configuration files later in this tutorial.

Terraform code, that is, Terraform configuration files, are written in a tree-like structure to ease the overall understanding of code with .tf format or .tf.json or .tfvars format. These configuration files are placed inside the Terraform modules.

Terraform modules are on the top level in the hierarchy where configuration files reside. Terraform modules can further call another child to terraform modules from local directories or anywhere in disk or Terraform Registry.

Terraform contains mainly five files as main.tf , vars.tf , providers.tf , output.tf and terraform.tfvars.

  1. main.tf – Terraform main.tf file contains the main code where you define which resources you need to build, update or manage.
  2. vars.tf – Terraform vars.tf file contains the input variables which are customizable and defined inside the main.tf configuration file.
  3. output.tf : The Terraform output.tf file is the file where you declare what output paraeters you wish to fetch after Terraform has been executed that is after terraform apply command.
  4. .terraform: This directory contains cached provider , modules plugins and also contains the last known backend configuration. This is managed by terraform and created after you run terraform init command.
  5. terraform.tfvars files contains the values which are required to be passed for variables that are refered in main.tf and actually decalred in vars.tf file.
  6. providers.tf – The povider.tf is the most important file whrere you define your terraform providers such as terraform aws provider, terraform azure provider etc to authenticate with the cloud provider.

Building Terraform Configuration files to create AWS Lambda function

Now that you know what are Terraform configurations files look like and how to declare each of them. In this section, you will learn how to build Terraform configuration files to create AWS Lambda function before running Terraform commands. Let’s get into it.

  • Log in to the Ubuntu machine using your favorite SSH client.
  • Create a folder in home directory named terraform-lambda-demo and switch to that folder.
mkdir ~/terraform-lambda-demo
cd ~/terraform-lambda-demo
  • Create a file named main.tf inside the ~/terraform-lambda-demo directory and copy/paste the below content. The below file creates the below components:
    • Creates IAM role and IAM policy that will be assumed by AWS Lambda to invoke a function.
    • Creates the AWS Lambda function.
    • Creates the AWS Lambda version layer. AWS Layer is a .zip file archive that contains libraries, a custom runtime, or other dependencies that keeps your deployment package small and easily deploys. AWS Lambda Layers allow you to reuse code across multiple lambda functions.
    • Creates the permissions of AWS Lambda function.
# Creating the IAM role and attach a policy so that Lambda can assume the role

resource "aws_iam_role" "lambda_role" {
 count  = var.create_function ? 1 : 0
 name   = var.iam_role_lambda
 assume_role_policy = <<EOF
{
  "Version": "2012-10-17",
  "Statement": [
    {
      "Action": "sts:AssumeRole",
      "Principal": {
        "Service": "lambda.amazonaws.com"
      },
      "Effect": "Allow",
      "Sid": ""
    }
  ]
}
EOF
}

# Generating the IAM Policy document in JSON format.

data "aws_iam_policy_document" "doc" {
  statement {
  actions    = var.actions
  effect     = "Allow"
  resources  = ["*"]
    }
}

# Creating IAM policy for AWS lambda function using previously generated JSON

resource "aws_iam_policy" "iam-policy" {
 count        = var.create_function ? 1 : 0
  name         = var.iam_policy_name
  path         = "/"
  description  = "IAM policy for logging from a lambda"
  policy       = data.aws_iam_policy_document.doc.json
}

# Attaching IAM policy on the newly created on IAM role.

resource "aws_iam_role_policy_attachment" "policy_attach" {
  count       = var.create_function ? 1 : 0
  role        = join("", aws_iam_role.lambda_role.*.name)
  policy_arn  = join("", aws_iam_policy.iam-policy.*.arn)
}

resource "aws_lambda_layer_version" "layer_version" {
  count                  = length(var.names) > 0 && var.create_function ? length(var.names) : 0
  filename              = length(var.file_name) > 0 ?  element(var.file_name,count.index) : null
  layer_name          = element(var.names, count.index)
  compatible_runtimes = element(var.compatible_runtimes, count.index)
}

# Generates an archive from content, a file, or directory of files.

data "archive_file" "default" {
  count            = var.create_function && var.filename != null ? 1 : 0
  type              = "zip"
  source_dir     = "${path.module}/files/"
  output_path  = "${path.module}/myzip/python.zip"
}

# Create a lambda function

resource "aws_lambda_function" "lambda-func" {
  count                           = var.create_function ? 1 :0
  filename                       = var.filename != null ? "${path.module}/myzip/python.zip"  : null
  function_name             = var.function_name
  role                               = join("",aws_iam_role.lambda_role.*.arn)
  handler                         = var.handler
  layers                            = aws_lambda_layer_version.layer_version.*.arn
  runtime                        = var.runtime
  depends_on                 = [aws_iam_role_policy_attachment.policy_attach]
}

# Giving permssions to cloudwatch event, SNS or S3 to access the Lambda function.

resource "aws_lambda_permission" "default" {
  count   = length(var.lambda_actions) > 0 && var.create_function ? length(var.lambda_actions) : 0
  action        = element(var.lambda_actions,count.index)
  function_name = join("",aws_lambda_function.lambda-func.*.function_name)
  principal     = element(var.principal,count.index)
}
  • Create one more file named vars.tf inside the ~/terraform-lambda-demo directory and copy/paste below content. This file contains all the variables that are referred in the main.tf configuration file.Now create another file vars.tf which should contains all the variables.
variable "create_function" {
  description = "Controls whether Lambda function should be created"
  type = bool
  default = true  
}

variable "iam_role_lambda" {}
variable "runtime" {}
variable "handler" {}
variable "actions" {
  type = list(any)
  default = []
  description = "The actions for Iam Role Policy."
}
 
variable "iam_policy_name" {}
variable "function_name" {}
variable "names" {
  type        = list(any)
  default     = []
  description = "A unique name for your Lambda Layer."
}
 
variable "file_name" {
  type        = list(any)
  default     = []
  description = "A unique file_name for your Lambda Layer."
}

variable "filename" {}
 
variable "create_layer" {
  description = "Controls whether layer should be created"
  type = bool
  default = false  
}
 
variable "lambda_actions" {
  type        = list(any)
  default     = []
  description = "The AWS Lambda action you want to allow in this statement. (e.g. lambda:InvokeFunction)."
}
 
variable "principal" {
  type        = list(any)
  default     = []
  description = "Valid AWS service principal such as events.amazonaws.com ,sns.amazonaws.com or s3.amazonaws.com."
}
 
variable "compatible_runtimes" {
  type        = list(any)
  default     = []
  description = "A list of Runtimes "
}

  • Create one more file terraform.tfvars inside the same folder and copy/paste the below content. This file contains the values of the variables that you declared in vars.tf file and refered in main.tf file.
iam_role_lambda = "iam_role_lambda"
actions = [
    "logs:CreateLogStream",
    "logs:CreateLogGroup",
    "logs:PutLogEvents"
]
lambda_actions = [
     "lambda:InvokeFunction"
  ]
principal= [
      "events.amazonaws.com" , "sns.amazonaws.com"
]
compatible_runtimes = [
     ["python3.8"]
]
runtime  = "python3.8"
iam_policy_name = "iam_policy_name"
 names = [
    "python_layer"
  ]
file_name = ["myzip/python.zip" ]  
filename = "files"   
handler = "index.lambda_handler"
function_name = "terraformfunction"
  • Now create a folder named files in the ~/terraform-lambda-demo directory and index.py inside the folder and copy/paste the below content.
import os
import json

def lambda_handler(event, context):
    json_region = os.environ['AWS_REGION']
    return {
        "statusCode": 200,
        "headers": {
            "Content-Type": "application/json"
        },
        "body": json.dumps({
            "Region ": json_region
        })
    }

  • Now the folder structure of all the files should like as shown below.
Folder structure of all the files in the terraform-lambda-demo
The folder structure of all the files in the terraform-lambda-demo
  • Now your files and code are ready for execution. Initialize the terraform using the terraform init command.
terraform init
Initializing the terraform using the terraform init command.
  • Terraform initialized successfully , now its time to run the plan command which provides you the details of the deployment. Run terraform plan command to confirm if correct resources is going to provisioned or deleted.
terraform plan
Running the terraform plan command
  • After verification, now its time to actually deploy the code using terraform apply command.
terraform apply
Running the terraform apply command

Terraform commands terraform init→ terraform plan→ terraform apply all executed successfully. But it is important to manually verify the AWS Lambda function on the AWS Management console.

  • Open your favorite web browser and navigate to the AWS Management Console and log in.
  • While in the Console, click on the search bar at the top, search for ‘Lambda’, and click on the Functions menu item.
Verifying the AWS Lambda function that Terraform created
  • Invoke the AWS Lambda function and validate as you did previously. After yoy execute you will see proper response from python application.
Verifying the AWS Lambda function response

Join 64 other subscribers

Conclusion

In this tutorial, you learned what AWS Lambda is how to create AWS Lambda using AWS Management console and Terraform.

Lambda is an AWS serverless and cost-effective service widely used everywhere and will help you get started with this in the organization. So what do you plan to deploy on your newly created AWS Lambda function?

How to create AWS EKS cluster using Terraform and connect Kubernetes cluster with ubuntu machine.

If you work with container orchestration tools like Kubernetes and want to shift towards the Cloud infrastructure, consider using AWS EKS to automate containerized applications’ deployment, scaling, and management.

AWS EKS service allows you to run Kubernetes on AWS without needing to install, operate, and maintain your own Kubernetes control plane or nodes and containerized applications

This tutorial will teach you what AWS EKS is and how to create an AWS EKS cluster using Terraform and connect the Kubernetes cluster with the Ubuntu machine.

Join 64 other subscribers

Table of Content

  1. What is Amazon Kubernetes Service (AWS EKS) ?
  2. AWS EKS Working
  3. Prerequisites
  4. Terraform files and Terraform directory structure
  5. Building Terraform Configuration files to Create AWS EKS Cluster
  6. Connecting to AWS EKS cluster or kubernetes cluster
  7. Conclusion

What is Amazon Kubernetes Service (AWS EKS) ?

Amazon Kubernetes Service (AWS EKS) allows you to host Kubernetes without worrying about infrastructure components such as Kubernetes nodes, installation of Kubernetes, etc. Some features of Amazon EKS are:

  • AWS EKS service expands and scales across many availability zones so that there is always a high availability.
  • AWS EKS service automatically scales and fix any impacted or unhealthy node.
  • AWS EKS service is interlinked with various other AWS services such as IAM, VPC , ECR & ELB etc.
  • AWS EKS service is a secure service.

AWS EKS Working

Now that you have a basic understanding of AWS EKS, it is important to know how it works.

  • First step in AWS EKS service is to create AWS EKS cluster using AWS CLI or AWS Management console.
  • While creating the AWS EKS cluster you have two options either choose your own AWS EC2 instances or instances managed by AWS EKS ie. AWS Fargate.
  • Once the AWS EKS cluster is succesfully created, connect to kubernetes cluster with kubectl commands.
  • Finally deploy and run applications on EKS cluster.
AWS EKS Working
AWS EKS Working

Prerequisites

  • Ubuntu machine to run terraform command, if you don’t have Ubuntu machine you can create an AWS EC2 instance on AWS account with 4GB RAM and at least 5GB of drive space.
  • Terraform Installed on Ubuntu Machine. If you don’t have Terraform installed refer Terraform on Windows Machine / Terraform on Ubuntu Machine
  • Ubuntu machine should have IAM role attached with AWS EKS full permissions oadmin rights.

You may incur a small charge for creating an EC2 instance on Amazon Managed Web Service.

Terraform files and Terraform directory structure

Now that you know what is Amazon Elastic search and Amazon OpenSearch service are. Let’s now dive into Terraform files and Terraform directory structure that will help you write the Terraform configuration files later in this tutorial.

Terraform code, that is, Terraform configuration files, are written in a tree-like structure to ease the overall understanding of code with .tf format or .tf.json or .tfvars format. These configuration files are placed inside the Terraform modules.

Terraform modules are on the top level in the hierarchy where configuration files reside. Terraform modules can further call another child to terraform modules from local directories or anywhere in disk or Terraform Registry.

Terraform contains mainly five files as main.tf , vars.tf , providers.tf , output.tf and terraform.tfvars.

  1. main.tf – Terraform main.tf file contains the main code where you define which resources you need to build, update or manage.
  2. vars.tf – Terraform vars.tf file contains the input variables which are customizable and defined inside the main.tf configuration file.
  3. output.tf : The Terraform output.tf file is the file where you declare what output paraeters you wish to fetch after Terraform has been executed that is after terraform apply command.
  4. .terraform: This directory contains cached provider , modules plugins and also contains the last known backend configuration. This is managed by terraform and created after you run terraform init command.
  5. terraform.tfvars files contains the values which are required to be passed for variables that are refered in main.tf and actually decalred in vars.tf file.
  6. providers.tf – The povider.tf is the most important file whrere you define your terraform providers such as terraform aws provider, terraform azure provider etc to authenticate with the cloud provider.

Building Terraform Configuration files to Create AWS EKS Cluster

Now that you know what are Terraform configurations files look like and how to declare each of them. Before running Terraform commands, let’s learn how to build Terraform configuration files to create AWS EKS Cluster on the AWS account. Let’s get into it.

  • Log in to the Ubuntu machine using your favorite SSH client.
  • Create a folder in opt directory named terraform-eks-demo and switch to that folder.
mkdir /opt/terraform-eks-demo
cd /opt/terraform-eks-demo
  • Create a file named main.tf inside the /opt/terraform-eks-demo directory and copy/paste the below content. The below file creates the below components:
    • Creates the IAM role that can be assumed while connecting with Kubernetes cluster.
    • Create security group, nodes for AWS EKS.
    • Creates the AWS EKS cluster and node groups.
# Creating IAM role so that it can be assumed while connecting to the Kubernetes cluster.

resource "aws_iam_role" "iam-role-eks-cluster" {
  name = "terraform-eks-cluster"
  assume_role_policy = <<POLICY
{
 "Version": "2012-10-17",
 "Statement": [
   {
   "Effect": "Allow",
   "Principal": {
    "Service": "eks.amazonaws.com"
   },
   "Action": "sts:AssumeRole"
   }
  ]
 }
POLICY
}

# Attach the AWS EKS service and AWS EKS cluster policies to the role.

resource "aws_iam_role_policy_attachment" "eks-cluster-AmazonEKSClusterPolicy" {
  policy_arn = "arn:aws:iam::aws:policy/AmazonEKSClusterPolicy"
  role       = "${aws_iam_role.iam-role-eks-cluster.name}"
}

resource "aws_iam_role_policy_attachment" "eks-cluster-AmazonEKSServicePolicy" {
  policy_arn = "arn:aws:iam::aws:policy/AmazonEKSServicePolicy"
  role       = "${aws_iam_role.iam-role-eks-cluster.name}"
}

# Create security group for AWS EKS.

resource "aws_security_group" "eks-cluster" {
  name        = "SG-eks-cluster"
# Use your VPC here
  vpc_id      = "vpc-XXXXXXXXXXX"  
 # Outbound Rule
  egress {                
    from_port   = 0
    to_port     = 0
    protocol    = "-1"
    cidr_blocks = ["0.0.0.0/0"]
  }
  # Inbound Rule
  ingress {                
    from_port   = 0
    to_port     = 0
    protocol    = "-1"
    cidr_blocks = ["0.0.0.0/0"]
  }
}

# Creating the AWS EKS cluster

resource "aws_eks_cluster" "eks_cluster" {
  name     = "terraformEKScluster"
  role_arn =  "${aws_iam_role.iam-role-eks-cluster.arn}"
  version  = "1.19"
 # Configure EKS with vpc and network settings 
  vpc_config {            
   security_group_ids = ["${aws_security_group.eks-cluster.id}"]
# Configure subnets below
   subnet_ids         = ["subnet-XXXXX","subnet-XXXXX"] 
    }
  depends_on = [
    "aws_iam_role_policy_attachment.eks-cluster-AmazonEKSClusterPolicy",
    "aws_iam_role_policy_attachment.eks-cluster-AmazonEKSServicePolicy",
   ]
}

# Creating IAM role for AWS EKS nodes with assume policy so that it can assume 

resource "aws_iam_role" "eks_nodes" {
  name = "eks-node-group"
  assume_role_policy = <<POLICY
{
  "Version": "2012-10-17",
  "Statement": [
    {
      "Effect": "Allow",
      "Principal": {
        "Service": "ec2.amazonaws.com"
      },
      "Action": "sts:AssumeRole"
    }
  ]
}
POLICY
}

resource "aws_iam_role_policy_attachment" "AmazonEKSWorkerNodePolicy" {
  policy_arn = "arn:aws:iam::aws:policy/AmazonEKSWorkerNodePolicy"
  role       = aws_iam_role.eks_nodes.name
}

resource "aws_iam_role_policy_attachment" "AmazonEKS_CNI_Policy" {
  policy_arn = "arn:aws:iam::aws:policy/AmazonEKS_CNI_Policy"
  role       = aws_iam_role.eks_nodes.name
}

resource "aws_iam_role_policy_attachment" "AmazonEC2ContainerRegistryReadOnly" {
  policy_arn = "arn:aws:iam::aws:policy/AmazonEC2ContainerRegistryReadOnly"
  role       = aws_iam_role.eks_nodes.name
}

# Create AWS EKS cluster node group

resource "aws_eks_node_group" "node" {
  cluster_name    = aws_eks_cluster.eks_cluster.name
  node_group_name = "node_tuto"
  node_role_arn   = aws_iam_role.eks_nodes.arn
  subnet_ids      = ["subnet-","subnet-"]
  scaling_config {
    desired_size = 1
    max_size     = 1
    min_size     = 1
  }

  depends_on = [
    aws_iam_role_policy_attachment.AmazonEKSWorkerNodePolicy,
    aws_iam_role_policy_attachment.AmazonEKS_CNI_Policy,
    aws_iam_role_policy_attachment.AmazonEC2ContainerRegistryReadOnly,
  ]
}
  • Create one more file provider.tf file inside the /opt/terraform-eks-demo directory and copy/paste below content. The provider.tf file will allows Terraform to connect to the AWS cloud.
provider "aws" {
  region = "us-east-2"
}
  • Now the folder structure of all the files should like below.
The folder structure of all the files in the /opt/terraform-eks-demo
  • Now your files and code are ready for execution. Initialize the terraform using the terraform init command.
terraform init
Initialize the terraform using the terraform init command.
Successful execution of terraform init command.
Successful execution of Terraform init command.
  • Terraform initialized successfully , now its time to run the plan command which provides you the details of the deployment. Run terraform plan command to confirm if correct resources is going to provisioned or deleted.
terraform plan
Running the terraform plan command
Output of the terraform plan command
The output of the terraform plan command
  • After verification, now its time to actually deploy the code using terraform apply command.
terraform apply
Terraform apply command execution

Terraform commands terraform init→ terraform plan→ terraform apply all executed successfully. But it is important to manually verify the AWS EKS cluster launched in the AWS Management console.

  • Open your favorite web browser and navigate to the AWS Management Console and log in.
  • While in the Console, click on the search bar at the top, search for ‘EKS’, and click on the EKS menu item. Generally EKS cluster take few minutes to launch.
IAM Role with proper permissions.

  • Now verify Amazon EKS cluster
Verifying the AWS EKS cluster
  • Finally verify the node group of the cluster.
 verify the node group of the cluster.
verify the node group of the cluster.

Connecting to AWS EKS cluster or kubernetes cluster

Now you have a newly created AWS EKS cluster in AWS EKS service with proper IAM role permissions and configuration, but let’s learn how to connect to AWS EKS cluster from your ubuntu machine.

  • Configure AWS credentials on Ubuntu machine using AWS CLI.

Make sure the AWS credentails should match with the IAM user or IAM role that created the cluster ie. use same IAM role credentials in Ubuntu machine that you used to create Kubernetes cluster.

  • To connect to AWS EKS cluster you will need AWS CLI and kubectl installed on ubuntu machine. If you don’t have Refer here
  • On ubuntu machine configure kubeconfig using the below command to make communication from your local machine to Kubernetes cluster in AWS EKS
aws eks update-kubeconfig --region us-east-2 --name terraformEKScluster
 configure kubeconfig on the ubuntu machine
configure kubeconfig on the ubuntu machine
  • Once the configuration is added, test the communication between local machine and AWS EKS cluster using kubectl get svc command. As you can see below you will get the service details within the cluster confirms the connectivity from Ubuntu machine to Kubernetes cluster.
kubectl get svc
Verify the Kubernetes service to test the connectivity from ubuntu machine to EKS cluster

Join 64 other subscribers

Conclusion

In this tutorial, you learned what is AWS Elastic Kubernetes service is and how to create a Kubernetes cluster using Terraform, followed by connecting the Kubernetes cluster using the kubectl client from the Ubuntu machine.

Now that you have the AWS EKS cluster created, which applications do you plan to deploy on it?

How to Launch AWS Elastic beanstalk using Terraform

If you want to scale instances, align a load balancer in front of them, host a website, and store all data in the database. Nothing could be better than Amazon Elastic beanstalk, which provides a common platform.

With Elastic Beanstalk, you can quickly deploy and manage applications in the AWS Cloud without having to worry about the infrastructure that runs those applications.

In this tutorial, we will learn how to step up Amazon Elastic beanstalk using Terraform on AWS step by step and then upload the code to run one of the simple applications.

Let’s get started.

Join 64 other subscribers

Table of Content

  1. What is AWS Elastic beanstalk?
  2. Prerequisites
  3. Building Terraform configuration files for AWS Elastic beanstalk
  4. Deploying Terraform configuration to Launch AWS Elastic beanstalk
  5. Verifying AWS Elastic beanstalk in AWS Cloud.
  6. Conclusion

What is AWS Elastic beanstalk?

AWS Elastic Beanstalk is one of the most widely used Amazon web service tool services. It is a service that provides a platform for various languages such as python, go ruby, java, .net, PHP for hosting the application.

The only thing you need to do in elastic beanstalk is upload code, and the rest of the things such as scaling, load balancing, monitoring will be taken care of by elastic beanstalk itself.

Elastic beanstalk makes the life of developer and cloud admins or sysadmins so easy compared to setting each service individually and interlinking each other. Some of the key benefits of AWS Elastic beanstalk are:

  • It scales the applications up or down as per the required traffic.
  • As infrastructure is managed and taken care of by AWS Elastic beanstalk developers working with admins don’t need to spend much time.
  • It is fast and easy to setup
  • You can interlink with lots of other AWS services of your own choice or you can skip it such as linking of application or classic or network load balancer.

Prerequisites

  • Ubuntu machine to run terraform preferably 18.04 version + , if you don’t have any machine you can create a ec2 instance on AWS account. Recommended to have 4GB RAM and at least 5GB of drive space.
  • Ubuntu machine should have IAM role attached with AWS Elastic beanstalk creation permissions or admin rights or access key and secret key configured in AWS CLI.
  • Terraform installed on the Ubuntu Machine. Refer How to Install Terraform on an Ubuntu machine.

You may incur a small charge for creating an EC2 instance on Amazon Managed Web Service.

Building Terraform configuration files for AWS Elastic beanstalk

Now that you have Terraform installed on your machine, It’s time to build Terraform configuration files for AWS Elastic beanstalk that you will use to launch AWS Elastic beanstalk on the AWS Cloud.

Assuming you are still logged in Ubuntu machine.

  • Create a folder in opt directory and name it as terraform-elasticbeanstalk-demo and switch to this directory.
mkdir /opt/terraform-elasticbeanstalk-demo
cd /opt/terraform-elasticbeanstalk-demo
  • Create a file named main.tf in the /opt/terraform-elasticbeanstalk-demo directory and copy/paste the below content into it. The below Terraform configuration creates the AWS elastic beanstalk application and enviornment that will be required for application to be deployed.
# Create elastic beanstalk application

resource "aws_elastic_beanstalk_application" "elasticapp" {
  name = var.elasticapp
}

# Create elastic beanstalk Environment

resource "aws_elastic_beanstalk_environment" "beanstalkappenv" {
  name                = var.beanstalkappenv
  application         = aws_elastic_beanstalk_application.elasticapp.name
  solution_stack_name = var.solution_stack_name
  tier                = var.tier

  setting {
    namespace = "aws:ec2:vpc"
    name      = "VPCId"
    value     = var.vpc_id
  }
  setting {
    namespace = "aws:autoscaling:launchconfiguration"
    name      = "IamInstanceProfile"
    value     =  "aws-elasticbeanstalk-ec2-role"
  }
  setting {
    namespace = "aws:ec2:vpc"
    name      = "AssociatePublicIpAddress"
    value     =  "True"
  }

  setting {
    namespace = "aws:ec2:vpc"
    name      = "Subnets"
    value     = join(",", var.public_subnets)
  }
  setting {
    namespace = "aws:elasticbeanstalk:environment:process:default"
    name      = "MatcherHTTPCode"
    value     = "200"
  }
  setting {
    namespace = "aws:elasticbeanstalk:environment"
    name      = "LoadBalancerType"
    value     = "application"
  }
  setting {
    namespace = "aws:autoscaling:launchconfiguration"
    name      = "InstanceType"
    value     = "t2.medium"
  }
  setting {
    namespace = "aws:ec2:vpc"
    name      = "ELBScheme"
    value     = "internet facing"
  }
  setting {
    namespace = "aws:autoscaling:asg"
    name      = "MinSize"
    value     = 1
  }
  setting {
    namespace = "aws:autoscaling:asg"
    name      = "MaxSize"
    value     = 2
  }
  setting {
    namespace = "aws:elasticbeanstalk:healthreporting:system"
    name      = "SystemType"
    value     = "enhanced"
  }

}

  • Create another file named vars.tf in the /opt/terraform-elasticbeanstalk-demo directory and copy/paste the below content into it. The variable file contains all the variables that you have referred in main.tf file.
variable "elasticapp" {
  default = "myapp"
}
variable "beanstalkappenv" {
  default = "myenv"
}
variable "solution_stack_name" {
  type = string
}
variable "tier" {
  type = string
}

variable "vpc_id" {}
variable "public_subnets" {}
variable "elb_public_subnets" {}

  • Create another file named provider.tf in the /opt/terraform-elasticbeanstalk-demo directory and copy/paste the below content into it. The provider.tf file will authenticate and allows Terraform to connect to AWS cloud.
provider "aws" {
  region = "us-east-2"
}
  • Finally create one more file named terraform.tfvars in the /opt/terraform-elasticbeanstalk-demo directory and copy/paste the below content into it.
vpc_id              = "vpc-XXXXXXXXX"
Instance_type       = "t2.medium"
minsize             = 1
maxsize             = 2
public_subnets     = ["subnet-XXXXXXXXXX", "subnet-XXXXXXXXX"] # Service Subnet
elb_public_subnets = ["subnet-XXXXXXXXXX", "subnet-XXXXXXXXX"] # ELB Subnet
tier = "WebServer"
solution_stack_name= "64bit Amazon Linux 2 v3.2.0 running Python 3.8"

  • Now use tree command on your ubuntu machine and your folder structure should look something like below.
 tree command on your ubuntu machine and your folder structure
tree command on your ubuntu machine and your folder structure

Deploying Terraform configuration to Launch AWS Elastic beanstalk

Now that all Terraform configuration files are set up, these are not doing much unless you use Terraform commands and deploy them.

  • To deploy the AWS Elastic beanstalk first thing you need to do is Initialize the terraform by running terraform init command.
terraform init

As you see below, Terraform was initialized successfully; now, it’s time to run terraform plan.

 Terraform was initialized successfully
Terraform was initialized successfully
  • Next run the terraform plan command. Teraform plan command provides the information regarding what all resources will be provisioned or deleted by Terraform.
terraform plan
Running Terraform plan command
  • Finally run terraform apply command that actually deploy the code and provision the AWS Elastic terraform.
terraform apply

Verifying AWS Elastic beanstalk in AWS Cloud.

Great Job; terraform commands were executed successfully. Now it’s time to validate the AWS Elastic beanstalk launched in AWS Cloud.

  • Navigate to the AWS cloud and then futher in AWS Elasticbeanstalk service. After you reach elastic beanstalk screen you will see the enviornment and applciation name that you specified in terraform.tfvar file.
AWS Elasticbeanstalk service page
  • Next in AWS Elastic beanstalk service page click on the application URL and you will see something like below.
AWS Elasticbeanstalk service link

Join 64 other subscribers

Conclusion

In this tutorial, you learned what AWS Elastic beanstalk is and how to set up Amazon Elastic beanstalk using Terraform on AWS step by step.

Now that you have AWS Elastic beanstalk launched on AWS using Terraform, which applications do you plan to deploy on it next?

How to create Secrets in AWS Secrets Manager using Terraform in Amazon account.

While deploying in the Amazon AWS cloud, are you saving your passwords in the text files, configuration files, or deployment files? That’s very risky and can expose your password to attackers. Still, no worries, you have come to the right place to learn and use AWS secrets in the AWS Secrets Manager, which solves all your security concerns, encrypts all of your stored passwords, and decrypts only while retrieving them.

In this tutorial, you will learn how to create Secrets in AWS Secrets Manager using Terraform in the Amazon account. Let’s get started.

Join 64 other subscribers

Table of Content

  1. What are AWS Secrets and AWS Secrets Manager?
  2. Prerequisites
  3. Terraform files and Terraform directory structure
  4. Building Terraform Configuration to create AWS Secrets and Secrets versions on AWS
  5. Creating Postgres database using Terraform with AWS Secrets in AWS Secret Manager
  6. Conclusion

What are AWS Secrets and AWS Secrets Manager?

There was a time when all the passwords of databases or applications were kept in configuration files. Although they are kept secure simultaneously, they can be compromised if not taken care of. If you are required to update the credentials, it used to take tons of hours to apply those changes to every single file, and if you miss any of the files, it can cause the entire application to get down immediately.

AWS Secrets Manager service manages all the above issues with AWS Secrets Manager by retrieving the AWS secrets or passwords programmatically. Another major benefit of using AWS secrets is that it rotates your credentials at the schedule you define. AWS Secrets Manager keeps the important user information passwords safe and secure.

The application connects with Secret Manager to retrieve secrets and then connects with database
The application connects with Secret Manager to retrieve secrets and then connects with the database.
Admin retrieving the secrets from the AWS Secret Manager and applying in the database

Features of AWS Secrets Manager

Some of the Features of AWS Secrets Manager are:

  • Automate generation of secrets on rotation using lambda.
  • Secrets are encrypted using KMS keys.
  • Replicate Secrets across multiple AWS regions. Secrets Manager keeps read replicas in sync with primary secrets.
  • You can encrypt the secrets using KMS keys or a customer managed keys that you create.

Prerequisites

  • Ubuntu machine 20.04 version would be great , if you don’t have any machine you can create a AWS EC2 instance on AWS account with recommended 4GB RAM and at least 5GB of drive space.
  • Ubuntu machine should have IAM role attached with full access to create AWS secrets in the AWS Secret Manager or administrator permissions.
  • Terraform installed on the Ubuntu Machine. Refer How to Install Terraform on an Ubuntu machine.

You may incur a small charge for creating an EC2 instance on Amazon Managed Web Service.

Terraform files and Terraform directory structure

Now that you have Terraform installed. Let’s now dive into Terraform files and Terraform directory structure that will help you write the Terraform configuration files later in this tutorial.

Terraform code, that is, Terraform configuration files, are written in a tree-like structure to ease the overall understanding of code with .tf format or .tf.json or .tfvars format. These configuration files are placed inside the Terraform modules.

Terraform modules are on the top level in the hierarchy where configuration files reside. Terraform modules can further call another child to terraform modules from local directories or anywhere in disk or Terraform Registry.

Terraform contains mainly five files as main.tf , vars.tf , providers.tf , output.tf and terraform.tfvars.

  1. main.tf – Terraform main.tf file contains the main code where you define which resources you need to build, update or manage.
  2. vars.tf – Terraform vars.tf file contains the input variables which are customizable and defined inside the main.tf configuration file.
  3. output.tf : The Terraform output.tf file is the file where you declare what output paraeters you wish to fetch after Terraform has been executed that is after terraform apply command.
  4. .terraform: This directory contains cached provider , modules plugins and also contains the last known backend configuration. This is managed by terraform and created after you run terraform init command.
  5. terraform.tfvars files contains the values which are required to be passed for variables that are refered in main.tf and actually decalred in vars.tf file.
  6. providers.tf – The povider.tf is the most important file whrere you define your terraform providers such as terraform aws provider, terraform azure provider etc to authenticate with the cloud provider.

Building Terraform Configuration to create AWS Secrets and Secrets versions on AWS

Now that you have sound knowledge of what Terraform configuration files look like and the purpose of each of the Terraform configuration files. So, let’s create Terraform configuration files required to create AWS secrets.

  • Log in to the Ubuntu machine using your favorite SSH client.
  • Create a folder in opt directory named terraform-demo-secrets and switch to that folder.
mkdir /opt/terraform-demo-secrets
cd /opt/terraform-demo-secrets
  • Create a file and name it as main.tf in the /opt/terraform-demo-secrets and copy/paste the below content. The below file creates the below components:
    • Creates random password for user adminaccount in AWS secret(Masteraccoundb)
    • Creates a secret named Masteraccoundb
    • Creates a secret version that will contain AWS secret(Masteraccoundb)
# Firstly create a random generated password to use in secrets.

resource "random_password" "password" {
  length           = 16
  special          = true
  override_special = "_%@"
}

# Creating a AWS secret for database master account (Masteraccoundb)

resource "aws_secretsmanager_secret" "secretmasterDB" {
   name = "Masteraccoundb"
}

# Creating a AWS secret versions for database master account (Masteraccoundb)

resource "aws_secretsmanager_secret_version" "sversion" {
  secret_id = aws_secretsmanager_secret.secretmasterDB.id
  secret_string = <<EOF
   {
    "username": "adminaccount",
    "password": "${random_password.password.result}"
   }
EOF
}

# Importing the AWS secrets created previously using arn.

data "aws_secretsmanager_secret" "secretmasterDB" {
  arn = aws_secretsmanager_secret.secretmasterDB.arn
}

# Importing the AWS secret version created previously using arn.

data "aws_secretsmanager_secret_version" "creds" {
  secret_id = data.aws_secretsmanager_secret.secretmasterDB.arn
}

# After importing the secrets storing into Locals

locals {
  db_creds = jsondecode(data.aws_secretsmanager_secret_version.creds.secret_string)
}
  • Create another file in the /opt/terraform-demo-secrets and name it as provider.tf. This file allows Terraform to interact with AWS cloud using AWS API.
provider "aws" {
  region = "us-east-2"
}
Checking all the files in terraform-demo-secrets folder
Checking all the files in the terraform-demo-secrets folder
  • Now your files and code are ready for execution. Initialize the terraform using the terraform init command in the /opt/terraform-demo-secrets.
terraform init
Initializing the terraform using the terraform init command.
  • Terraform initialized successfully , now its time to run the plan command which provides you the details of the deployment. Run terraform plan command to confirm if correct resources is going to provisioned or deleted.
terraform plan
Running the terraform plan command
Output of the terraform plan command
The output of the terraform plan command
  • After verification, now its time to actually deploy the code using terraform apply command.
terraform apply
Running the terraform apply command
  • Great Job; terraform commands were executed succesfully. Now Open your AWS account and navigate to the AWS Secrets Manager.

As you can see, the AWS secret has been created successfully in the AWS account. Click on the secret (Masteraccoundb) and further click on Retrieve secret value button.

Verifying the AWS secret
  • Click on Retrieve secret value to see the values stored for the AWS Secret.
Retrieve the AWS secret value

As you can see, the secret keys and values are successfully added as you defined in Terraform configuration file.

Verifying the AWS secret values

Creating Postgres database using Terraform with AWS Secrets in AWS Secret Manager

Now the secret keys and values are successfully added as you defined in Terraform configuration file using Terraform. The next step is to use these AWS secrets as credentials for the database master account while creating the database.

  • Open the same Terraform configuration file main.tf agaian and copy/paste the below code at the bottom of th file. As you can see the below file creates the database cluster using the AWS secrets master_username = local.db_creds.username and master_password = local.db_creds.password.
resource "aws_rds_cluster" "main" { 
  cluster_identifier = "democluster"
  database_name = "maindb"
  master_username = local.db_creds.username
  master_password = local.db_creds.password
  port = 5432
  engine = "aurora-postgresql"
  engine_version = "11.6"
  db_subnet_group_name = "dbsubntg"  # Make sure you create this before manually
  storage_encrypted = true 
}


resource "aws_rds_cluster_instance" "main" { 
  count = 2
  identifier = "myinstance-${count.index + 1}"
  cluster_identifier = "${aws_rds_cluster.main.id}"
  instance_class = "db.r4.large"
  engine = "aurora-postgresql"
  engine_version = "11.6"
  db_subnet_group_name = "dbsubntg"
  publicly_accessible = true 
}
  • Again execute the terraform init → terraform plan → terraform apply commands.
terraform apply
terraform apply command created the database successfully using the AWS Secrets
  • Now navigate to the AWS RDS service on Amazon account and check the Postgres cluster that got created recently.
Navigating to the AWS RDS service on Amazon account
  • Finallly click on democluster and you should see the AWS secrets created earlier by Terraform are succesfully applied in the Postgres database in AWS RDS.
AWS secrets created earlier by Terraform are successfully applied in the Postgres database in AWS RDS

Join 64 other subscribers

Conclusion

In this tutorial, you learned what is AWS Secrets and AWS Secrets manager, how to create AWS secrets in the AWS Secrets Manager, and create a Postgres database utilizing AWS secrets as master account credentials.

Now that you have secured your database credentials by storing them in AWS secrets, what do you plan to secure next?

How to work with multiple Terraform Provisioners

Have you ever passed the data or any script on any compute resource while creating? Most of you might have passed the user data or scripts after creating the resource. Consider using Terraform provisioners if you want to pass the data even before the resource is created.

Terraform provisioners allow to pass data in any resource that cannot be passed when creating resources. Multiple terraform provisioners can be specified within a resource block and executed in the order they’re defined in the configuration file.

In this tutorial, you will learn how to work with multiple Terraform Provisioners using Terraform. Let’s get into it.

Join 64 other subscribers

Table of Content

  1. What is Terraform provisioners?
  2. Prerequisites
  3. Terraform files and Terraform directory structure
  4. Building Terraform configuration files to use Terraform provisioners on AWS EC2 instance.
  5. Verifying the Softwares in AWS EC2 instance created using Terraform Provisioner
  6. Conclusion

What is Terraform provisioners?

Do you know what Terraform allows you to perform an action on your local machine or remote machine such as running a command on the local machine, copying files from local to remote machines or vice versa, Passing data into virtual machines, etc. all this can be done by using Terraform provisioner?

Terraform provisioners allow to pass data in any resource that cannot be passed when creating resources. Multiple terraform provisioners can be specified within a resource block and executed in the order they’re defined in the configuration file.

The terraform provisioners interact with remote servers over SSH or WinRM. Most cloud computing platforms provide mechanisms to pass data to instances at the time of their creation such that the data is immediately available on system boot. Still, you can pass the data with Terraform provisioners even after creating the resource.

Terraform provisioners allows you to declare conditions such as when = destroy , on_failure = continue and If you wish to run terraform provisioners that aren’t directly associated with a specific resource, use null_resource.

Prerequisites

  • Ubuntu machine to run terraform command, if you don’t have Ubuntu machine you can create an AWS EC2 instance on AWS account with 4GB RAM and at least 5GB of drive space.
  • Terraform Installed on Ubuntu Machine. If you don’t have Terraform installed refer Terraform on Windows Machine / Terraform on Ubuntu Machine
  • Ubuntu machine should have IAM role attached with complete AWS EC2 permissions or administrator rights.

You may incur a small charge for creating an EC2 instance on Amazon Managed Web Service.

Terraform files and Terraform directory structure

Now that you know what is Amazon Elastic search and Amazon OpenSearch service are. Let’s now dive into Terraform files and Terraform directory structure that will help you write the Terraform configuration files later in this tutorial.

Terraform code, that is, Terraform configuration files, are written in a tree-like structure to ease the overall understanding of code with .tf format or .tf.json or .tfvars format. These configuration files are placed inside the Terraform modules.

Terraform modules are on the top level in the hierarchy where configuration files reside. Terraform modules can further call another child to terraform modules from local directories or anywhere in disk or Terraform Registry.

Terraform contains mainly five files as main.tf , vars.tf , providers.tf , output.tf and terraform.tfvars.

  1. main.tf – Terraform main.tf file contains the main code where you define which resources you need to build, update or manage.
  2. vars.tf – Terraform vars.tf file contains the input variables which are customizable and defined inside the main.tf configuration file.
  3. output.tf : The Terraform output.tf file is the file where you declare what output paraeters you wish to fetch after Terraform has been executed that is after terraform apply command.
  4. .terraform: This directory contains cached provider , modules plugins and also contains the last known backend configuration. This is managed by terraform and created after you run terraform init command.
  5. terraform.tfvars files contains the values which are required to be passed for variables that are refered in main.tf and actually decalred in vars.tf file.
  6. providers.tf – The povider.tf is the most important file whrere you define your terraform providers such as terraform aws provider, terraform azure provider etc to authenticate with the cloud provider.

Building Terraform configuration files to use Terraform provisioners on AWS EC2 instance.

Now that you know what are Terraform configurations files and how to declare each of them. In this section, you will learn how to build Terraform configuration files by using multiple provisioners to work with the AWS EC2 instance. Let’s get into it.

  • Log in to the Ubuntu machine using your favorite SSH client.
  • Create a folder in opt directory named terraform-provisioners-demo and switch to that folder.
mkdir /opt/terraform-provisioners-demo
cd /opt/terraform-provisioners-demo
  • Create a file named main.tf inside the /opt/terraform-provisioners-demo directory and copy/paste the below content. The main.tf file performs the following thing:
  • Creates a secret key pair (public and private keys) so that provisioners use it to connect and login to machine over SSH protocol .
  • Next, using the local exec provisioners Terraform executes command locally on your machine.
  • The remote exec provisioners installs software (Apache) on AWS EC2 instance.
  • Finally, the file Provisioner uploads the file (file.json) in the AWS EC2 instance.
# Creating the Key pair on AWS 
resource "aws_key_pair" "deployer" {     
  key_name   = "deployer-key"
# public_key generates the  private and public key on local machine
  public_key = "${file("~/.ssh/id_rsa.pub")}" 
}

# Creating the instance
 
resource "aws_instance" "my-machine" {       
  ami = "ami-0a91cd140a1fc148a"
  key_name = aws_key_pair.deployer.key_name
  instance_type = "t2.micro"

# Declaring the first provisioner 
  provisioner  "local-exec" {                  
        command = "echo ${aws_instance.my-machine.private_ip} >> ip.txt"
        on_failure = continue
       }
 
# Declaring the second provisioner which needs SSH/Winrm connection
  provisioner  "remote-exec" {         
      connection {
      type        = "ssh"
      user        = "ubuntu"
      private_key = "${file("~/.ssh/id_rsa")}"
      agent       = false
      host        = aws_instance.my-machine.public_ip     
      timeout     = "30s"
    }
      inline = [
        "sudo apt install -y apache2",
      ]
  }
 
# Declaring the third provisioner that also needs SSH/Winrm connection
  provisioner "file" {                
    source      = "C:\\Users\\4014566\\Desktop\\service-policy.json"
    destination = "/tmp/file.json"
    connection {
      type        = "ssh"
      user        = "ubuntu"
      host        = aws_instance.my-machine.public_ip
      private_key = "${file("~/.ssh/id_rsa")}"
      agent       = false
      timeout     = "30s"
    }
  }  
  • Create one more file provider.tf file inside the /opt/terraform-s3-demo directory and copy/paste below content. The provider.tf file will allows Terraform to connect to the AWS cloud.
provider "aws" {
  region = "us-east-2"
}

  • Now your files and code are ready for execution. Initialize the terraform using the terraform init command.
terraform init
Initializing the terraform using the terraform init command.
  • Terraform initialized successfully , now its time to run the plan command which provides you the details of the deployment. Run terraform plan command to confirm if correct resources is going to provisioned or deleted.
terraform plan
  • After verification, now its time to actually deploy the code using terraform apply command.
terraform apply
Command executed locally on the ubuntu machine using local exec

Verifying the Softwares in AWS EC2 instance created using Terraform Provisioner

Terraform commands terraform init→ terraform plan→ terraform apply all executed successfully. But it is important to manually verify the software on the AWS EC2.

As you can see below, the file.json is copied successfully, and also apache installation is successful.

command executed on a remote machine using other remote-exec and file provisioners

Join 64 other subscribers

Conclusion

This tutorial taught you what Terraform provisioners are and how to work with various Terraform provisioners using Terraform on AWS.

Now that you have a newly created AWS instance, what do you plan to copy on it using Terraform provisioner?

How to Launch AWS S3 bucket on Amazon using Terraform

Do you have lots of log rotation issues, or does your system hangs when lots of logs are generated on the disk, and your system behaves very abruptly? Do you have less space to keep your important deployments jars or wars? Consider using Amazon Simple Storage Service (Amazon S3) to solve these issues.

Storing all the logs, deployment code, and scripts with Amazon’s AWS S3 provides unlimited storage, safe and secure, and quick.

In this tutorial, learn how to Launch an AWS S3 bucket on Amazon using Terraform. Let’s dive in.

Join 64 other subscribers

Table of Content

  1. What is the Amazon AWS S3 bucket?
  2. Prerequisites
  3. Terraform files and Terraform directory structure
  4. Building Terraform Configuration files to Create AWS S3 bucket using Terraform
  5. Uploading the Objects in the AWS S3 bucket
  6. Conclusion

What is the Amazon AWS S3 bucket?

AWS S3, why it is S3? The name itself tells that it’s a 3 word whose alphabet starts with “S.” The Full form of AWS S3 is a simple storage service. AWS S3 service helps in storing unlimited data safely and efficiently. Everything in the AWS S3 service is an object such as pdf files, zip files, text files, war files, anything. Some of the features of the AWS S3 bucket are below:

  • To store the data in AWS S3 bucket you will need to upload the data.
  • To keep your AWS S3 bucket secure addthe necessary permissions to IAM role or IAM user.
  • AWS S3 buckets have unique name globally that means there will be only 1 bucket throughout different accounts or any regions.
  • 100 buckets can be created in any AWS account, post that you need to raise a ticket to Amazon.
  • Owner of AWS S3 buckets is specific to AWS account only.
  • AWS S3 buckets are created region specific such as us-east-1 , us-east-2 , us-west-1 or us-west-2
  • AWS S3 bucket objects are created in AWS S3 in AWS console or using AWS S3 API service.
  • AWS S3 buckets can be publicly visible that means anybody on the internet can access it but is recommended to keep the public access blocked for all buckets unless very much required.
Recommended: Private bucket

Prerequisites

  • Ubuntu machine to run terraform command, if you don’t have Ubuntu machine you can create an AWS EC2 instance on AWS account with 4GB RAM and at least 5GB of drive space.
  • Terraform Installed on Ubuntu Machine. If you don’t have Terraform installed refer Terraform on Windows Machine / Terraform on Ubuntu Machine
  • Ubuntu machine should have IAM role attached with full access to create AWS S3 bucket or administrator permissions.

You may incur a small charge for creating an EC2 instance on Amazon Managed Web Service.

Terraform files and Terraform directory structure

Now that you know what is Amazon Elastic search and Amazon OpenSearch service are. Let’s now dive into Terraform files and Terraform directory structure that will help you write the Terraform configuration files later in this tutorial.

Terraform code, that is, Terraform configuration files, are written in a tree-like structure to ease the overall understanding of code with .tf format or .tf.json or .tfvars format. These configuration files are placed inside the Terraform modules.

Terraform modules are on the top level in the hierarchy where configuration files reside. Terraform modules can further call another child to terraform modules from local directories or anywhere in disk or Terraform Registry.

Terraform contains mainly five files as main.tf , vars.tf , providers.tf , output.tf and terraform.tfvars.

  1. main.tf – Terraform main.tf file contains the main code where you define which resources you need to build, update or manage.
  2. vars.tf – Terraform vars.tf file contains the input variables which are customizable and defined inside the main.tf configuration file.
  3. output.tf : The Terraform output.tf file is the file where you declare what output paraeters you wish to fetch after Terraform has been executed that is after terraform apply command.
  4. .terraform: This directory contains cached provider , modules plugins and also contains the last known backend configuration. This is managed by terraform and created after you run terraform init command.
  5. terraform.tfvars files contains the values which are required to be passed for variables that are refered in main.tf and actually decalred in vars.tf file.
  6. providers.tf – The povider.tf is the most important file whrere you define your terraform providers such as terraform aws provider, terraform azure provider etc to authenticate with the cloud provider.

Building Terraform Configuration files to Create AWS S3 bucket using Terraform

Now that you know what are Terraform configurations files look like and how to declare each of them. In this section, you will learn how to build Terraform configuration files to create AWS S3 bucket on the AWS account before running Terraform commands. Let’s get into it.

  • Log in to the Ubuntu machine using your favorite SSH client.
  • Create a folder in opt directory named terraform-s3-demo and switch to that folder.
mkdir /opt/terraform-s3-demo
cd /opt/terraform-s3-demo
  • Create a file named main.tf inside the /opt/terraform-s3-demo directory and copy/paste the below content. The below file creates the below components:
    • Creates the AWS S3 bucket in AWS account.
    • Provides the access to the AWS S3 bucket.
    • Creating encryption keys that will protect the AWS S3 bucket.
# Providing the access to the AWS S3 bucket.

resource "aws_s3_bucket_public_access_block" "publicaccess" {
  bucket = aws_s3_bucket.demobucket.id
  block_public_acls       = false
  block_public_policy     = false
}

# Creating the encryption key which will encrypt the bucket objects

resource "aws_kms_key" "mykey" {
  deletion_window_in_days = "20"
}

# Creating the AWS S3 bucket.

resource "aws_s3_bucket" "demobucket" {

  bucket          = var.bucket
  force_destroy   = var.force_destroy

  server_side_encryption_configuration {
    rule {
      apply_server_side_encryption_by_default {
        kms_master_key_id = aws_kms_key.mykey.arn
        sse_algorithm     = "aws:kms"
      }
    }
  }
  versioning {
    enabled          = true
  }
  lifecycle_rule {
    prefix  = "log/"
    enabled = true
    expiration {
      date = var.date
    }
  }
}
  • Create one more file named vars.tf inside the /opt/terraform-s3-demo directory and copy/paste below content. This file contains all the variables that are referred in the main.tf configuration file.
variable "bucket" {
 type = string
}
variable "force_destroy" {
 type = string
}
variable "date" {
 type = string
}
  • Create one more file provider.tf file inside the /opt/terraform-s3-demo directory and copy/paste below content. The provider.tf file will allows Terraform to connect to the AWS cloud.
provider "aws" {
  region = "us-east-2"
}

  • Create one more file terraform.tfvars inside the same folder and copy/paste the below content. This file contains the values of the variables that you declared in vars.tf file and refered in main.tf file.
bucket          = "terraformdemobucket"
force_destroy   = false
date = "2022-01-12"
  • Now the folder structure of all the files should like below.
Folder structure of all the files in the /opt/terraform-s3-demo
The folder structure of all the files in the /opt/terraform-s3-demo
  • Now your files and code are ready for execution. Initialize the terraform using the terraform init command.
terraform init
Initializing the terraform using the terraform init command.
  • Terraform initialized successfully , now its time to run the plan command which provides you the details of the deployment. Run terraform plan command to confirm if correct resources is going to provisioned or deleted.
terraform plan
Running the terraform plan command
  • After verification, now its time to actually deploy the code using terraform apply command.
terraform apply
Running the terraform apply command

Terraform commands terraform init→ terraform plan→ terraform apply all executed successfully. But it is important to manually verify the AWS S3 bucket launched in the AWS Management console.

  • Open your favorite web browser and navigate to the AWS Management Console and log in.
  • While in the Console, click on the search bar at the top, search for ‘S3’, and click on the S3 menu item.
Verifying the AWS S3 bucket that Terraform created

Uploading the Objects in the AWS S3 bucket

Now that you have the AWS S3 bucket created in the AWS account, which is great, let’s upload a sample text file in the bucket by clicking on the Upload button.

Navigating to the AWS S3 bucket
  • Now click on Add files button and choose any files that you wish to add in the newly created AWS S3 bucket. This tutorial uses sample.txt file and uploads it.
Adding the files in newly created bucket
Adding the files in the newly created bucket
  • As you can see the sample.txt has been uploaded successfully.
Verifying the sample.txt in the AWS bucket

Join 64 other subscribers

Conclusion

In this tutorial, you learned Amazon AWS S3 and how to create an Amazon AWS S3 bucket using Terraform.

Most of your phone and website data is stored on AWS S3, so now what do you plan to store with this newly created AWS bucket.

How to Launch multiple EC2 instances on AWS using Terraform count and Terraform for_each

Creating multiple AWS EC2 instances is generally the need of the project or the organization when you are asked to create dozens of AWS EC2 machines in a particular AWS account, and using AWS console will take hours to do that why not automate it using Terraform and save your hours of hard work?

There are various automated ways that can create multiple instances quickly, but automating with Terraform is way easier and more fun.

In this tutorial, you will learn how to Launch multiple AWS EC2 instances on AWS using Terraform count and Terraform for_each. Let’s dive in.

Join 64 other subscribers

Table of Content

  1. What is Amazon EC2 instance?
  2. Prerequisites
  3. Terraform files and Terraform directory structure
  4. Launch multiple EC2 instances using Terraform count
  5. Launch multiple EC2 instances using Terraform for_each
  6. Conclusion

What is Amazon EC2 instance?

Amazon Elastic Compute Cloud (Amazon EC2) provides the scalable capacity in the Amazon Web Services (AWS) Cloud. With AWS EC2, you don’t need to worry about the hardware and time to develop and deploy applications on the machines.

You can use Amazon EC2 to launch as many or as few virtual servers as you need, configure security and networking, and manage storage. Amazon EC2 enables you to scale up or down the computations such as memory or CPU when needed. Also, AWS EC2 instances are safe as initially, they grant access to them using SSH keys.

Prerequisites

  • Ubuntu machine 20.04 version would be great , if you don’t have any machine you can create a AWS EC2 instance on AWS account with recommended 4GB RAM and at least 5GB of drive space.
  • Ubuntu machine should have IAM role attached with full access to create AWS secrets in the AWS Secret Manager or administrator permissions.
  • Terraform installed on the Ubuntu Machine. Refer How to Install Terraform on an Ubuntu machine.

You may incur a small charge for creating an EC2 instance on Amazon Managed Web Service.

Terraform files and Terraform directory structure

Now that you have Terraform installed. Let’s now dive into Terraform files and Terraform directory structure that will help you write the Terraform configuration files later in this tutorial.

Terraform code, that is, Terraform configuration files, are written in a tree-like structure to ease the overall understanding of code with .tf format or .tf.json or .tfvars format. These configuration files are placed inside the Terraform modules.

Terraform modules are on the top level in the hierarchy where configuration files reside. Terraform modules can further call another child to terraform modules from local directories or anywhere in disk or Terraform Registry.

Terraform contains mainly five files as main.tf , vars.tf , providers.tf , output.tf and terraform.tfvars.

  1. main.tf – Terraform main.tf file contains the main code where you define which resources you need to build, update or manage.
  2. vars.tf – Terraform vars.tf file contains the input variables which are customizable and defined inside the main.tf configuration file.
  3. output.tf : The Terraform output.tf file is the file where you declare what output paraeters you wish to fetch after Terraform has been executed that is after terraform apply command.
  4. .terraform: This directory contains cached provider , modules plugins and also contains the last known backend configuration. This is managed by terraform and created after you run terraform init command.
  5. terraform.tfvars files contains the values which are required to be passed for variables that are refered in main.tf and actually decalred in vars.tf file.
  6. providers.tf – The povider.tf is the most important file whrere you define your terraform providers such as terraform aws provider, terraform azure provider etc to authenticate with the cloud provider.

Launch multiple EC2 instances using Terraform count

Another special argument is Terraform count. By default, terraform create a single resource defined in Terraform resource block. But at times, you want to manage multiple objects of the same kind, such as creating four AWS EC2 instances of the same type in the AWS cloud without writing a separate block for each instance. Let’s learn how to use Terraform count meta argument.

This demonstration will create multiple AWS EC2 instances using Terraform count. So let’s create all the Terraform configuration files required to create multiple AWS EC2 instances on the AWS account.

  • Log in to the Ubuntu machine using your favorite SSH client.
  • Create a folder in opt directory named terraform-demo and switch to this folder. This terraform-demo folder will contain all the configuration files that Terraform needs.
mkdir /opt/terraform-demo
cd /opt/terraform-demo
  • Create main.tf file in the /opt/terraform-demo directory and copy/paste the content below. The below code creates the four identical AWS EC2 instances in AWS account using Terraform count meta argument.
resource "aws_instance" "my-machine" {
   count = 4   # Here we are creating identical 4 machines. 
   ami = var.ami
   instance_type = var.instance_type
   tags = {
      Name = "my-machine-${count.index}"
           }
}
  • Create another file named vars.tf file in the /opt/terraform-demo directory and copy/paste the content below. The vars.tf file contains all the variables that you reffered in the main.tf file.
# Creating a Variable for ami
variable "ami" {       
  type = string
}

# Creating a Variable for instance_type
variable "instance_type" {    
  type = string
}
  • Create another file named terraform.tfvars file in the /opt/terraform-demo directory and copy/paste the content below. The terraform.tfvars file contains all the values that are needed by variables declared in the var.tf file.
 ami = "ami-0742a572c2ce45ebf"
 instance_type = "t2.micro"

  • Create one more file named outputs.tf inside the /opt/terraform-demo directory and copy/paste the below content. This file contains all the outputs variables that will be used to display he output after running the terraform apply command.
output "ec2_machines" {
 # Here * indicates that there are more than one arn because count is 4   
  value = aws_instance.my-machine.*.arn 
}
 
  • Create another file and name it as provider.tf. This file allows Terraform to interact with AWS cloud using AWS API.
provider "aws" {
  region = "us-east-2"
}
  • Now your folder should have all files as shown below and should look like.
Terraform configurations and structure
  • Now your files and code are ready for execution. Initialize the terraform using the terraform init command.
terraform init
Initialize the terraform using the terraform init command.
  • Terraform initialized successfully , now its time to run the plan command which provides you the details of the deployment. Run terraform plan command to confirm if correct resources is going to provisioned or deleted.
terraform plan
Running terraform plan command
Output of the terraform plan command
The output of the terraform plan command
  • After verification, now its time to actually deploy the code using terraform apply command.
terraform apply
Running terraform apply command

Terraform commands terraform init→ terraform plan→ terraform apply All executed successfully. But it is important to manually verify all the four AWS instances launched in AWS.

  • Open your favorite web browser and navigate to the AWS Management Console and log in.
  • While in the Console, click on the search bar at the top, search for ‘EC2’, and click on the EC2 menu item and you should see four EC2 instances.
Four instance launched using Terraform count
Four instances launched using Terraform count

Launch multiple EC2 instances using Terraform for_each

In the previous example, you created more than four AWS instances, but all the instances contain the same attributes such as instance_type, ami, etc. But if you need to create multiple instances with different attributes, such as one instance with t2.medium and others with t2.micro types, you should consider using Terraform for_each.

Assuming you are still logged into the Ubuntu machine using your favorite SSH client.

  • Create a folder in opt directory named terraform-for_each-demo and switch to this folder. This terraform-for_each-demo folder will contain all the configuration files that Terraform needs.
mkdir /opt/terraform-for_each-demo
cd /opt/terraform-for_each-demo
  • Create main.tf file in the /opt/terraform-for_each-demo directory and copy/paste the content below. The below code creates the two AWS EC2 instances with different instance_type in AWS account using Terraform for_each argument.
resource "aws_instance" "my-machine" {
  ami = var.ami
  for_each  = {                     # for_each iterates over each key and values
      key1 = "t2.micro"             # Instance 1 will have key1 with t2.micro instance type
      key2 = "t2.medium"            # Instance 2 will have key2 with t2.medium instance type
        }
        instance_type  = each.value
	key_name       = each.key
    tags =  {
	   Name  = each.value
	}
}
  • Create another file vars.tf file in the /opt/terraform-for_each-demo directory and copy/paste the content below.
variable "tag_ec2" {
  type = list(string)
  default = ["ec21a","ec21b"]
}
                                           
variable "ami" {       # Creating a Variable for ami
  type = string
}
  • Create another file terraform.vars file in the /opt/terraform-for_each-demo directory and copy/paste the content below.
ami = "ami-0742a572c2ce45ebf"
instance_type = "t2.micro"
  • Now that you have all the Terraform configurations read for execution.
  • Next initialize the Terraform using terraform init command followed by terraform plan and finally terraform apply to deploy the changes.
terraform init 
terraform plan
terraform apply
Two instance launched using Terraform for_each
Two instances launched using Terraform for_each

Join 64 other subscribers

Conclusion

Terraform is a great open-source tool that provides the easiest code and configuration files to work with. Now that you know how to launch multiple AWS EC2 instances on AWS using Terraform count and Terraform for_each on Amazon Web Service.

So which argument do you plan to use in your next Terraform deployment?

Terraform Cheat Sheet and Terraform commands

If you are looking for the terraform commands, then you are in the right place; this Terraform Cheat Sheet and Terraform commands will simply help you to understand all Terraform commands that you need to run daily; why not learn all terraform commands from basics to becoming a terraform pro.

Terraform is an infrastructure as a code tool to build and change the infrastructure effectively and simpler way. With Terraform, you can work with various cloud providers such as Amazon AWS, Oracle, Microsoft Azure, Google Cloud, and many more.

Let’s dive into this Terraform Cheatsheet and Terraform commands.

Join 64 other subscribers

Table of Content

  1. Prerequisites
  2. Terraform Commands
  3. Quick Glance of Terraform CLI Commands
  4. Terraform commands walkthrough
  5. Conclusion

Prerequisites

Join 64 other subscribers

Terraform Commands

Let’s kick off this tutorial by learning all the Terraform commands you need to use. The Terraform command-line interface or Terraform CLI can be used via terraform command, which accepts a variety of subcommands such as terraform init or terraform plan.

  • terraform init: It initializes the provider, module version requirements, and backend configurations.
  • terraform init -input=true ➔ You can need to provide the inputs on the command line else terraform will fail.
  • terraform init -lock=false ➔ Disable lock of terraform state file but this is not recommended
  • terraform init -upgrade ➔ Upgrades Terraform modules and Terraform plugins
  • terraform plan: terraform plan command determines the state of all resources and compares them with real or existing infrastructure. It uses terraform state file data to compare and provider API to check.
  • terraform plan -compact-warnings ➔ Provides the summary of warnings
  • terraform plan -out=path ➔ Saves the execution plan on the specific directory.
  • terraform plan -var-file= abc.tfvars ➔ To use specfic terraform.tfvars specified in the directory.
  • terraform apply: To apply the changes in a specific cloud such as AWS or Azure.
  • terraform apply -backup=path ➔ To backup the Terraform state file
  • terraform apply -lock=true ➔ Locks the state file
  • terraform apply -state=path ➔ prompts to provide the path to save the state file or use it for later runs.
  • terraform apply -var-file= abc.tfvars ➔ Enter the specific terraform.tfvars which contains environment-wise variables.
  • terraform apply -auto-approve ➔ This command will not prompt to approve the apply command.
  • terraform destroy: It will destroy terraform-managed infrastructure or the existing enviornment created by Terraform.
  • terraform destroy -auto-approve ➔ This command will not prompt to approve the destroy command.
  • terraform console: Provides interactive console to evaluate the expressions such as join command or split command.
  • terraform console -state=path ➔ Path to local state file
  • terraform fmt: terraform fmt command formats the configuration files in the proper format.
  • terraform fmt -check ➔ Checks the input format
  • terraform fmt – recursive ➔ It formats Terraform configuration files stored in subdirectories.
  • terraform fmt – diff ➔ displays the difference between the current and previous formats.
  • terraform validate -json ➔ Output is in json format
  • terraform graph: terraform graph generates a visual representation of the execution plan in graph form.
  • terraform graph -draw-cycles
  • terraform graph -type=plan
  • terraform output: terraform output command extracts the values of an output variable from the state file.
  • terraform output -json
  • terraform output -state=path
  • terraform state list: It lists all the resources present in the state file created or imported by Terraform.
  • terraform state list – id=id ➔ This command will search for a particular resource using resource id in Terraform state file.
  • terraform state list -state=path ➔ This command will prompt you to provide the path of the state file and then provides the list of all resources in terraform state file.
  • terraform state show: It shows attributes of specific resources.
  • terraform state show -state=path ➔ This command will prompt you to provide the path and then provide the attributes of specific resources.
  • terraform import: This command will import existing resources from infrastructure which was not created using terraform but will be imported in terraform state file and will be included in Terraform next time we run it.
  • terraform refresh: It will reconcile the Terraform state file. Whatever resource you created using terraform and if they are manually or by any means modified, the refresh will sync them in the state file.
  • terraform state rm: This command will remove the resources from the Terraform state file without actually removing the existing resources.
  • terraform state mv: This command moves the resources within the Terraform state file from one location to another
  • terraform state pull: This command will manually download the Terraform state file from a remote state in your local machine.

Quick Glance of Terraform CLI Commands

Previously, you learned all the Terraform commands individually, but let’s check out the below Terraform CLI commands table to help you group each Terraform command category-wise.

Initialize ProvisionModify ConfigCheck infraManipulate State
terraform initterraform planterraform fmtterraform graphterraform state list
terraform getterraform applyterraform validateterraform outputterraform state show
terraform destroyterraform consoleterraform state show terraform state mv/rm
terraform state listterraform state pull/push
Terraform CLI commands

Terraform commands walkthrough

Now that you have a sound idea about each of the terraform commands let’s walk through some of the Terraform commands with the practicals.

terraform -version  # It gives Terraform Version information
Finding Terraform version
  • Now Initialize the terraform by running the terraform init command in same working directory where you have all the above terraform configuration files.
terraform init   
Initializing the terraform using terraform init command
  • Next run the terraform plan command. This command provides the blueprint of what all resources will be deployed before deploying actually.
terraform plan   
Running the terraform plan command
terraform validate   
Running the terraform validate command
  • Now run the Terraform show command provides the human readable output of state file that gets generated only after terraform plan command.
terraform show  
Running the terraform show command
  • To list all resources within terraform state file run the terraform state list command.
terraform state list 
Running the terraform state list command
terraform apply 
Running the terraform apply command
  • To provide graphical view of all resources in configuration files run terraform graph command.
terraform graph  
Running the terraform graph command
  • To Destroy the resources that are provisioned using Terraform run Terraform destroy command.
terraform destroy   # Destroys all your resources or the one which you specified 
Running the terraform destroy command

Join 64 other subscribers

Conclusion

In this tutorial, you covered all the terraform commands that are useful for beginners and experienced professionals and will be of massive use.

So which Terraform command do you use the most?

How to Install Terraform on an Ubuntu machine

Many automation tools and scripts are available in the market, but one of the most widely used and easy to use is Terraform, also known as Infrastructure as a code tool.

In this tutorial, you’ll install Terraform on Ubuntu 20.04. You’ll then work with Terraform to create a service on Amazon Managed Service. So let’s get started.

Join 64 other subscribers

Table of Content

  1. What is Terraform?
  2. Prerequisites
  3. How to Install Terraform on Ubuntu 20.04 LTS
  4. Terraform files and Terraform directory structure
  5. Terraform ec2 instance example (terraform aws ec2)
  6. Conclusion

What is Terraform?

Terraform is a tool for building, versioning, and changing the infrastructure. Terraform is Written in GO Language, and the syntax language of configuration files is HashiCorp configuration language(HCL) which is much easier than yaml or json.

Terraform is used with various cloud providers such as Amazon AWS, Oracle, Microsoft Azure, Google Cloud, etc.

Prerequisites

  • Ubuntu machine preferably 18.04 version + , if you don’t have any machine you can create a ec2 instance on AWS account. Recommended to have 4GB RAM and at least 5GB of drive space
  • Ubuntu machine should have IAM role attached with AWS EC2 instance creation permissions or admin rights.

You may incur a small charge for creating an EC2 instance on Amazon Managed Web Service.

How to Install Terraform on Ubuntu 20.04 LTS

Now that you have a basic idea about terraform let’s kick off this tutorial by first installing terraform on Ubuntu 20.04 machine.

  • First log in to the Ubuntu machine sing your favorite SSH client such as putty.
  • Next, update the existing system packages on the ubuntu machine by running below command.
sudo apt update
  • Now, download the latest version of Terraform in the opt directory. You can install Terraform on any directory but it is recommended to use opt directory for software installations.
wget https://releases.hashicorp.com/terraform/0.14.8/terraform_0.14.8_linux_amd64.zip
  • Further install zip package which you will need in next step to unzip Terraform zip file.
sudo apt-get install zip -y
  • Now, unzip the Terraform download zip file from the unzip command.
unzip terraform*.zip
  • Next, move the Terraform executable file to executable directory such as /usr/local/bin so that you can run Terraform from any directory of your Ubuntu machine.
sudo mv terraform /usr/local/bin
  • Finally, verify the Terraform installation by running terraform command or terraform version command.
terraform  # To check if terraform is installed 

terraform -version # To check the terraform version </mark> 
Checking the Terraform installation
  • This confirms that terraform has been successfully installed on ubuntu 18.04 machine.
Checking the Terraform installation by running terraform version command

Terraform files and Terraform directory structure

Now that you have Terraform installed. Let’s now dive into Terraform files and Terraform directory structure that will help you write the Terraform configuration files later in this tutorial.

Terraform code, that is, Terraform configuration files, are written in a tree-like structure to ease the overall understanding of code with .tf format or .tf.json or .tfvars format. These configuration files are placed inside the Terraform modules.

Terraform modules are on the top level in the hierarchy where configuration files reside. Terraform modules can further call another child to terraform modules from local directories or anywhere in disk or Terraform Registry.

Terraform contains mainly five files as main.tf , vars.tf , providers.tf , output.tf and terraform.tfvars.

  1. main.tf – Terraform main.tf file contains the main code where you define which resources you need to build, update or manage.
  2. vars.tf – Terraform vars.tf file contains the input variables which are customizable and defined inside the main.tf configuration file.
  3. output.tf : The Terraform output.tf file is the file where you declare what output paraeters you wish to fetch after Terraform has been executed that is after terraform apply command.
  4. .terraform: This directory contains cached provider , modules plugins and also contains the last known backend configuration. This is managed by terraform and created after you run terraform init command.
  5. terraform.tfvars files contains the values which are required to be passed for variables that are refered in main.tf and actually decalred in vars.tf file.
  6. providers.tf – The povider.tf is the most important file whrere you define your terraform providers such as terraform aws provider, terraform azure provider etc to authenticate with the cloud provider.

Terraform ec2 instance example (terraform aws ec2)

Let’s wrap up this ultimate guide with a basic Terraform ec2 instance example or terraform aws ec2.

  • Assuming you already have Terraform installed on your machine.
  • First create a folder terraform-demo in opt directory. This folder will contain all the configuraion file that Terraform needs to build ec2.
mkdir /opt/terraform-demo
cd /opt/terraform-demo
  • Now create main.tf file under terraform-demo folder and copy/paste the content below.
resource "aws_instance" "my-machine" {          # This is Resource block where we define what we need to create

  ami = var.ami                                 # ami is required as we need ami in order to create an instance
  instance_type = var.instance_type             # Similarly we need instance_type
}

  • Create one more file named vars.tf file under terraform-demo folder and copy/paste the content below. The vars.tf file contains the variables that you referred in main.tf file.
variable "ami" {                       # We are declaring the variable ami here which we used in main.tf
  type = string      
}

variable "instance_type" {             # We are declaring the variable instance_type here which we used in main.tf
  type = string 
}
  • Create one more file output.tf file under terraform-demo folder and paste the content below. This file will allow Terraform to display he output after running terraform apply command.
output "ec2_arn" {
  value = aws_instance.my-machine.arn    
}  
  • Create provider.tf file under terraform-demo folder and paste the content below.
provider "aws" {     # Defining the Provider Amazon  as we need to run this on AWS  
  region = "us-east-2"
}
  • Create terraform.tfvars file under terraform-demo folder and paste the content below. This file contains the value of Terraform vaiables declared in vars.tf file.
ami = "ami-013f17f36f8b1fefb" 
instance_type = "t2.micro"
  • Now, run tree command which will provide you the folder structure. You should see something like below.
tree command
tree command
  • Now your files and code are ready for execution. Initialize the terraform using the terraform init command.
terraform init
Initializing the terraform using the terraform init command.
  • Terraform initialized successfully , now its time to run the plan command which provides you the details of the deployment. Run terraform plan command to confirm if correct resources is going to provisioned or deleted.
terraform plan
Running the terraform plan command
  • After verification, now its time to actually deploy the code using terraform apply command.
terraform apply
Running the terraform apply command
Output of the terraform apply command
The output of the terraform apply command

Great Job; terraform commands were executed successfully. Now you should have the AWS EC2 instance launched in AWS Cloud.

It generally takes a minute or so to launch an instance, and yes, you can see that the instance is successfully launched now in the us-east-2 region as expected.

Join 64 other subscribers

Conclusion

In this tutorial, you learned What is terraform, how to Install Terraform on the Ubuntu machine and launch an ec2 instance on an AWS account using terraform. Keep Terraforming !!

Now that you have the AWS EC2 instance launched, what are you planning to deploy on the newly created AWS EC2?