With lots of software development and testing around different applications and products you certainly need a best way to deploy it in effective and in best way. With So many microservices and code it becomes very crucial for any developer or system engineers to collaborate and make a successful product ready.
Managing the code is now very well taken care by Git which is distributed code repository but on the top of it deployment has been very effective and easily managed with the help of GitLab
In this tutorial you will learn all about GitLab , Managing Pipelines , Projects and many more which a devops engineer should know to get started.
Table of Content
- What is GitLab?
- Prerequisites
- Creating Projects on GitLab
- Creating a Repository on GitLab
- Creating a Branch on GitLab
- Get started with GitLab CI/CD Pipelines
- Pipeline Architecture
- Conclusion
What is GitLab?
Git is a distributed version control designed to handle small to large projects with speed and efficiency. On the top of Git , GitLab is fully integrated platform to manage devops lifecycle or software developments.
It is single application to manage entire DevOps lifecycle.
Prerequisites
- You should have GitLab account handy. If you don’t have create it from here
Creating Projects on GitLab
GitLab projects hold all the files , folders , code and all the documents you need to build your applications.
- To create a project in GitLab click on Projects on the top and then click on Create a Project

- Now click on Create blank project

- On the Blank project tab provide the Project name and as this is demo we will keep this repository Private.
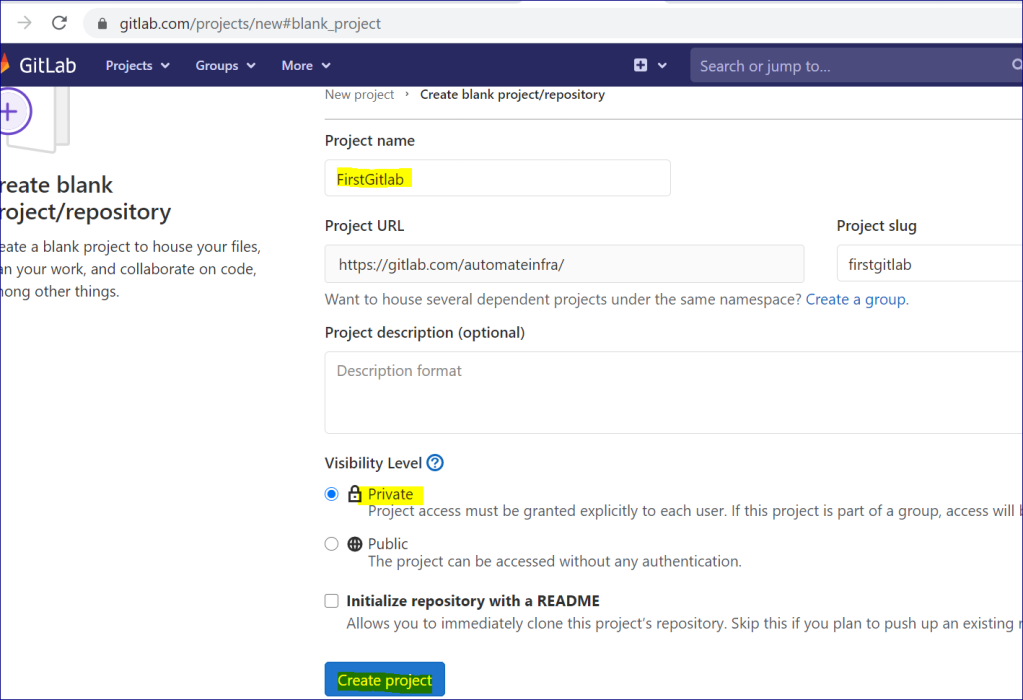
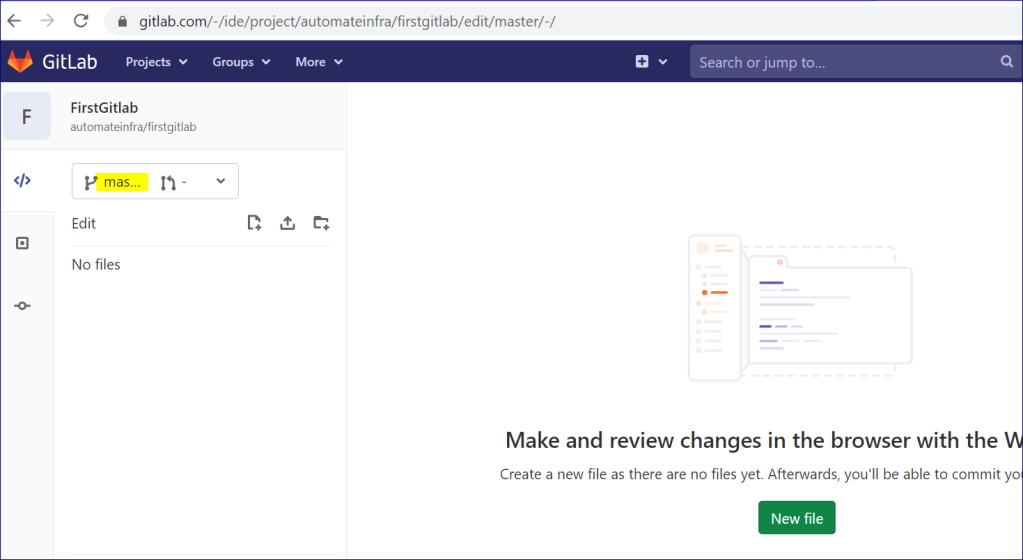
- Now Project is successfully created.

- You are ready to upload files either manually create/upload on GitLab

- Also you can push the files using command line by cloning the repository and adding the files as show below.
git clone https://gitlab.com/XXXXXXXXX/XXXXX.git
cd firstgitlab
touch README.md
git add README.md
git commit -m "add README"
git push -u origin master
Creating a Repository on GitLab
A repository is a place where you store all your code and related files. It is part of a Project. You can create multiple repositories in a single project.
To create a new repository, all you need to do is create a new project or fork an existing project. Once you create a new project, you can add new files via UI or via command line.
Creating a Branch on GitLab
- By Now, you saw GitLab Project creation. By default if you add any file it will be checked in
master branch.
- Click on New file and then select
Dockerfileand add content and thencommitthe file by adding the comments.

- You will see that
Dockerfileis now added in master branch underFirstGitLabproject.

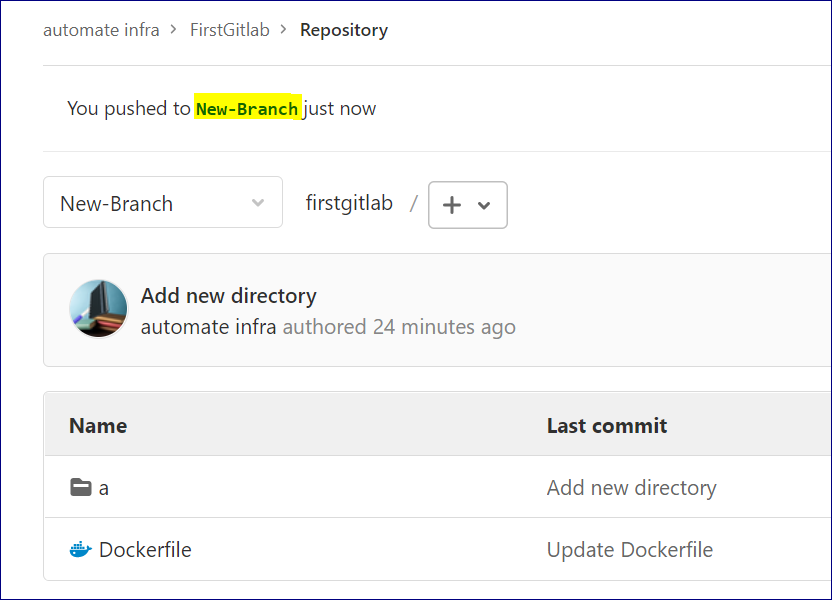
- So far we created a file which by default gets added in master branch. But if you need a separate Branch click on the
Branchesand then hit New Branch.

- Provide a name for the new branch.

Get started with GitLab CI/CD Pipelines
Before you start CI/CD part on GitLab make sure to have following
runners: runners are agents that run your CI/CD jobs. To check the available runners Go to Settings > CI/CD and expand Runners. As long as you have at least one active available runner then you will be able to run the Job.

.gitlab-ci.ymlfile : In this file you define your CI/CD jobs , decisions which runner should take with specific conditions, structure of job and order of Jobs. Go to Project overview and then click on New file & name it as .gitlab-ci.yml

- Now Paste the below content
build-job:
    stage: build
    script:
       - echo "Hello, $GITLAB_USER_LOGIN"
test-job:
    stage: test
    script:
       - echo "Testing CI/CD Pipeline"
deploy-job:
    stage: deploy
    script:
       - echo "Deploy from the $CI_COMMIT_BRANCH branch"

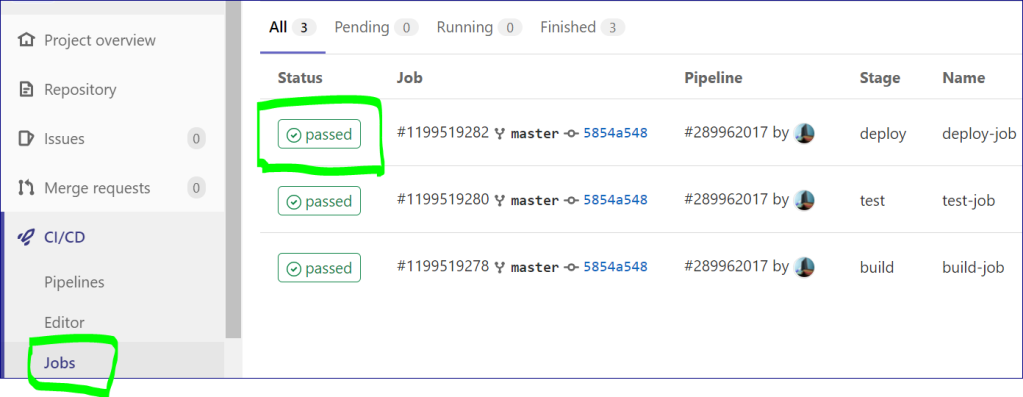
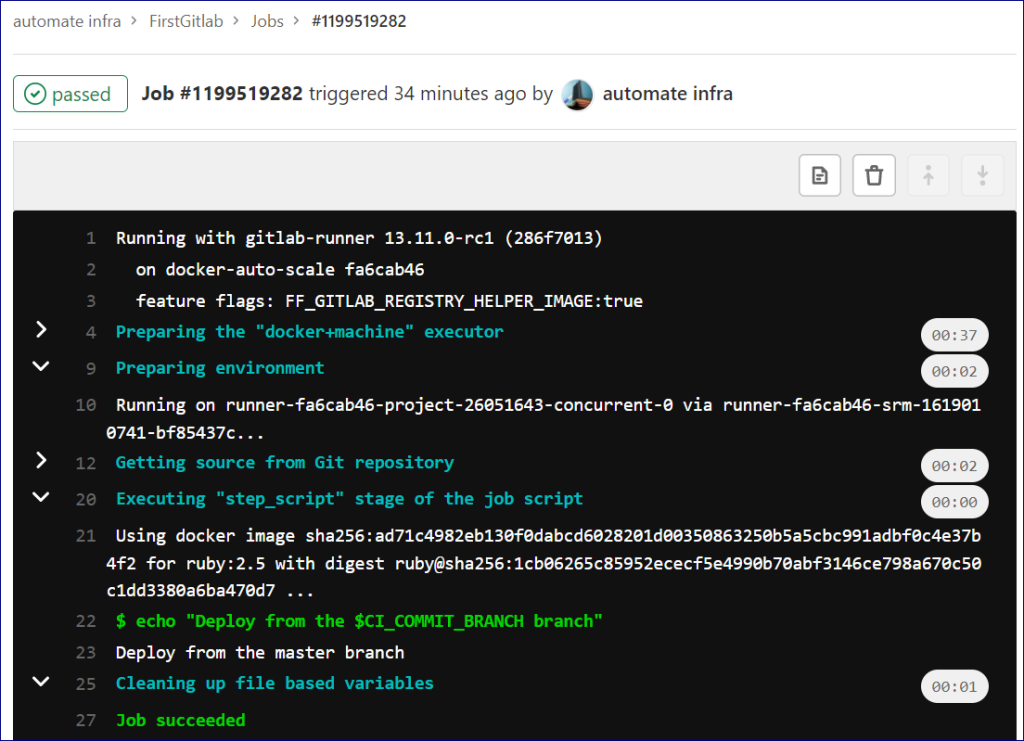
- Now Pipeline should automatically trigger for this pipeline configuration. Click on
Pipelinesto validate and View status of pipeline.

- To view details of a job, click the job name, for example build.
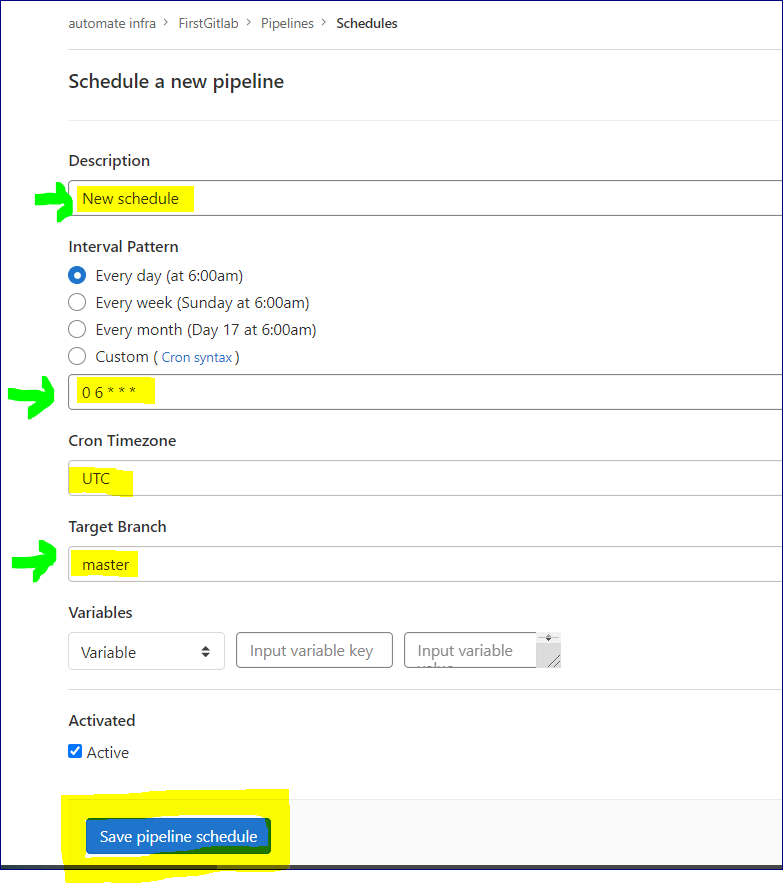
- Pipelines can be scheduled to run automatically as and when required.


Pipeline Architecture
Pipelines are the fundamental building blocks for CI/CD in GitLab. There are three main ways to structure your pipelines, each with their own advantages. These methods can be mixed and matched if needed:
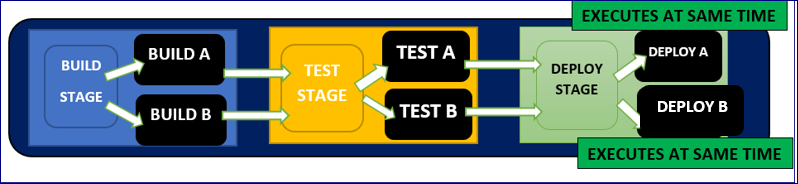
- Basic: Good for straightforward projects where all the configuration are stored at one place. This is the simplest pipeline in GitLab. It runs everything in the build stage at the same time and once all of those finish, it runs everything in the test stage the same way, and so on.
If Build A is completed it waits for BUILD B and once both are completed it moves to next TEST STAGE. Similarly if TEST B is completed it will wait for TEST A and then once both are completed they move to DEPLOY STAGE.
Directed Acyclic Graph: Good for large, complex projects that need efficient execution and you want everything to run as quickly as possible.
If Build A and TEST A both are completed it moves to next DEPLOY STAGE even if TEST B is still running

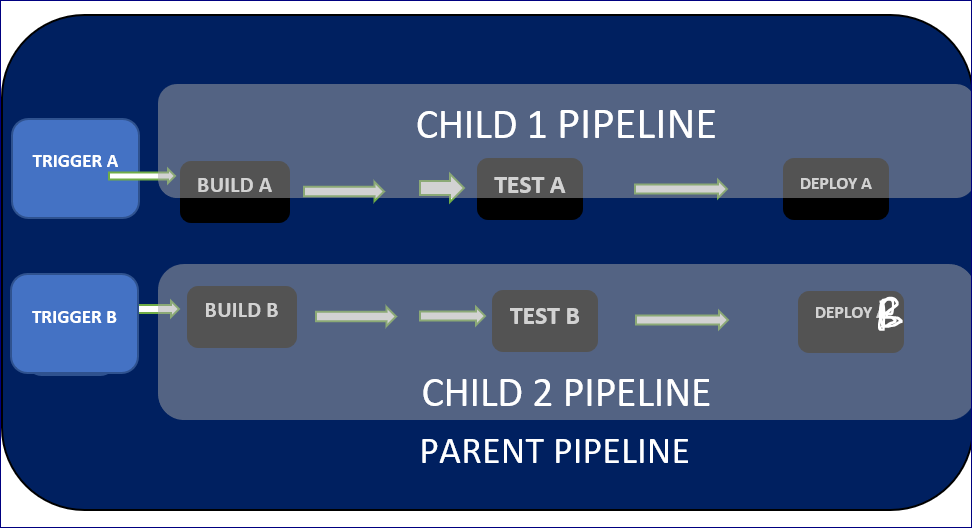
Child/Parent Pipelines: Good for monorepos and projects with lots of independently defined components. This job is run mostly using trigger keyword.
Conclusion
GitLab is the first single application for software development, security, and operations that enables continuous DevOps. GitLab makes the software lifecycle faster and improves the speed of business.
GitLab provides solutions for each of the stages of the DevOps lifecycle. So Which application are you going to build ?
Hope you had learnt a lot from this guide and helped you. If you like please share.
