If you are looking to create Python applications or programs that allow you to work with various API requests, nothing could be better than one of the most widely used web frameworks, Python flask.
With Python flask web frameworks, you can create and build from static to dynamic applications and work with API requests.
In this Python flask tutorial, you will learn everything you should know about Python flask, such as installing flask, flask render_template, etc.
Table of Content
- What are Web Frameworks?
- What is Python Flask?
- What is WSGI (Web Server Gateway Interface)?
- Why do we need Virtual Environment for Python?
- Prerequisites
- Installing and Setting up Python Flask on your machine
- URL binding, URL redirection with flask url_for in Python Flask
- Rendering templates or html page using flask render_template
- Rendering templates and redirecting html page using flask render_template
- flask file upload: Easy Example
- Conclusion
What are Web Frameworks?
The web frameworks or web application frameworks are the software framework designed to support the development of web applications, including web services, web resources, and web APIs.
Some of the most popular web frameworks are React.js, Angular, Tornado, PYRAMID, DJANGO, and one of the best Python flask.
There is a difference between web frameworks and library. Library is a set of resuable functions that you call and in contrast frameworks contains code which aids in programming rather you calling it.
What is Python Flask
Python Web frameworks contain a collection of packages or modules that allow developers to write Web applications or services easily in Python code.
To run the application in the Python Flask framework, First, you need to import the Flask class. An instance of this class will be our WSGI application. While Python flask is lightweight and easy to use but Flask’s built-in server is not suitable for production as it doesn’t scale well.
Some of the options available for properly running Flask in production are Deploying Flask on Heroku, Deploying Flask on Google App Engine, Deploying Flask on Google Cloud Run, Deploying Flask on AWS Elastic Beanstalk, Deploying on Azure (IIS),Deploying on PythonAnywhere etc.
What is WSGI (Web Server Gateway Interface)?
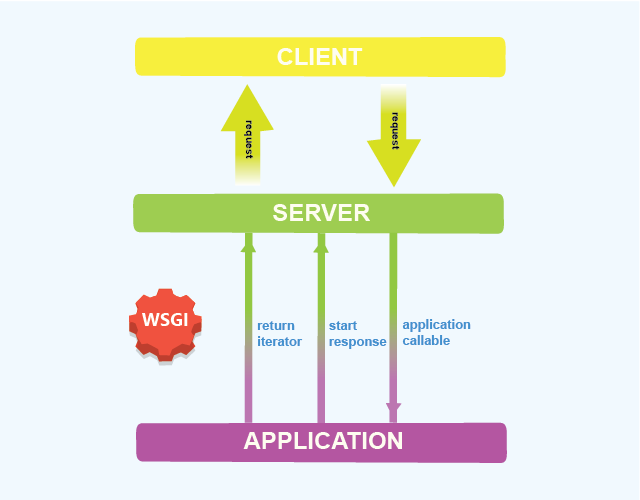
WSGI stands for “Web Server Gateway Interface,” which is used to forward requests from a web server (such as Apache or NGINX) to a backend Python web application or framework. Responses are then passed back to the webserver to reply to the requestor.
WSGI container is altogether a separate running process that runs on a different port than your web server, and your web server is configured to pass requests to the WSGI container which runs your web application, then pass the response (in the form of HTML) back to the requester on the browser.
A web server’s configuration specifies what requests should be passed to the WSGI server to process. Once a request is processed and generated by the WSGI server, the response is passed back through the web server and the browser.
Why do we need Virtual Environment for Python?
When we create projects for Python, you are dependent on several libraries and dependencies, so to work on a particular project with specific versions of libraries and packages, it is recommended and a better approach to have a separate virtual environment else applications with the same libraries and version it may be breaking the functionalities.
Prerequisites
This post will be a step-by-step tutorial. If you’d like to follow along, ensure you have the following in place:
- A windows 10 plus machine.
- Python v3.6 or later – This tutorial will be using Python v3.9.2 on a Windows 10 machine. If you don’t have Python installed, install it from here.
- A code editor – This tutorial will use Visual Studio (VS) Code.
Installing Python Virtual Enviornment and Python Flask on Windows
Now, you just learned about Python Flask that is it is a web framework for Python. Next, let’s kick off this tutorial by installing and setting Python Flask on your machine; our work with it uses some basic code and programs. Let’s begin!
- Before you write your first python flask application make sure you have
virtual environmentinstalled and created on your system.
Python 3 comes with a virtual environment module called venv preinstalled so we will skip this step.
- Now, install the virtual enviornment using the below command. They essentially allow you to create a “virtual” isolated Python installation and install packages into that virtual installation
py -m pip install --user virtualenv
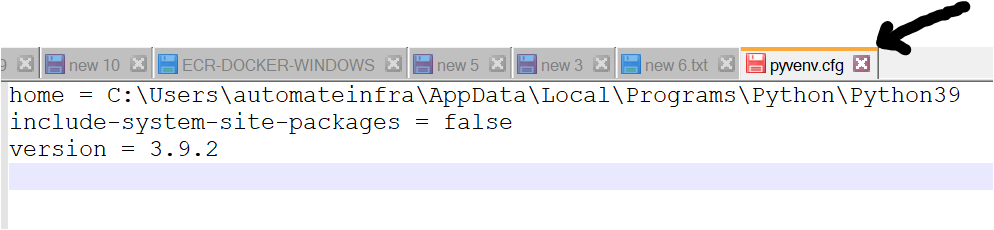
- Next, you need to use the venv module command to create a virtual environment. The name of the virtual enviornment is v
irt. This command will also create the directory with the same name(virt), a file inside it named pyvenv.cfg and a script folder containing Python binaries as shown below.
To create a virtual environment, go to your project’s directory and run venv. If you are using Python 2, replace
venvwithvirtualenvin the below commands.
py -3 -m venv virt # virt is the location to create the virtual environment

- Before you can start installing or using packages in your virtual environment, you’ll need to activate it. Activating a virtual environment will put the virtual environment-specific
pythonandpipexecutables into your shell’sPATH

To activate the virtual enviornment in ubuntu or Linux machine use (source virt/bin/activate) command.
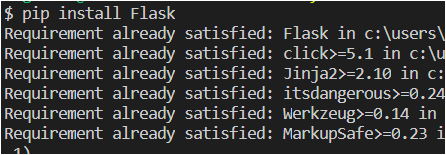
- Finally, install a Python flask on your machine by running the following command. After executing the command below, distributions and dependencies are installed automatically when installing Flask.
- Werkzeug implements WSGI, the standard Python interface between applications and servers.
- Jinja is a template language that renders the pages your application serves.
- MarkupSafe comes with Jinja. It escapes untrusted input when rendering templates to avoid injection attacks.
pip install flask # Install Flask from pip
URL binding, URL redirection with flask url_for in Python Flask
Now that you have a Python flask installed on your machine and setup, it is not useful unless you use it. Eager to get started? This section gives a good introduction to flask application.
In the python flask program, let’s learn how to work with URL binding, URL redirection, and debug mode.
- Open your favorite code editor such as visual studio, and create a folder named
Flaskand create a fileflask_prog.pyinside it and copy-paste the below code.app = Flask(__name__): An instance or object of the class will be our WSGI application and acts as a central registry for the view functions, the URL rules, template configuration, and much more.__name__is a convenient shortcut for this that is appropriate for most cases. This is needed so that Flask knows where to look for resources such as templates and static files.- app.route(rule, options)
- The rule parameter represents
URL bindingwith thefunction. - The options list parameters to be forwarded to the underlying Rule object.
- The rule parameter represents
- app.run(host, port, debug, options)
- Host : (Default) 127.0.0.1 (localhost). Set to ‘0.0.0.0’ to have server available externally.
- port: Defaults to 5000; you can set it to 5001, 5002, etc.
- Debug Defaults to false. If set to true, it provides debug information.
- options: To be forwarded to the underlying server.
# CREATE A FLASK APPLICATION

from flask import Flask, url_for # Importing the class flask
from markupsafe import escape

# Creating Flask class object/instance named app, The first argument is name of application’s module or package. It will also work with __name__
# app = Flask(__name__.split('.')[0])  #  This is a comment to show how to add a argument name
app = Flask(__name__)

# route() tell Flask what URL should trigger our function.
#  route() decorator to tell Flask what URL should trigger our function
@app.route('/home')
def home():
    return "This is my First Flask Website but Actually, I own Automateinfra.com"
@app.route('/login')
def login():
    return "This is my login page"
@app.route('/user/<username>') # Function receives <variable_name> as a keyword argument
def profile(username):
    return 'User %s' % escape(username)
@app.route('/post/<int:post_id>')
def post_id(post_id):
    return 'Post %d' % post_id

# To build a URL to a specific function, use the url_for() function.
with app.test_request_context():
    print(url_for('home'))
    print(url_for('login'))
    print(url_for('profile', username = 'Automate Infra'))
    print(url_for('post_id', post_id = '100'))

if __name__ =='__main__':
    app.run(debug=True)
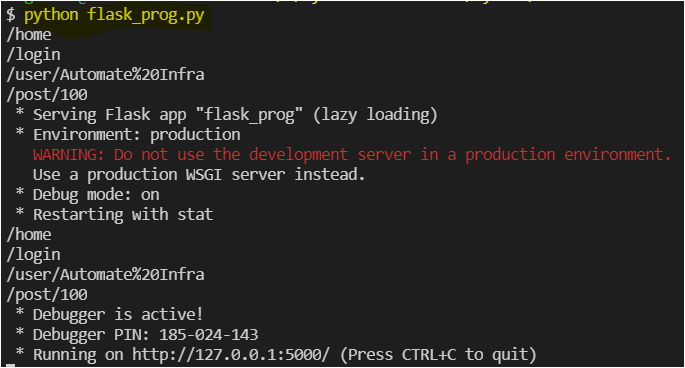
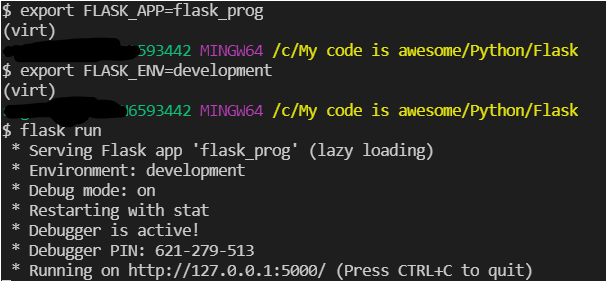
- Now execute the flask program by running the following command on the visual studio terminal.
python flask_prog.py
To ignore the WARNING: This is a development server. Do not use it in a production deployment.
Use a production WSGI server instead.
export FLASK_APP=flask_prog
export FLASK_ENV=development
flask run
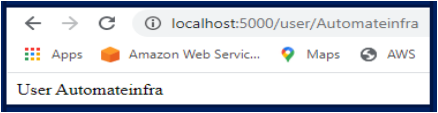
To verify the application working, navigate to the browser and hit 127.0.0.1:5000/login or 127.0.0.1:5000/user/<any-username>

Rendering templates or html page using flask render_template
One of the coolest features of Python is to use of templates. Templates are files containing static data and placeholders for dynamic data. A template is rendered with specific data to produce a final document. Flask uses the Jinja template library to render templates. Let’s dive in.
Assuming you are still on code editor.
- Create one folder named
templatesand under that, create another filehello.htmland paste the below content.
THIS IS MY HTML FILE WHICH IS BEING USED IN FLASK APP BELOW

<!DOCTYPE html>

<title>Hello Welcome</title>
{% if name %}
<h1>Hello {{name}} , Welcome </h1>
{% else %}
<h1>Hello, World!</h1>
{% endif %}
- Create one more file and name
app.pyunder the Flask folder and paste the below content.
from flask import Flask
from flask import render_template
from flask import request

app = Flask(__name__)

@app.route('/hello/')
@app.route('/hello/<name>')

def hello(name=None):
    return render_template('hello.html', name=name)

if __name__ =='__main__':
   app.run(debug=True)
- Now, you should have a folder structure something like the below.

- Finally, execute the flask program by running the Python command on the visual studio terminal, as shown below.
python app.py

- Navigate to the browser and open
127.0.0.1:5000/helloand127.0.0.1:5000/hello/<name>and you should see the output below.


Rendering templates and redirecting html page using flask render_template
Web applications use different HTTP methods when accessing URLs. By default, a route only answers to GET requests. You can use the methods argument of the route() decorator to handle different HTTP methods.
Assuming you are still on code editor:
- Create another file
code.htmland paste the below content.
# This is my HTML Page

<html>
  <body>
    <form action="http://localhost:5000/login" method="post">
      <p>Please Enter your name</p>
      <p><input type="text" name="automateinfra" /></p>
      <p><input type="submit" value="Submit" /></p>
    </form>
  </body>
</html>

- Create another file
redirection.pyand paste the below content.
# MY FLASK APPLICATION

from flask import Flask , redirect , url_for , request
app = Flask(__name__)

@app.route('/success/<name>')
def success(name):
    return 'welcome %s' % name

@app.route('/login', methods = ['GET','POST'])
def login():
    if request.method == 'POST':
       user = request.form['automateinfra']
       return redirect(url_for('success', name = user))
    else:
       return "INVALID"

if __name__ == '__main__':
   app.run(debug = True)
- Now execute the python program by running the following command.
python redirection.py
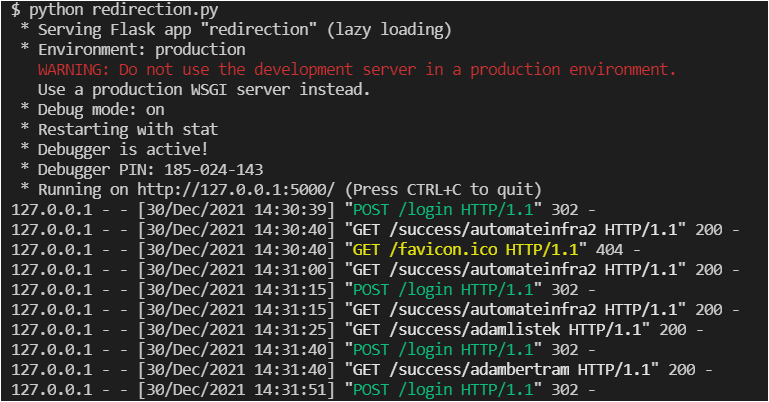
- Simultaneously run html page (code.html) in any browser and provide the name as
automateinfra
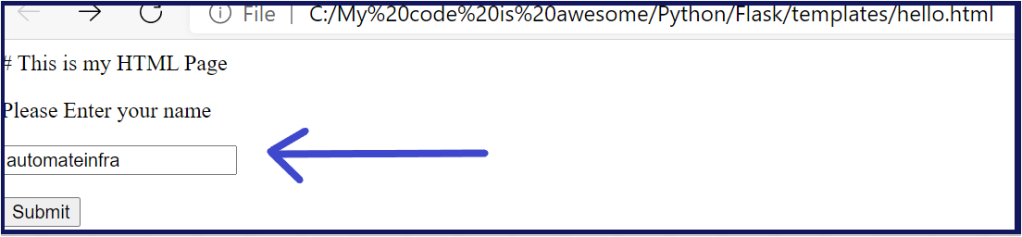
On browserYou will notice that when the form is submitted, it gets redirected to the Flask application and execute the success function.

flask file upload: Easy Example
You have learned how to render web pages and HTML pages by now. Now, lets us dive into the file uploading site and learn how to upload the file within a specific folder and display a file to the user. Are you interested in seeing an example of a flask file upload? If yes? Let’s dive in.
- Create a file upload
.htmland paste the below content.
<html>
   <body>
      <form action = "http://localhost:5000/success" method = "POST"
         enctype = "multipart/form-data">
         <input type = "file" name = "file" />
         <input type = "submit"/>
      </form>
   </body>
</html>
- Create another file upload
_flask.pyand paste the below content.
from flask import *
app = Flask(__name__)
@app.route('/upload')
def upload():
return render_template('upload.html')
@app.route('/success', methods = ['POST'])
def success():
if request.method == 'POST':
f = request.files['file']
f.save(f.filename)
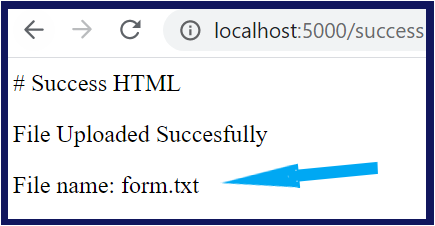
return render_template('success.html', name = f.filename)
if __name__ == '__main__':
app.run(debug = True)
- Now, execute the python script using the below command
python upload_flask.py

- Now, open your browser and navigate to http://localhost:5000/upload and
uploada file ( In my case, its form.txt).

- Now click on
Submit.
Conclusion
This tutorial taught you what Python flask is and how to install a flask on your windows machine.
Also, you learned how to work with Python flask, such as URL binding, URL redirection and debug mode, Rendering Templates, and redirecting html page and file uploading.
So which applications are you launching next on the Python flask web framework?

You made my DAY. Thank you for the wonderful Post.
LikeLike
Pingback: How to Install Jenkins on Ubuntu Machine Step by Step | Automateinfra
Pingback: The Ultimate Python interview questions: learn python the hard way | Automateinfra