Well, nowadays mostly people in IT need some form of coding and automation skills to manage Infrastructure such as Amazon cloud deployments, Azure deployment or applications deployments on datacenter. Yes you heard it right, certainly you need a way to store the code.
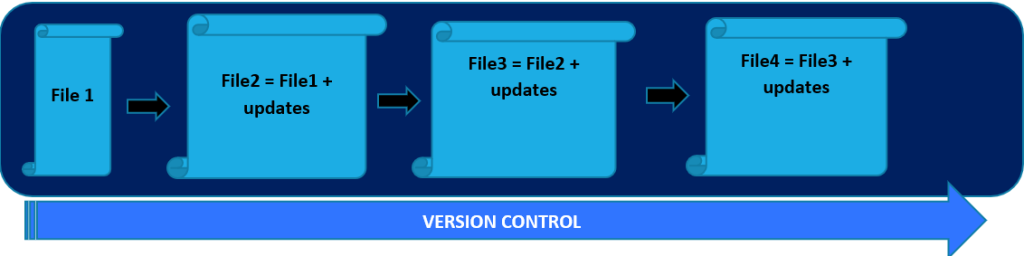
The code cannot be kept on your local machines as many people simultaneously work and to efficiently manage your code , versions of code you need a proper way. To achieve this we have two best products in market that is GitLab and GitHub.
This side shanky and in this yet another GitLab vs GitHub: Know your Go to Platform tutorial, I am going to give you in depth overview and detailed knowledge about both products GitLab and GitHub. Rest I leave up to you to consider which one suits you better after going through this entire tutorial.
Lets dive in right now.
Prerequisites
This guide will have some practical’s in between so make sure you to have following things before in hand.
- GitLab account and GitHub Account.
Table of Content
- Prerequisites
- What is GitLab?
- How to access GitLab?
- GitLab installation
- What is GitLab runner and GitLab Runner Installation
- Configure GitLab Runner Configuration
- GitLab Runner Docker
- GitLab Runner SSH
- GitLab Runner Commands
- GitLab Namespaces
- GitLab Access Management
- Configure LDAP in GitLab
- Configure AWS Cognito in GitLab
- Authenticating with GitLab from Git
- Git Credential Manager
- Create a personal access token in GitLab
- Clone GitLab repository using personal access token
- Creating a Project Label in GitLab
- Git Commit in GitLab
- Creating first GitLab CI/CD pipeline
- Configure GitLab Pipelines: Declaring Variables , Rules in GitLab Jobs
- Declaring Services in GitLab Jobs
- GitLab code Dependency scanning
- GitLab code scanning in containers
- GitLab Environments and Deployments
- Authenticate GitLab with AWS
- What is GitHub?
- Getting started with your GitHub account
- How to access GitHub?
- What is GitHub Desktop
- GitHub Webhooks
- Authenticating with GitHub from Git
- GitHub HTTPS Authentication with GitHub cli
- GitHub HTTPS Authentication with Git Credential Manager
- Generating Personal Access Token in GitHub
- GitHub code scanning
- GitHub code scanning in containers
- Advance GitHub code scanning
- GitHub Status
- GitHub Pricing
- Conclusion
What is GitLab?
GitLab is a code hosting platform for collaboration and version control. GitLab platform allows you to deliver software faster and efficiently, while strengthening security and compliance.
How to access GitLab?
You can access GitLab using various option as shown below.
- GitLab SaaS: You can simply use this by signing in.
- Install GitLab Self Managed your own instance.
GitLab installation
You can install GitLab on several cloud providers, or use one of the following methods.
- You can install GitLab using Linux Package, Helm chart, Docker (The GitLab Docker images are monolithic images of GitLab running all the necessary services in a single container.), Source.
- You can install GitLab on AWS, GCP, Azure.
# Ubuntu/Debian
sudo apt update && sudo apt install gitlab-ee

# RHEL/CentOS 6 and 7
sudo yum install gitlab-ee

# RHEL/CentOS 8
sudo dnf install gitlab-ee

# SUSE
sudo zypper install gitlab-ee
Note: GitLab is developed for Linux-based operating systems. It does not run on Microsoft Windows.
What is GitLab runner and GitLab Runner Installation
GitLab Runners are the agents that are responsible for all of the running CI/CD pipelines and GitLab CI/CD features.
GitLab Runner can be installed and used on GNU/Linux, macOS, FreeBSD, and Windows. You can install it in a container, by downloading a binary manually or by using a repository for rpm/deb packages.
To install GitLab on ubuntu and Linux Operating system first you need to add repo and use apt-get command.
- Add the official GitLab repository:
curl -L "https://packages.gitlab.com/install/repositories/runner/gitlab-runner/script.deb.sh" | sudo bash
curl -L "https://packages.gitlab.com/install/repositories/runner/gitlab-runner/script.rpm.sh" | sudo bash
- Now run the below commands.
sudo apt-get install gitlab-runner
sudo yum install gitlab-runner
Configure GitLab Runner Configuration
To configure more settings in GitLab runner you can modify (config.tml) file on the below locations.
/etc/gitlab-runner/  # This is for unix machines
./ # on other systems
GitLab Runner Docker
- Lets checkout the configuration for where we need to specify the volume for a docker container.
[runners.docker]
  host = ""
  hostname = ""
  tls_cert_path = "/Users/ayufan/.boot2docker/certs"
  image = "ruby:2.7"
  privileged = false
  disable_cache = true
  volumes = ["/path/to/volume/in/container"]
GitLab Runner SSH
- Configure SSH connection with GitLab runner.
[runners.ssh]
  host = "my-production-server"
  port = "22"
  user = "root"
  password = "production-server-password"
  identity_file = ""
GitLab Runner Commands
GitLab runner command allows you to register, manage and run your builds. Lets checkout quickly few of important commands that one should know to perform actions on GitLab commands.
- To take help from GitLab runner commands.
gitlab-runner --help
- Run Gitlab runner with debug mode on.
gitlab-runner run --debug
- To register GitLab runner.
gitlab-runner register --name my-runner --url http://gitlab.example.com --registration-token my-registration-token
- To Run GitLab runner as service.
gitlab -runner install --service myservice --syslog true --working-directory ~/mygitlabrunner --user root --password ***
gitlab-runner uninstall  # This command stops and uninstalls GitLab Runner from being run as an service.
gitlab-runner start        # This command starts the GitLab Runner service.
gitlab-runner stop       # This command stops the GitLab Runner service.
gitlab-runner restart   # This command stops and then starts the GitLab Runner service.
gitlab-runner status    # This command prints the status of the GitLab Runner service
GitLab Namespaces
If you need to organize your projects accordingly then you can create a namespace. Different projects with different requirements or configurations can be kept within different namespaces.
The namespace for user account is:

GitLab Access Management
GitLab contains various projects and within projects members are created which are either user or groups. Each member gets role assigned to it so that they can access the projects accordingly. User can be part of single group or multiple groups.
When your project belongs to a group, project members inherit their role from the group. With group access tokens, you can use a single token to, Perform actions for groups, manage the projects within the group.
Note: However you cannot use group access tokens to create other group, project, or personal access tokens.
Configure LDAP in GitLab
This section is a optional as it requires higher level authentication where users login to GitLab using AD SSO.
- To configure LDAP in GitLab edit the
/etc/gitlab/gitlab.rbfile as shown below and save the file.
gitlab_rails['ldap_enabled'] = true
gitlab_rails['ldap_servers'] = {
  'main' => {
    'label' => 'LDAP',
    'host' =>  'ldap.mydomain.com',
    'port' => 636,
    'uid' => 'sAMAccountName',
    'encryption' => 'simple_tls',
    'base' => 'dc=example,dc=com',
  }
}
- reconfigure GitLab
sudo gitlab-ctl reconfigure
Configure AWS Cognito in GitLab
To enable the AWS Cognito OAuth 2.0 OmniAuth provider, register your application with Cognito. This process generates a Client ID and Client Secret for your application. To enable AWS Cognito as an authentication provider, complete the following steps. You can modify any settings you configure later.
- Sign in to the AWS console.
- From the Services menu, select Cognito.
- Select Manage User Pools and then in the upper-right corner, select Create a user pool.
- Enter the user pool name and then select Step through settings.
- Under How do you want your end users to sign in?, select Email address or phone number and Allow email addresses.
- Under Which standard attributes do you want to require?, select email.
- Configure the remaining settings to suit your needs. In the basic setup, these settings do not affect GitLab configuration.
- In the App clients settings:
- Select Add an app client.
- Add the App client name.
- Select the Enable username password based authentication checkbox.
- Select Create app client.
- Set up the AWS Lambda functions for sending emails and finish creating the user pool.
- After creating the user pool, go to App client settings and provide the required information:
- Enabled Identity Providers – select all
- Callback URL –
https://<your_gitlab_instance_url>/users/auth/cognito/callback - Allowed OAuth Flows – Authorization code grant
- Allowed OAuth 2.0 Scopes –
email,openid, andprofile
- Save changes for the app client settings.
- Under Domain name, include the AWS domain name for your AWS Cognito application.
- Under App Clients, find your app client ID. Select *Show details to display the app client secret. These values correspond to the OAuth 2.0 Client ID and Client Secret. Save these values.
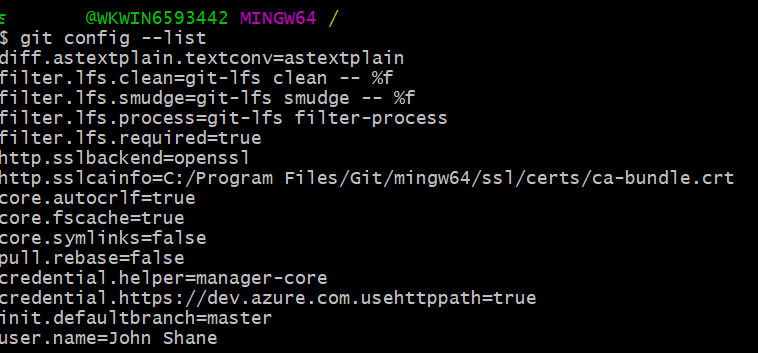
Authenticating with GitLab from Git
You need a way to authenticate to GitLab from Git and to accomplish this below sections will guide you to authenticate.
Git Credential Manager GitLab
In case of Git over HTTPS, Git Credential Manager (GCM) offers an alternative to personal access tokens. By default, GCM authenticates using OAuth, opening GitLab in your web browser.
Once it’s installed and configured, Git Credential Manager is called implicitly by Git. You don’t have to do anything special, and GCM isn’t intended to be called directly by the user
Create a personal access token in GitLab
Personal access tokens can be an alternative to OAuth2 and used to:
- Authenticate with the GitLab API.
- Authenticate with Git using HTTP Basic Authentication.
You can create as many personal access tokens as you like.
- In the upper-right corner, select your avatar.
- Select Edit profile.
- On the left sidebar, select Access Tokens.
- Enter a name and optional expiry date for the token.
- Select the desired scopes.
- Select Create personal access token.
Clone GitLab repository using personal access token
Its important to know how to clone a repository using PAT. Lets checkout below command.
git clone https://<username>:<personal_token>@gitlab.com/gitlab-org/gitlab.git
Note: When 2Factor Authentication is enabled, you can’t use your password to authenticate with Git over HTTPS or the GitLab API. You can use a personal access token instead
Creating a Project Label in GitLab
With labels, you can organize and tag your work, and track the work items you’re interested in. Lets dive in and see how to create Labels in GitLab.
- Navigate to GitLab, then to Main menu and projects then project information.
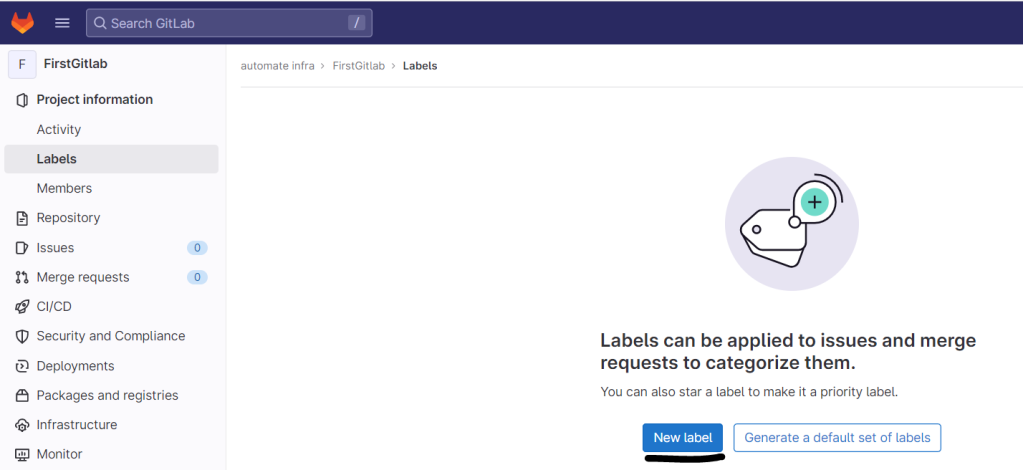
- Create a new Label.


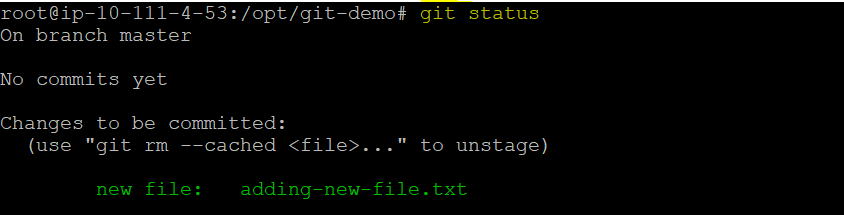
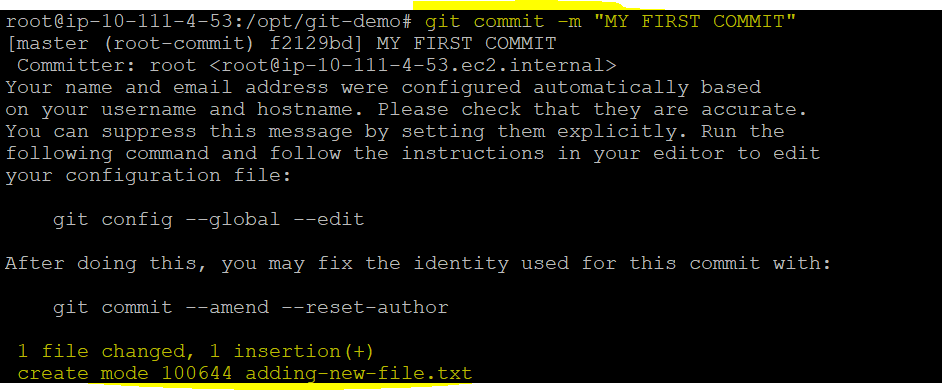
Git Commit in GitLab
Commit message: A commit message identifies what is being changed and why. In GitLab, you can add keywords to the commit message to perform one of the following actions:
Creating first GitLab CI/CD pipeline
Before we create the the pipeline, lets learn some basic terms first.
- CI (Continuous Integration): Pushing changes in code such as scripts etc. multiple times a day can introduce the risk so each change submitted to an application, even to development branches, is built and tested automatically and continuously.
- CD (Continuous delivery): Not only is your application built and tested each time a code change is pushed to the codebase, the application is also deployed continuously. Continuous Delivery checks the code automatically, but it requires human intervention to manually and strategically trigger the deployment of the changes
- CD (Continuous deployment) is another step beyond Continuous Integration, similar to Continuous Delivery. The difference is that instead of deploying your application manually, you set it to be deployed automatically.
Make sure, before you start creating your first GitLab CI/CD pipeline, you have:
- At least one GitLab runner active.
- A project in GitLab
- The Maintainer or Owner role for the project.
- To check if GitLab runner is available navigate to Settings and then to CI/CD.

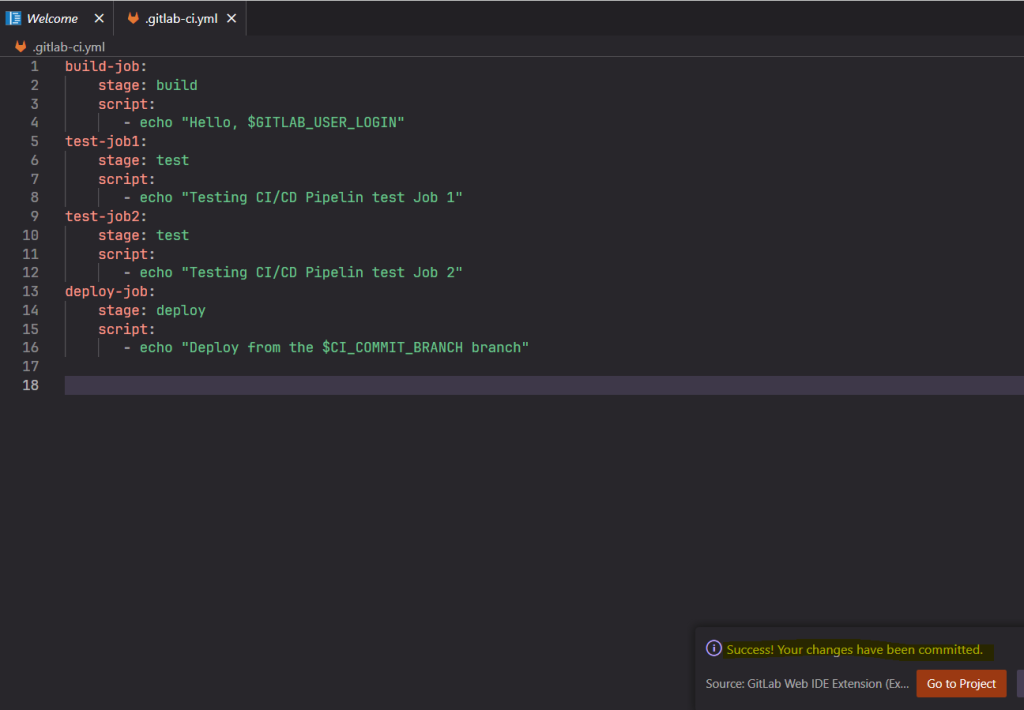
- Create a blank Dockerfile in the repository. The job will run on GitLab Docker executor.
- Next, create a .gitlab-ci.yml file so that runner can structure and order of jobs. On the left sidebar, select Repository > Files and create the file and copy/paste the below code.
- Each Job each has a specific Stage and stage defines the sequential execution of the Jobs. Jobs, which define what to do and Stages, which define when to run the jobs.
- Use needs keyword to run jobs out of stage order.
- Use rules to skip the jobs or specify when to run the job.
- Use the default keyword to specify additional configurations that are applied to all jobs.
build-job:
    stage: build
    script:
       - echo "Hello, $GITLAB_USER_LOGIN"
test-job1:
    stage: test
    script:
       - echo "Testing CI/CD Pipelin test Job 1"
test-job2:
    stage: test
    script:
       - echo "Testing CI/CD Pipelin test Job 2"
deploy-job:
    stage: deploy
    script:
       - echo "Deploy from the $CI_COMMIT_BRANCH branch"
- You should have below files in the repository.

- To View the status of your pipeline and jobs navigate to CI/CD and then pipelines.


- Further to view the build job logs, click on it.
- Note: variables: To push a commit without triggering a pipeline, add
[ci skip]or[skip ci]

Configure GitLab Pipelines: Declaring Variables , Rules in GitLab Jobs
- To add variables in the GitLab job.
variables:
  DEPLOY_ENVIRONMENT:
    value: "staging"
    options:
      - "production"
      - "staging"
      - "canary"
    description: "The deployment target. Set to 'staging' by default."
- To add rules and workflow in the GitLab job. Rules apply to specific job however workflow apply to entire jobs.
workflow:
  rules:
    - if: $CI_PIPELINE_SOURCE == 'merge_request_event'

job1:
  script:
    - echo "This job runs in merge request pipelines"
  rules:
    - if: $CI_PIPELINE_SOURCE == 'merge_request_event'

job2:
  script:
    - echo "This job also runs in merge request pipelines"
- GitLab CI/CD job token
When a pipeline job is about to run, GitLab generates a unique token and injects it as the CI_JOB_TOKEN predefined variable. You can also use the job token to authenticate and clone a repository from a private project in a CI/CD job. You can call on project from another project.
git clone https://gitlab-ci-token:${CI_JOB_TOKEN}@gitlab.example.com/<namespace>/<project>
Declaring Services in GitLab Jobs
When you configure CI/CD, you specify an image, which is used to create the container where your jobs run. To specify this image, you use the image keyword.
You can specify an additional image by using the services keyword. This additional image is used to create another container, which is available to the first container. The two containers have access to one another and can communicate when running the job.
default:
  before_script:
    - bundle install

test:2.6:
  image: ruby:2.6
  services:
    - postgres:11.7
  script:
    - bundle exec rake spec

test:2.7:
  image: ruby:2.7
  services:
    - postgres:12.2
  script:
    - bundle exec rake spec
GitLab code Dependency scanning
The Dependency Scanning feature can automatically find security vulnerabilities in your software dependencies while you’re developing and testing your applications.
include:
  - template: Jobs/Dependency-Scanning.gitlab-ci.yml
GitLab code scanning in containers
By including an extra Container Scanning job in your pipeline that scans for those vulnerabilities and displays them in a merge request, you can use GitLab to audit your Docker-based apps.
To enable container scanning, add the Container-Scanning.gitlab-ci.yml template to your .gitlab-ci.yml file. Also make sure GitLab CI/CD pipeline must include the test stage. If you’re using a third-party container registry, you might need to provide authentication credentials through the CS_REGISTRY_USER and CS_REGISTRY_PASSWORD configuration variables.
- Below template builds your Docker image, pushes it to the container registry, and scans the image.
include:
  - template: Jobs/Build.gitlab-ci.yml
  - template: Security/Container-Scanning.gitlab-ci.yml

container_scanning:
  variables:
    CS_DEFAULT_BRANCH_IMAGE: $CI_REGISTRY_IMAGE/$CI_DEFAULT_BRANCH:$CI_COMMIT_SHA
GitLab Environments and Deployments
Environments describe where code is deployed. Each time GitLab CI/CD deploys a version of code to an environment, a deployment is created.

build-job:
    stage: build
    script:
       - echo "Hello, $GITLAB_USER_LOGIN"
test-job1:
    stage: test
    script:
       - echo "Testing CI/CD Pipelin test Job 1"
test-job2:
    stage: test
    script:
       - echo "Testing CI/CD Pipelin test Job 2"
deploy-job:
    stage: deploy
    environment:
      name: staging
    script:
       - echo "Deploy from the $CI_COMMIT_BRANCH branch"
Authenticate GitLab with AWS
To use GitLab CI/CD to connect to AWS, you must authenticate. After you set up authentication, you can configure CI/CD to deploy.
- Sign on to your AWS account.
- Create an IAM user.
- Select your user to access its details. Go to Security credentials > Create a new access key.
- Note the Access key ID and Secret access key.
- In your GitLab project, go to Settings > CI/CD. Set the following CI/CD variables:Environment variable nameValue
AWS_ACCESS_KEY_IDYour Access key ID.AWS_SECRET_ACCESS_KEYYour secret access key.AWS_DEFAULT_REGIONYour region code. You might want to confirm that the AWS service you intend to use is available in the chosen region. - Variables are protected by default. To use GitLab CI/CD with branches or tags that are not protected, clear the Protect variable checkbox.
What is GitHub?
GitHub is a code hosting platform for version control and collaboration. You can perform below tasks within GitHub using Version control system ( VCS) called Git.
- Create and use a repository
- Start and manage a new branch
- Make changes to a file and push them to GitHub as commits
- Open and merge a pull request
Getting started with your GitHub account
To sign up for an account on GitHub.com, navigate to https://github.com/ and follow the prompts. To best use GitHub, you’ll need to set up Git. Git is responsible for everything GitHub-related that happens locally on your computer.
Organizations are shared accounts where businesses and open-source projects can collaborate across many projects at once.
GitHub provides two types of Enterprise products:
- GitHub Enterprise Cloud
- GitHub Enterprise Server
The main difference between the products is that GitHub Enterprise Cloud is hosted by GitHub, while GitHub Enterprise Server is self-hosted.
How to access GitHub?
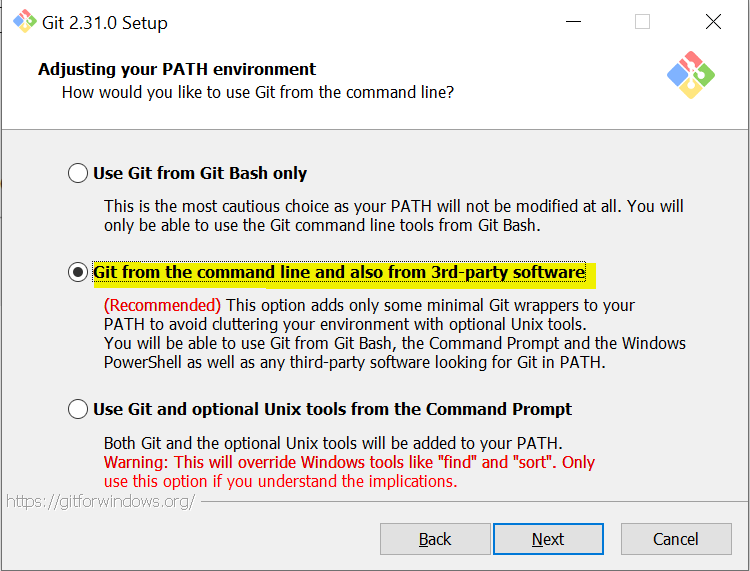
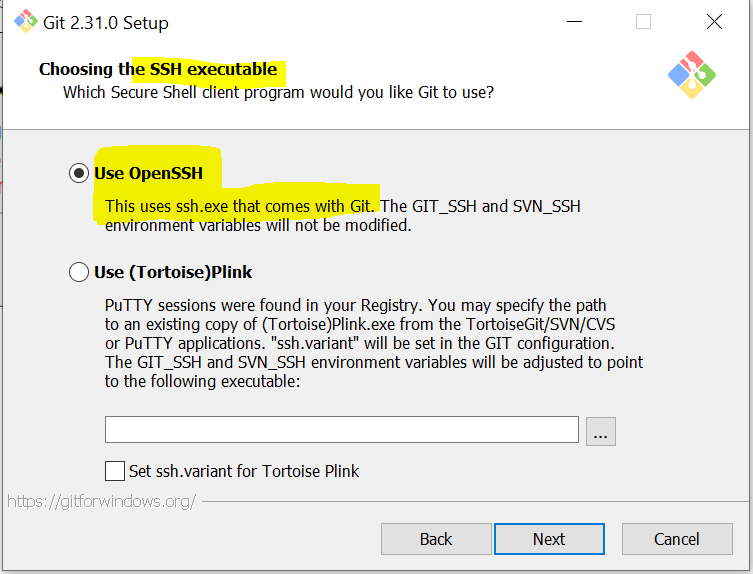
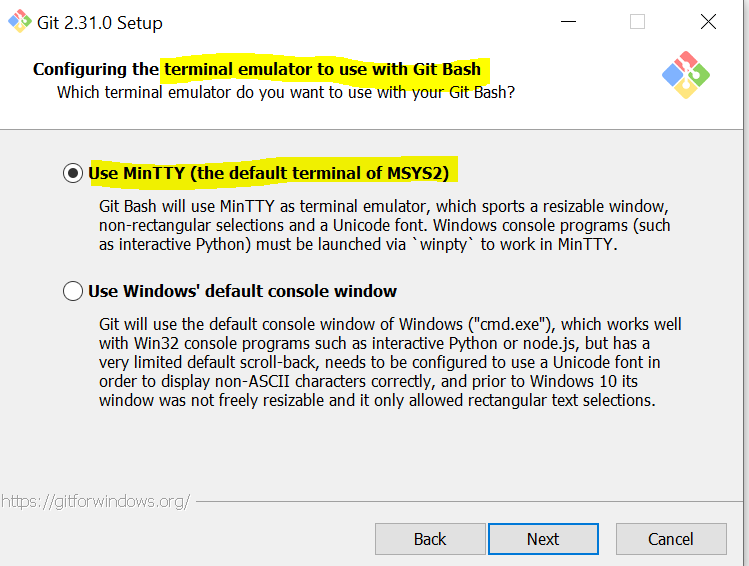
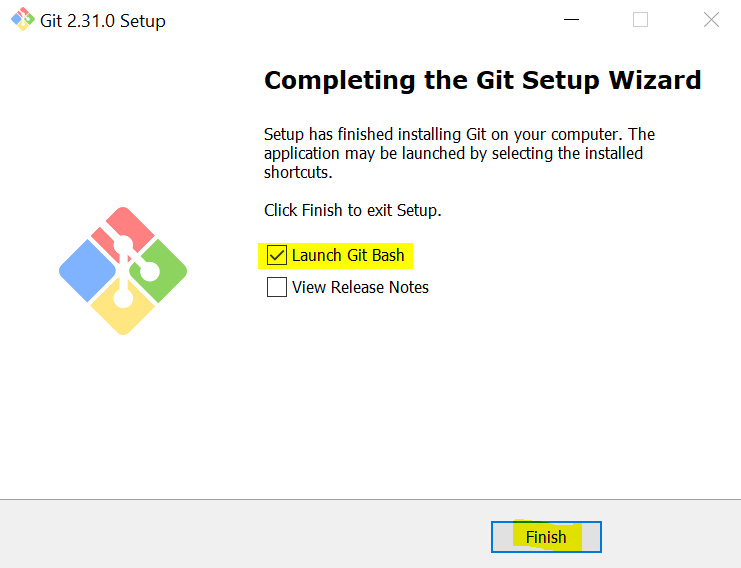
You can access GitHub using following methods. Note make sure you have git already installed and to download go to https://git-scm.com/downloads.
- GitHub CLI to use GitHub from the command line. To install GitHub CLI follow here.
- GitHub Desktop client that work locally but not on command line.
- Gitbash
- Browse to GitHub.com
- GitHub API
- GitHub Mobile is available as an Android and iOS app. To install go here
What is GitHub Desktop
With GitHub Desktop, you can interact with GitHub using a GUI instead of the command line or a web browser. You can use GitHub Desktop to complete most Git commands from your desktop, such as pushing to, pulling from, and cloning remote repositories, attributing commits, and creating pull requests, with visual confirmation of changes.
You can download GitHub Desktop from https://desktop.github.com/.
GitHub Webhooks
Webhooks allow you to build or set up integrations, such as GitHub Apps which subscribe to certain events on GitHub.com. When one of those events is triggered, we’ll send a HTTP POST payload to the webhook’s configured URL.
Webhooks can be used to update an external issue tracker, trigger CI builds, update a backup mirror, or even deploy to your production server.
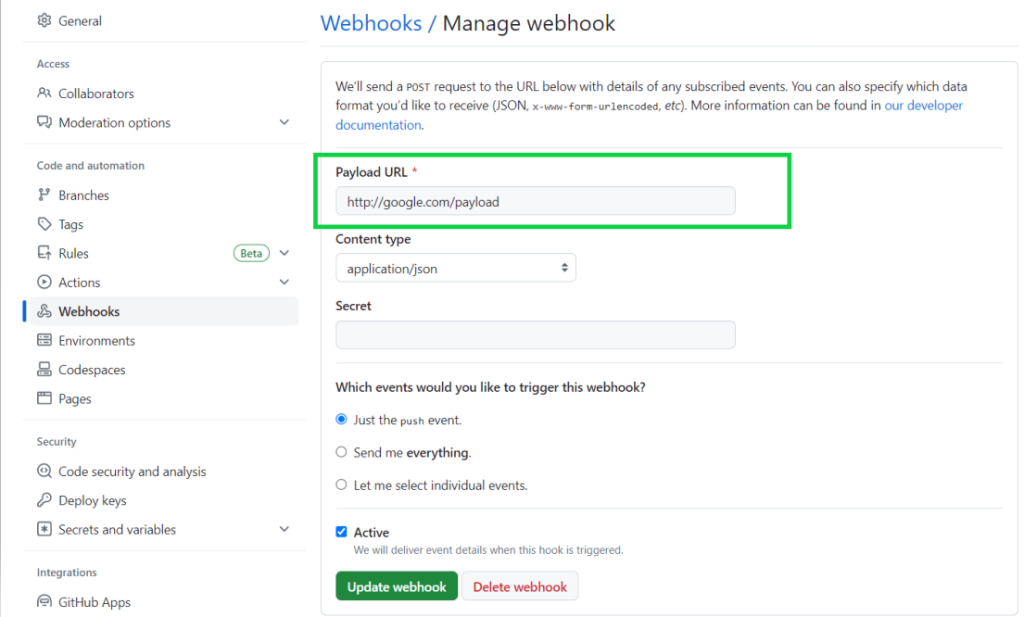
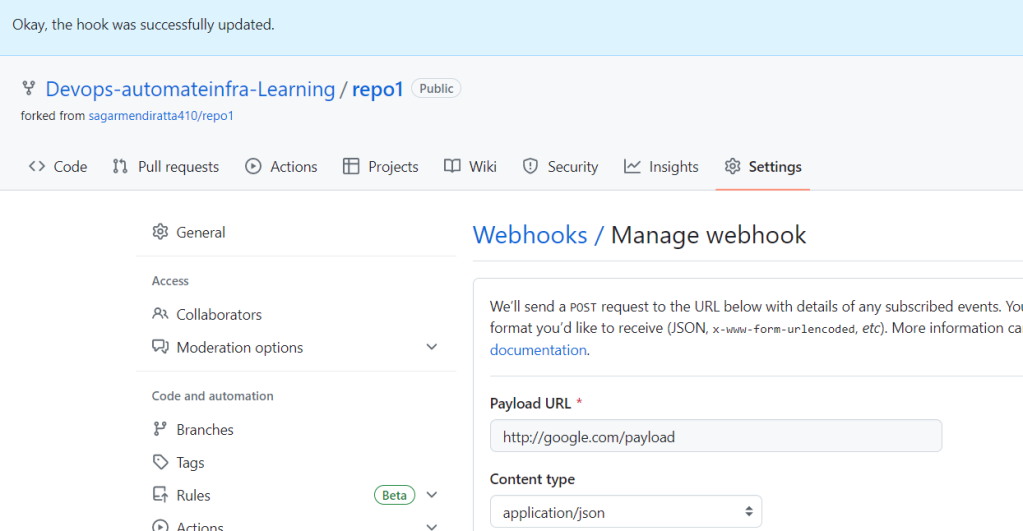
When configuring a webhook, you can use the UI or API to choose which events will send you payloads.
- Go to settings on the repository.

- Navigate to Webhooks and click on Add Webhook.

- The payload URL is the URL of the server that will receive the webhook
POSTrequests from the Github. Setting a webhook secret allows you to ensure thatPOSTrequests sent to the payload URL are from GitHub.
Note: You can configure to receive webhooks with GitHub CLI using below command.
gh extension install cli/gh-webhook
Authenticating with GitHub from Git
GitHub HTTPS Authentication with GitHub cli
GitHub CLI will automatically store your Git credentials for you when you choose HTTPS as your preferred protocol for Git operations and answer “yes” to the prompt asking if you would like to authenticate to Git with your GitHub credentials.
gh auth login
GitHub HTTPS Authentication with Git Credential Manager
Git Credential Manager (GCM) is another way to store your credentials securely and connect to GitHub over HTTPS.
The next time you clone an HTTPS URL that requires authentication, Git will prompt you to log in using a browser window. Once you’ve authenticated successfully, your credentials are stored in the Windows credential manager and will be used every time you clone an HTTPS URL. Git will not require you to type your credentials in the command line again unless you change your credentials.
GCM is included with Git for Windows. During installation you will be asked to select a credential helper, with GCM listed as the default. Once it’s installed and configured, Git Credential Manager is called implicitly by Git. You don’t have to do anything special, and GCM isn’t intended to be called directly by the user.
To install Git Credential Manager , follow here.
Password-based authentication for Git has been removed in favor of more secure authentication methods use Personal Access Token.
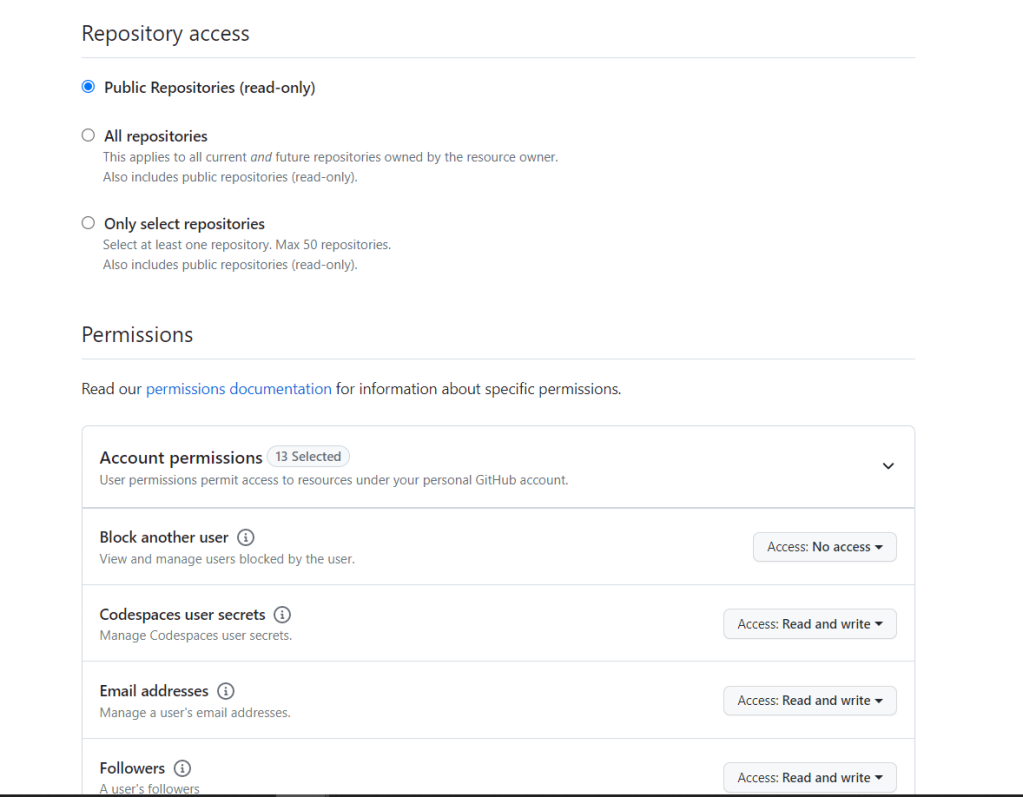
Generating Personal Access Token in GitHub
A token that is used in place of a password when performing Git operations over HTTPS with Git on the command line or the API. Also called a personal access token.
When you git clone, git fetch, git pull, or git push to a remote repository using HTTPS URLs on the command line, Git will ask for your GitHub username and password. When Git prompts you for your password, enter your personal access token.


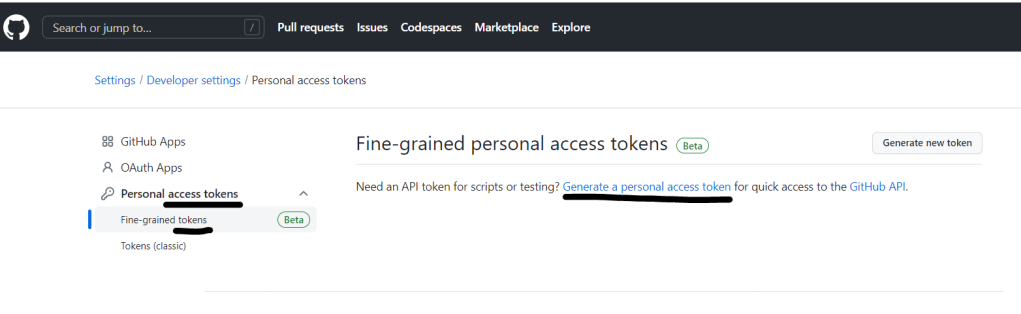


For example, on the command line you would enter the following:
$ git clone https://github.com/USERNAME/REPO.git
Username: YOUR_USERNAME
Password: YOUR_TOKEN
Note: Personal access tokens can only be used for HTTPS Git operations. If your repository uses an SSH remote URL, you will need to switch the remote from SSH to HTTPS.
GitHub code scanning
You can use code scanning to find security vulnerabilities and errors in the code for your project on GitHub. To do code scanning you can use CodeQL analysis and third party pools.
- CodeQL is the code analysis engine developed by GitHub to automate security checks. You can analyze your code using CodeQL and display the results as code scanning alerts.
To setup code scanning follow the below steps.
- On GitHub.com, navigate to the main page of the repository and go to settings.
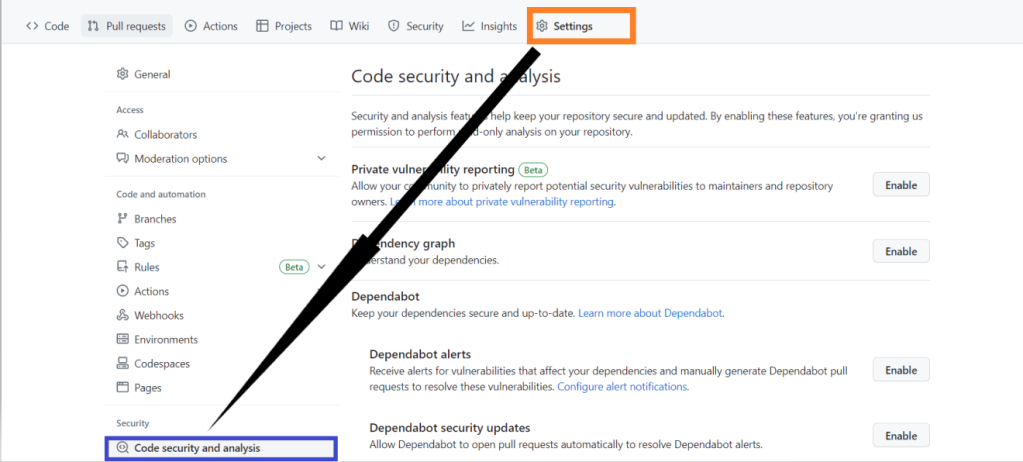


- You can also integrate third party tools to scan your code such as Dependency Review.

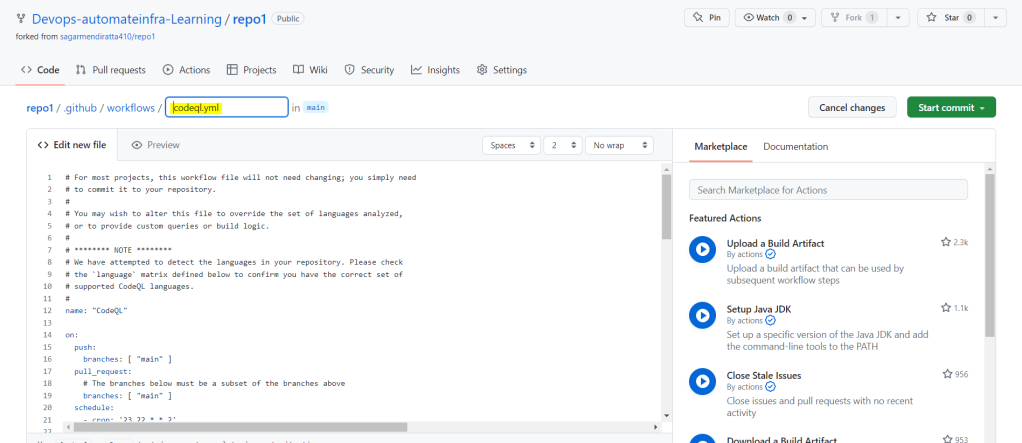
GitHub code scanning in containers
If you’re configuring code scanning for a compiled language, and you’re building the code in a containerized environment, the analysis may fail with the error message “No source code was seen during the build.” This indicates that CodeQL was unable to monitor your code as it was compiled.
You must run CodeQL inside the container in which you build your code.
name: "CodeQL"

on:
  push:
    branches: [main]
  pull_request:
    branches: [main]
  schedule:
    - cron: '15 5 * * 3'

jobs:
  analyze:
    name: Analyze
    runs-on: ubuntu-latest
    permissions:
      security-events: write
      actions: read

    strategy:
      fail-fast: false
      matrix:
        language: [java]

    # Specify the container in which actions will run
    container:
      image: codeql-container:f0f91db

    steps:
      - name: Checkout repository
        uses: actions/checkout@v3
      - name: Initialize CodeQL
        uses: github/codeql-action/init@v2
        with:
          languages: ${{ matrix.language }}
      - name: Build
        run: |
          ./configure
          make
      - name: Perform CodeQL Analysis
        uses: github/codeql-action/analyze@v2
Advance GitHub code scanning
- On GitHub.com, navigate to the main page of the repository.
- Under your repository name, click Actions.

- Add new workflow.
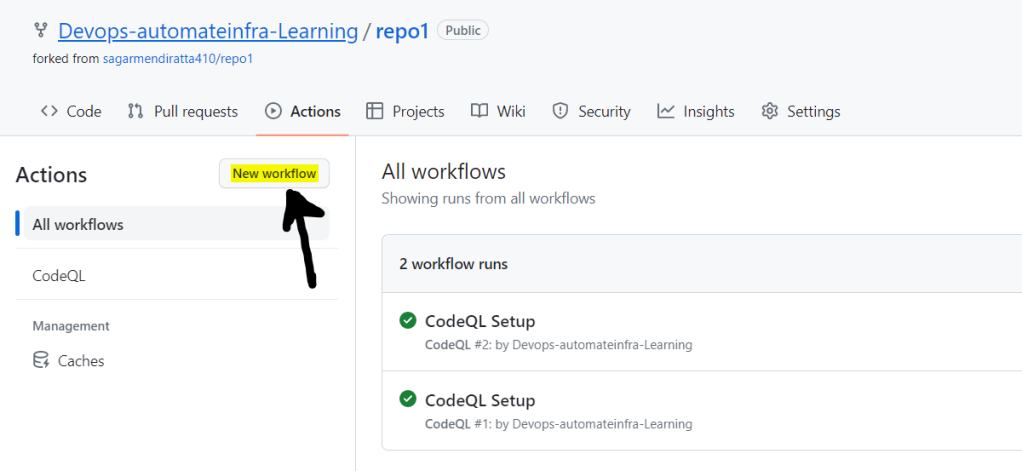
- Configure CodeQL Analysis and commit below yml.
GitHub Status
To get a status of entire GitHub about your projects and repositories you can access GitHub status website using https://www.githubstatus.com/.
GitHub Pricing
There are three plans available for GitHub as shown below.
- FREE PLAN: Free of cost: The basics for individuals and organizations.
- TEAM PLAN: Around $4 per month for one user which includes Advanced collaboration for individuals and organizations.
- Enterprise PLAN: Around $20 per month for one user which includes Security, compliance, and flexible deployment
Conclusion
In this tutorial you learnt everything you should know to understand GitLab and GitHub and how these two products just makes your life as simple as breathing. GitHub is not open source however GitLab is an open source product.
Also in this tutorial you learn various concept that helps you identity how both product works and their features.
Now that you have sound knowledge about these products, so where do you plan to host your code in your next assignment?